User Guide for iMyFone PDFacademy
Welcome to PDFacademy, your ultimate solution for managing PDF files with ease!
With PDFacademy, you can effortlessly create, view, edit, annotate, convert, and organize your documents—all in one place. Its user-friendly interface ensures that anyone can navigate PDF tasks easily, regardless of technical expertise.
| Top Features of PDFacademy | Free Trial | Full Version |
|---|---|---|
| Create PDF | ||
| Open and View PDF Files | ||
| Convert PDF | ||
| Combine and Splite PDF | ||
| Compress PDF | ||
| Lifetime Free Updates | ||
| 24/7 Customer Support | ||
| 30-day Money Back Guarantee |
Whether you’re a busy professional aiming to optimize your workflow, or a student looking to manage study materials, PDFacademy helps enhance your productivity and simplify your PDF experience.
Dive into this guide to discover how PDFacademy can transform the way you work with PDF documents!
Download and Install PDFacademy for Windows
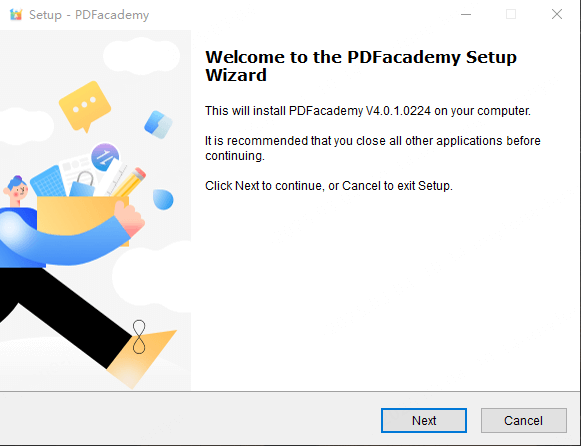
Step 1. Click “Free Download” Button to Download and Open the Installer.
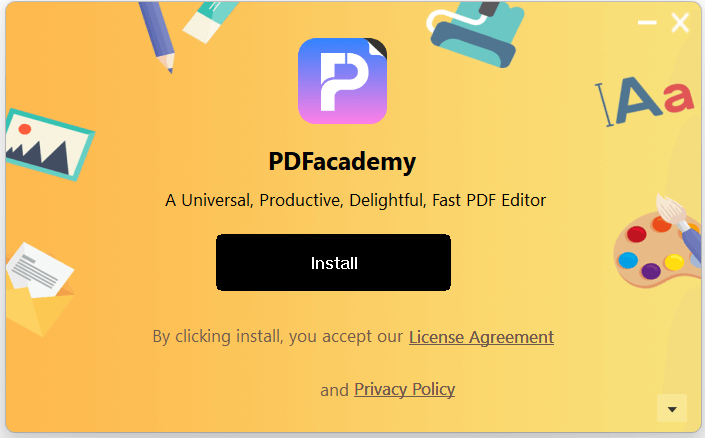
Step 2. Click the "Install" Button.
Step 3. Run PDFacademy.
Sign up and Log in PDFacademy
First, you need to register with a valid email address or activate your account using the activation code received from iMyFone.
[ After signing or activating, you can use the free features as following: ]
1. Read PDF for free.
2. Convert PDF twice a day for free.
3. Create PDF twice a day for free.
4. Trail watermarks will be added when saving the modified document.
5. OCR feature limited.
6. Batching processing executes only two files.
7. One template can be added on the watermark, header and footer, and background individually.
8. 1GB of free storage space in the free version, with a file size limitation of 10MB per file.
[NOTE] :
To reduce limitations and enjoy more advanced features, such as saving files without watermarks and unlimited conversions, you can purchase a subscription plan or a lifetime license on our pricing page.
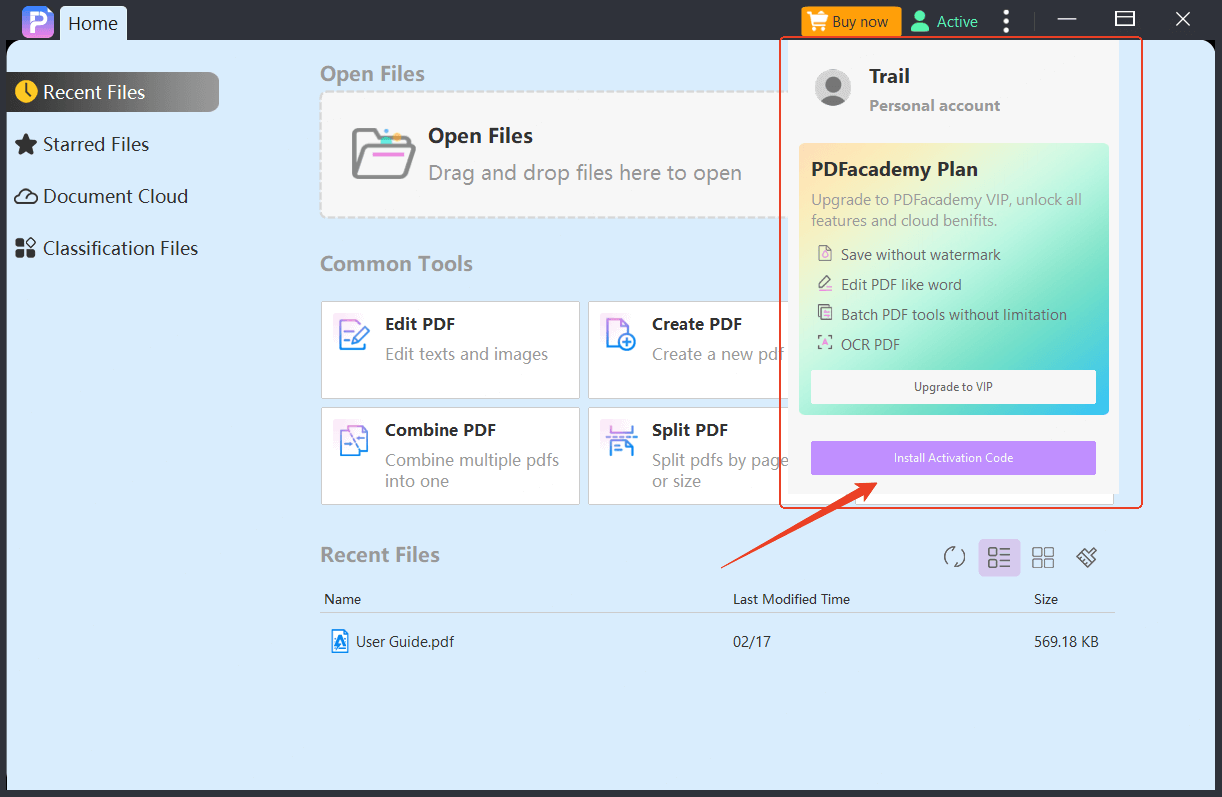
How to activate your account?
Step 1. Click “Active” button

Step 2. Enter your “Activation Code” received from iMyFone
Open and Create PDF in PDFacademy
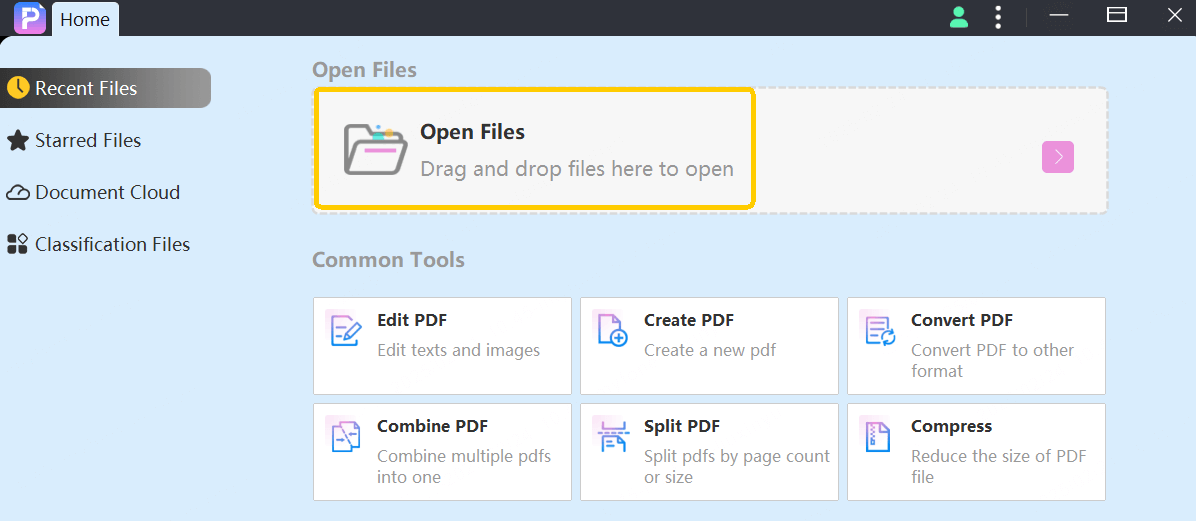
[Two ways to “Open PDFs” in PDFacademy] :
Way 1. Drag any PDF file from your drive and drop it into PDFacademy.
Way 2. Click on the Open File button and double-click on the recent file of Recent List.
[Content supported by PDFacademy for creation] :
- Allows users to create PDF files from Word/Excel/PowerPoint and Images;
- Allows users to create single or multiple PDFs from various files in supported formats;
- Supports creating PDFs as blank document;
- Supports batch creation;
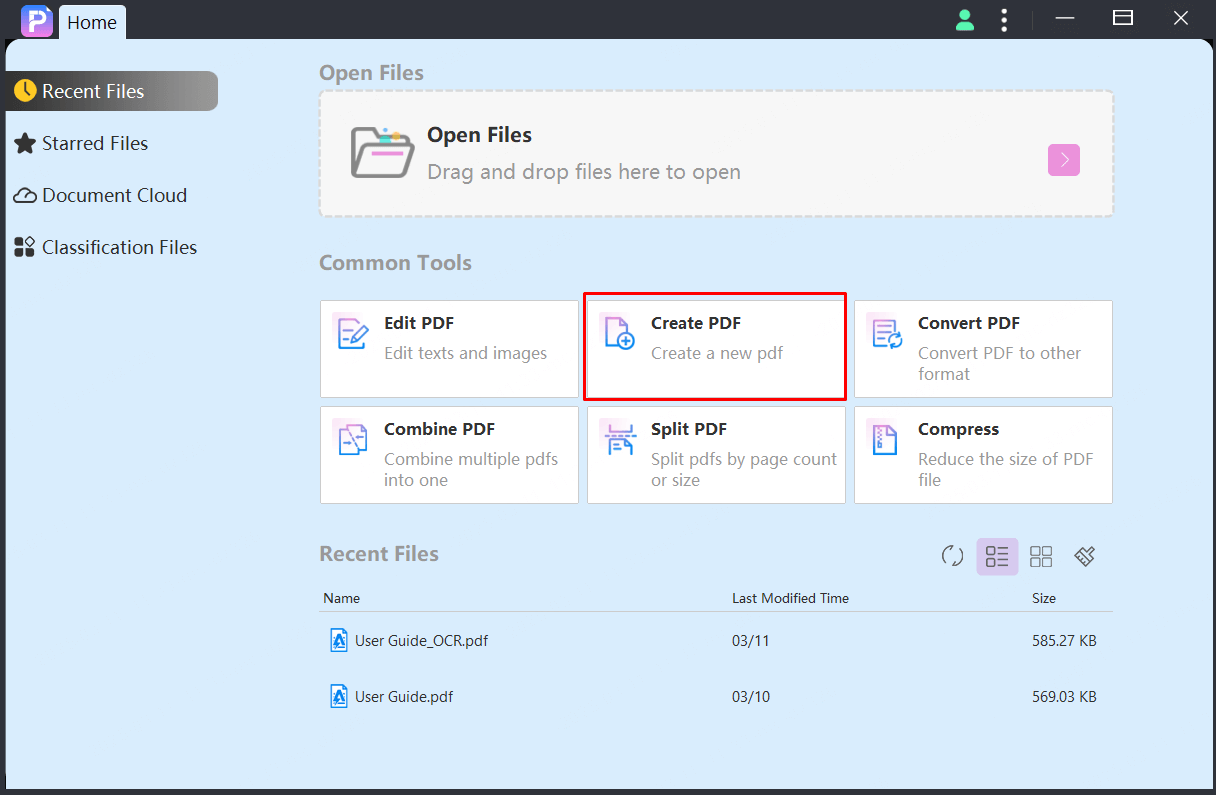
[Two ways to “Create PDFs” in PDFacademy] :
Way 1. Create a PDF from a File
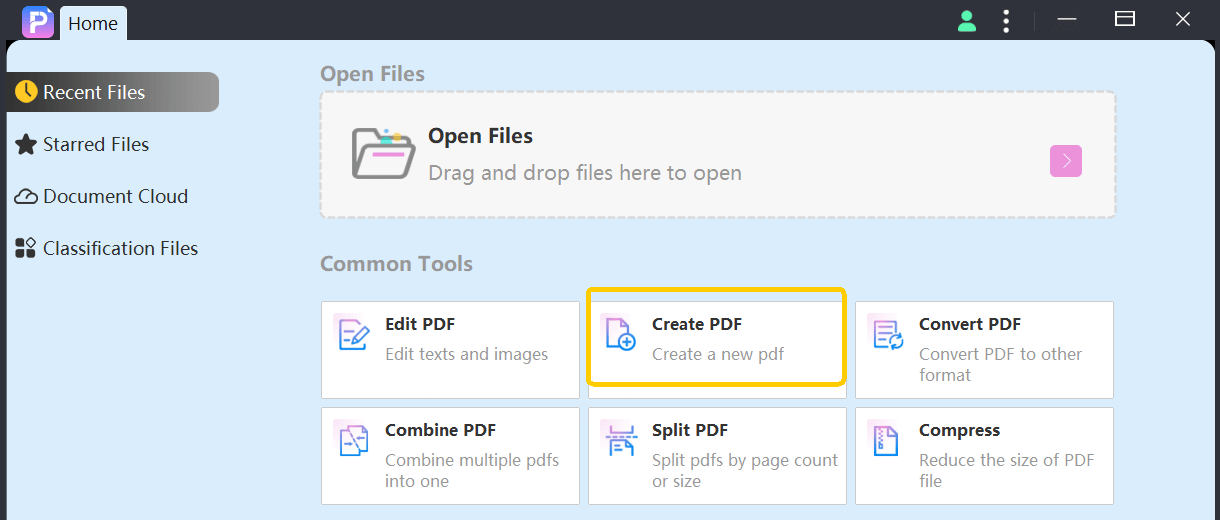
Step 1. Open the PDFacademy software, then click the "Create PDF" button on the homepage.
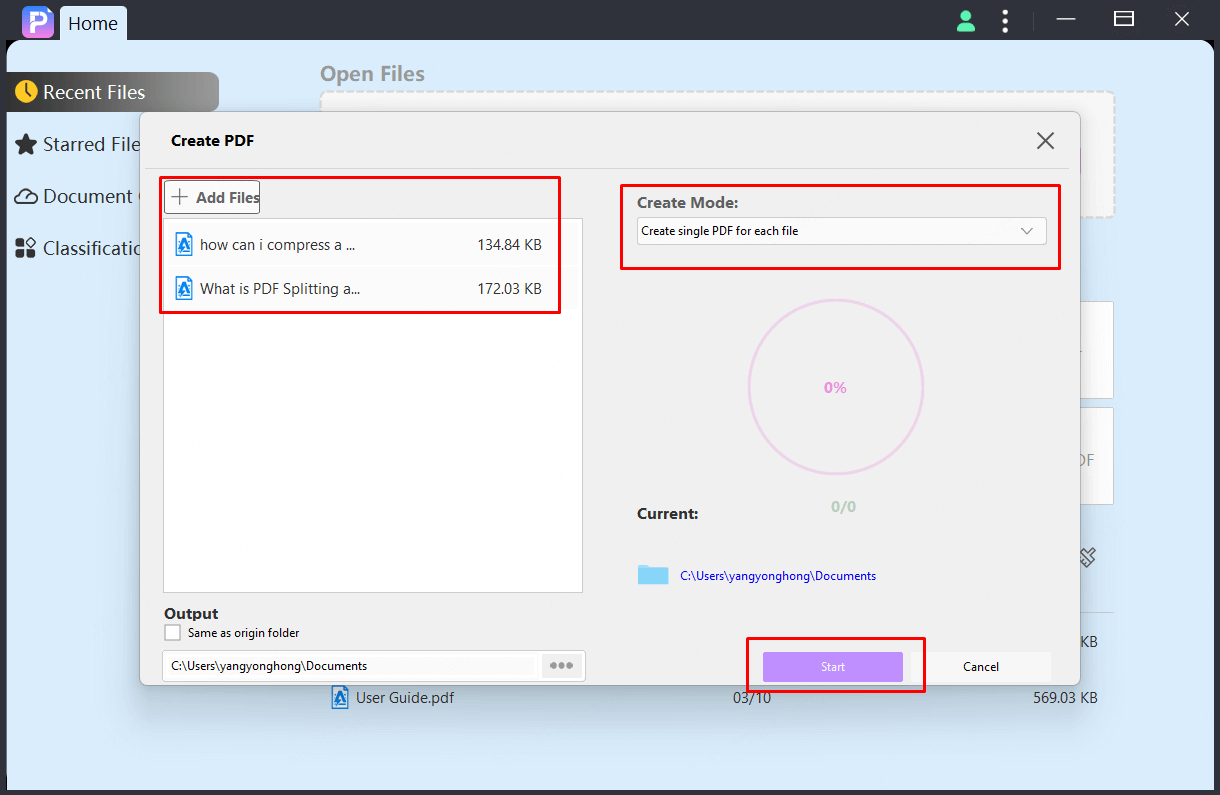
Step 2. In the pop-up window, click the "Add Files" button and select the files you want to convert to PDF.
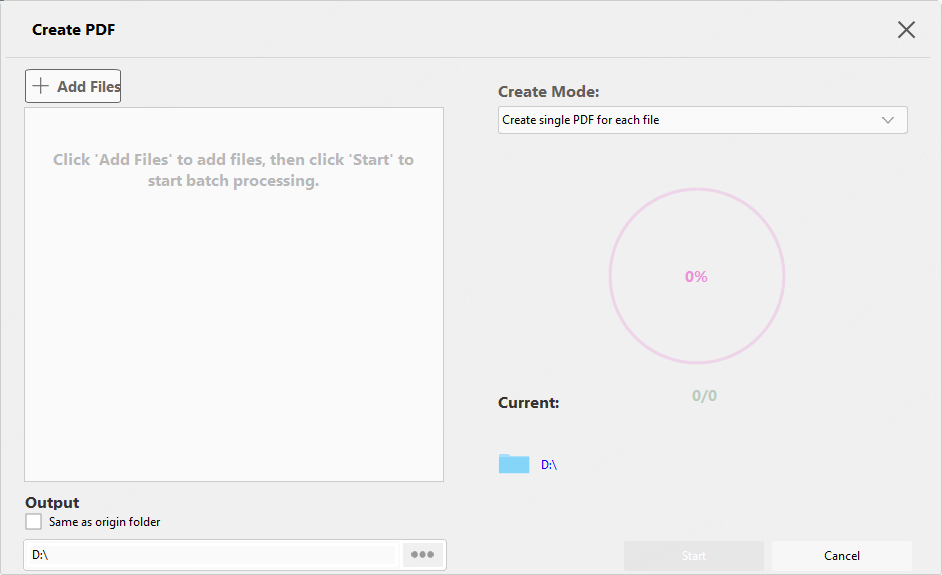
Step 3. Click the drop-down menu under "Create Mode" and choose the mode you prefer.
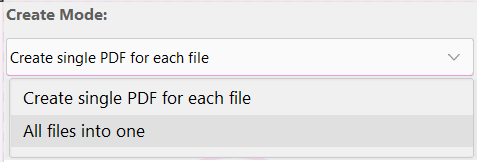
Step 4. Click the "Start" button to begin creating the PDF.
Tips: Create a PDF from a File
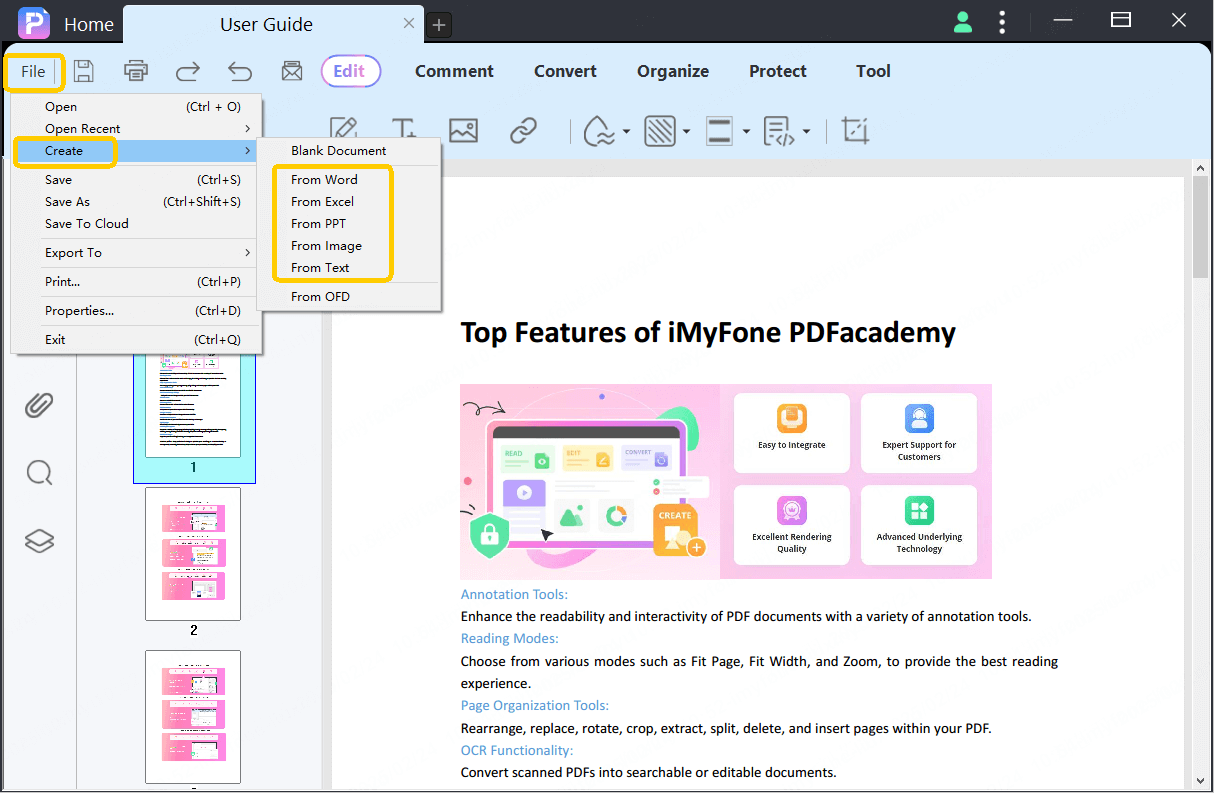
Step 1. In the "File" menu, hover your mouse over the "Create" button.
Step 2. Select your desired option from the given choices: PDF from Word, PDF from Excel, PDF from PowerPoint, PDF from Images.
Way 2. Create a PDF from a blank page
Step 1. Hover the mouse over the "Create" button in the "File" menu.
Step 2. Choose the ”Blank Document” item.
Step 3. Customize the page style in the pop-up settings window.
- Title: Input the name you like for the created file.
- Size: Choose among Custom (then enter the width the height you want), A3, A4, A5, Executive, Folio, Ledger, Legal, Letter, and Tabloid.
- Direct: Select portrait or landscape.
- Pages: Enter a specific number to customize the number of pages.
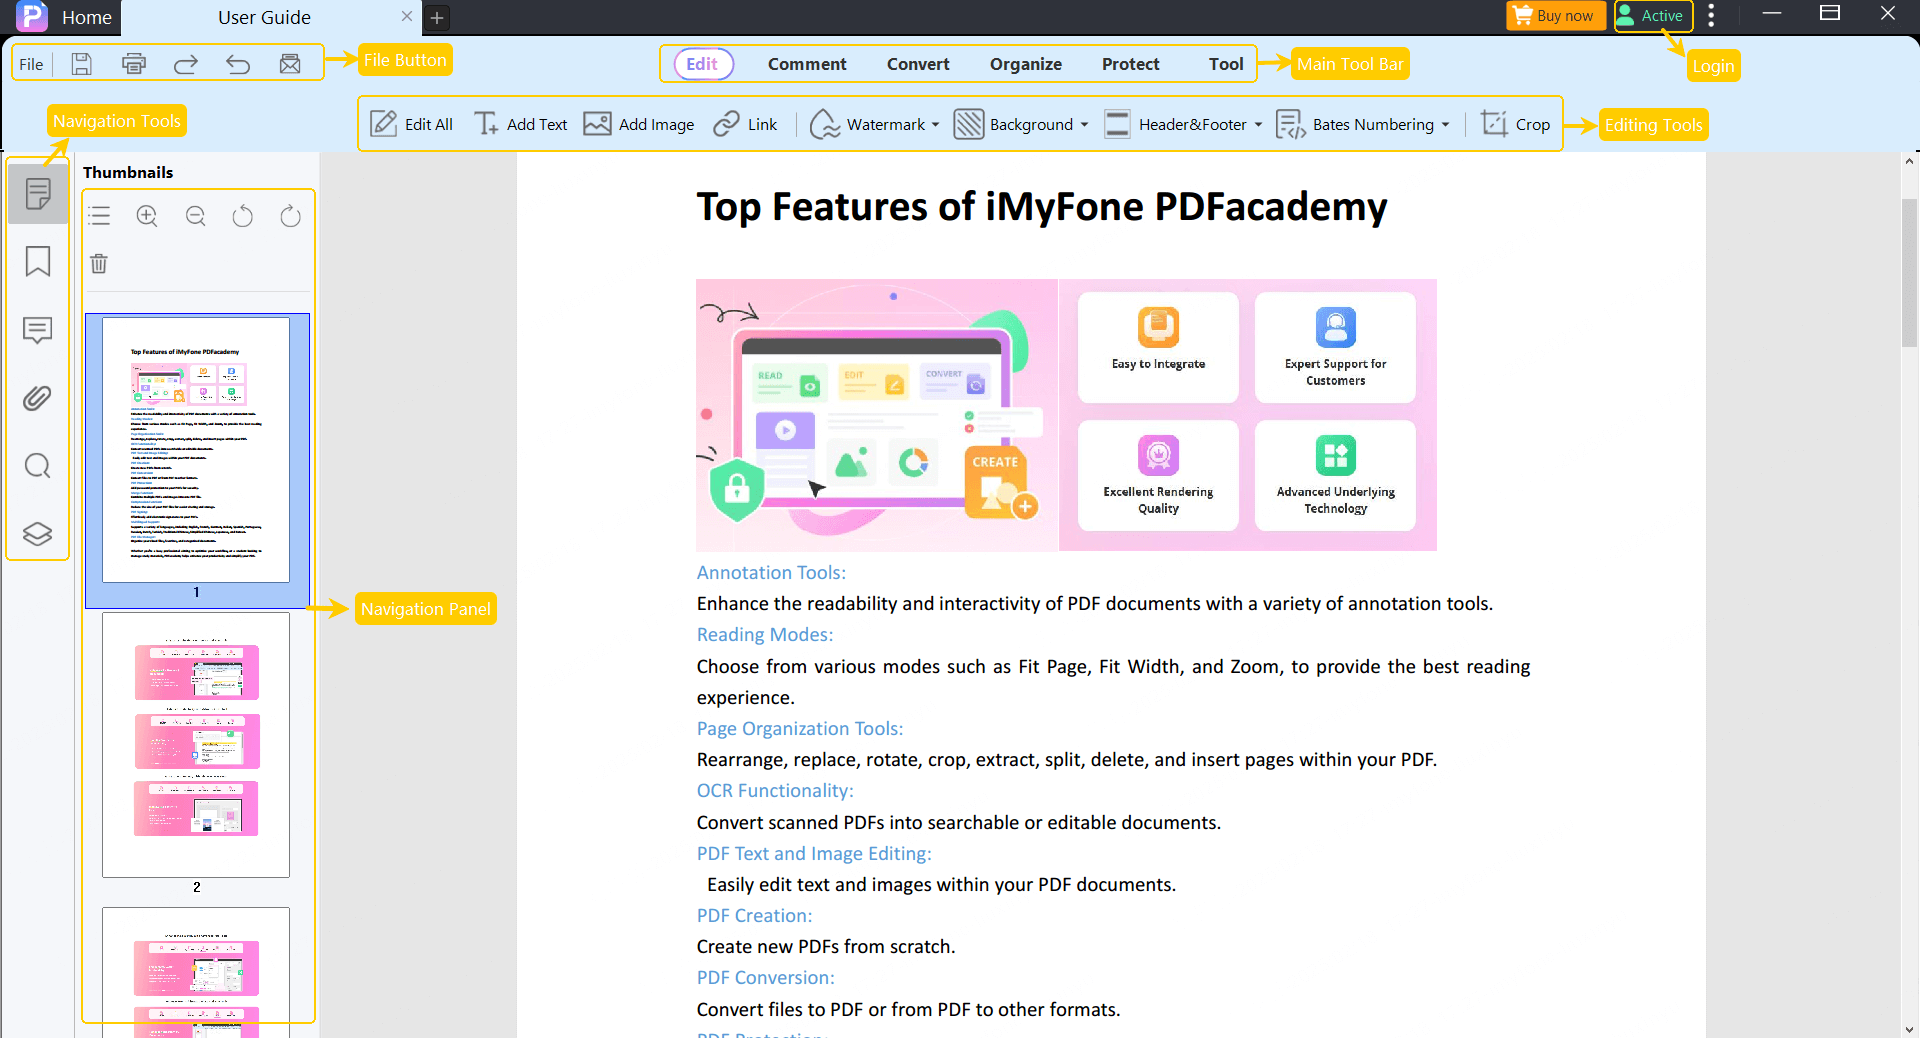
Navigation Bar
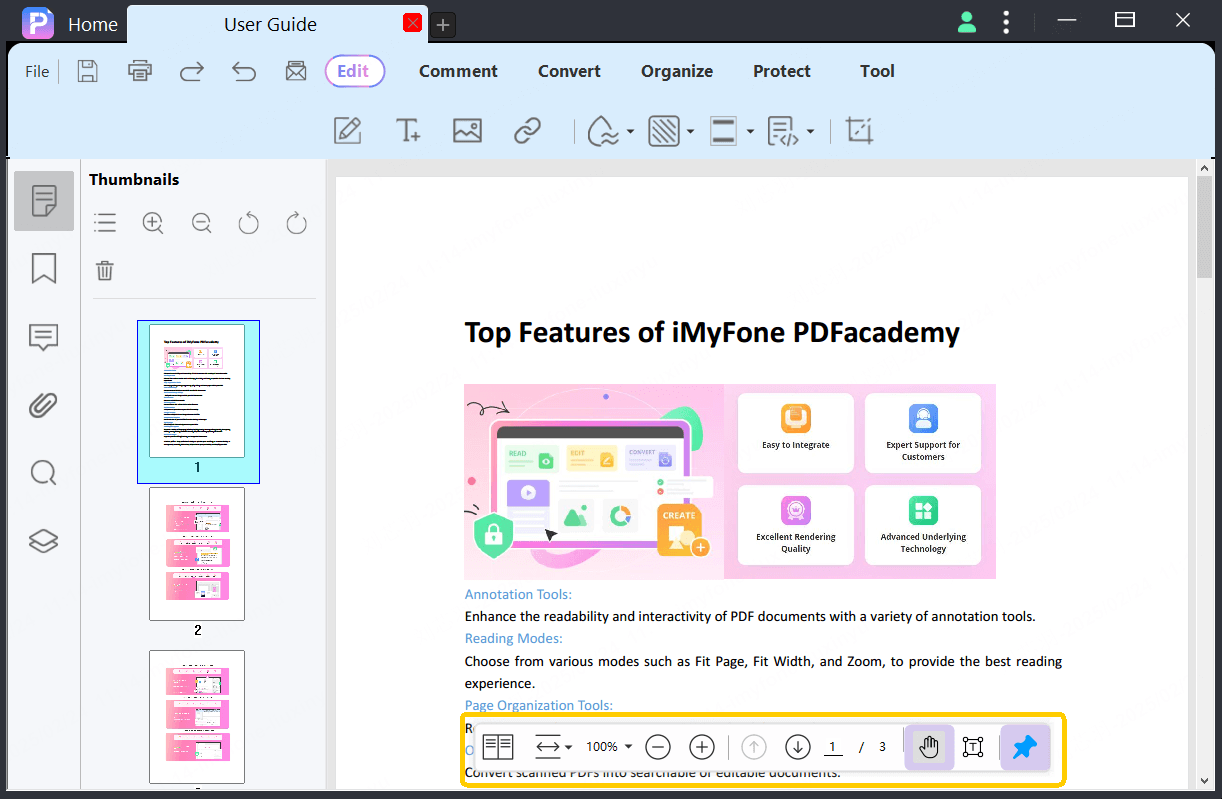
The navigation bar typically floats at the bottom of the PDF view area. If the navigation bar is not showing when you viewing a PDF on PDFacademy, move the mouse to the bottom of the PDF view area.
[You can do the following through this navigation bar:]
- Change Page Display Mode
- Change Page Zoom Mode
- Zoom in and out of the particular page
- Show the total page numbers and the present page number
- Go to the previous page of the PDF
- Go to the next page of the PDF
- Or go to any specific page number
- Go to reading mode
- Select text tool
- Float or fixed the navigation bar
Navigation Panel
The navigation panel of PDFacademy is typically displayed on the left side of the page. It is mainly divided into the following sections:
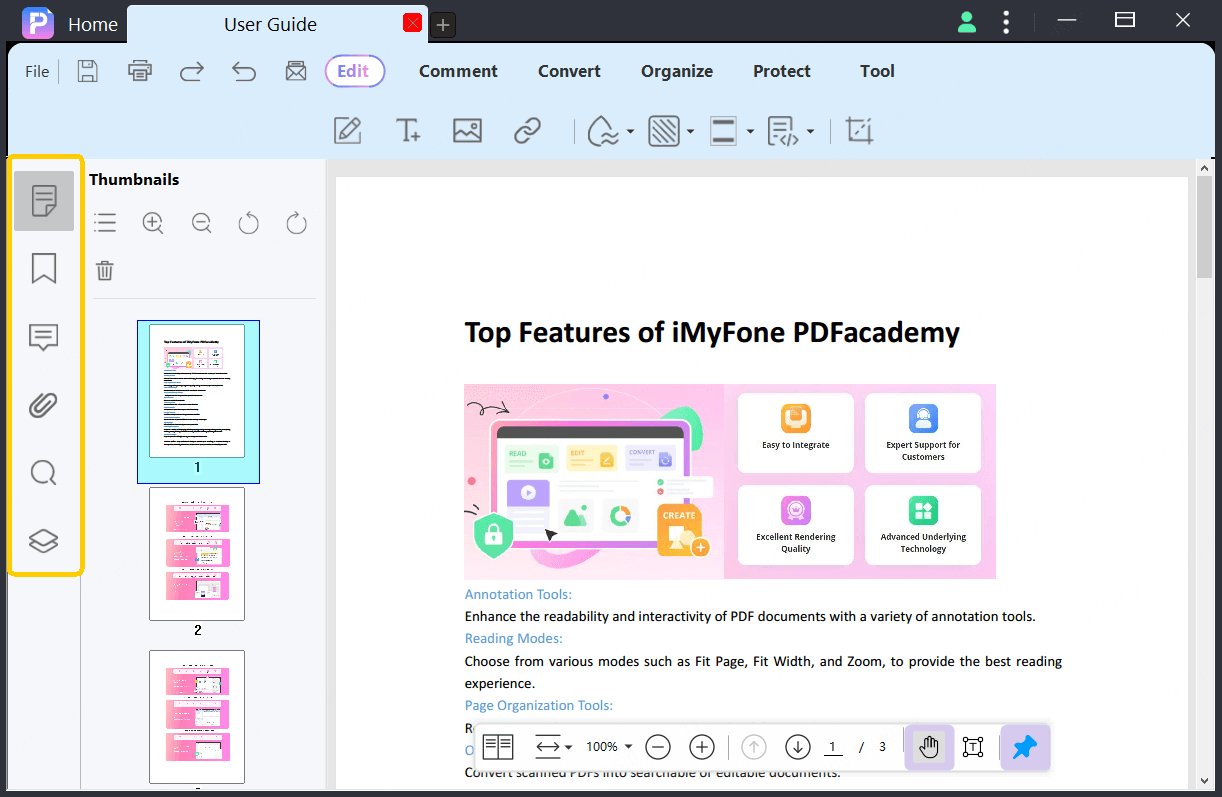
Thumbnail panel
You can quickly scroll through all pdf pages in PDF document by mouse wheel, or by dragging the scroll bar in the panel.
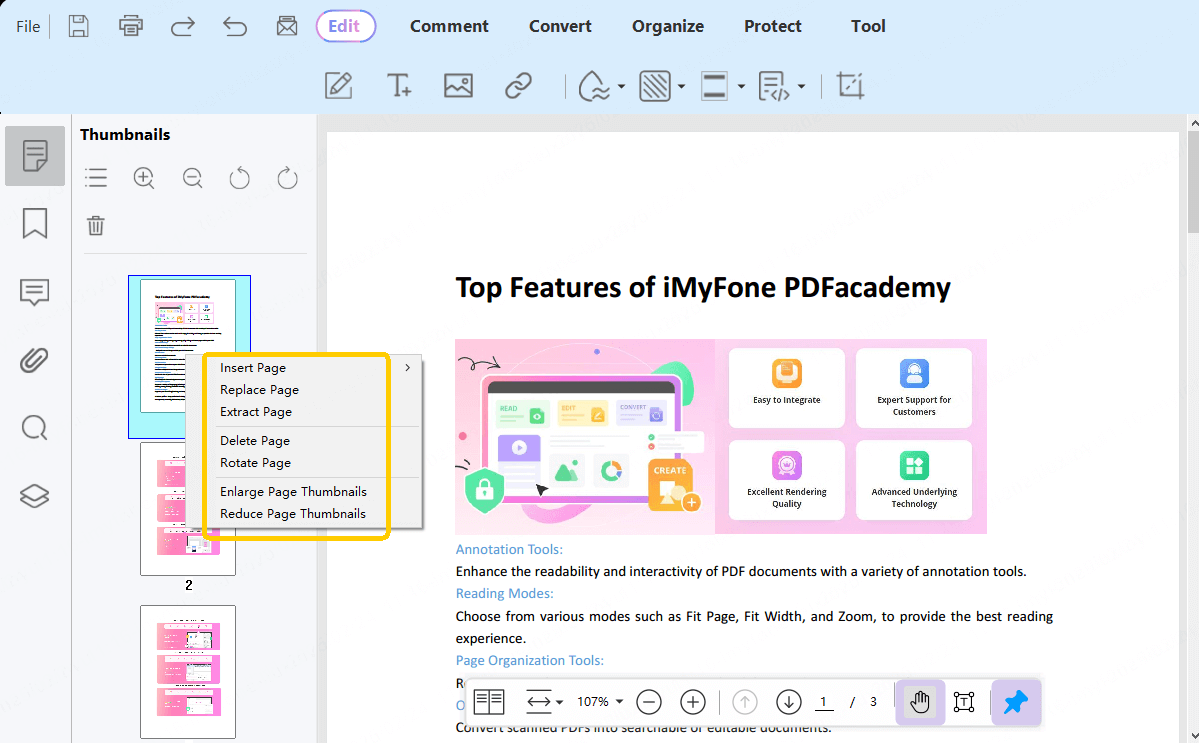
By Right-clicking on a page in the thumbnail panel, you can adjust the size of the thumbnails or organize pages. Besides, you can reorder pages by dragging them in this panel.
Bookmark panel
Bookmark panel show the outline of PDF document, allowing you to navigate the document through the bookmark items.
By clicking on a single bookmark item, you can jump to the corresponding target link and view the related text details. These bookmarks let you navigate to different pages within the document.
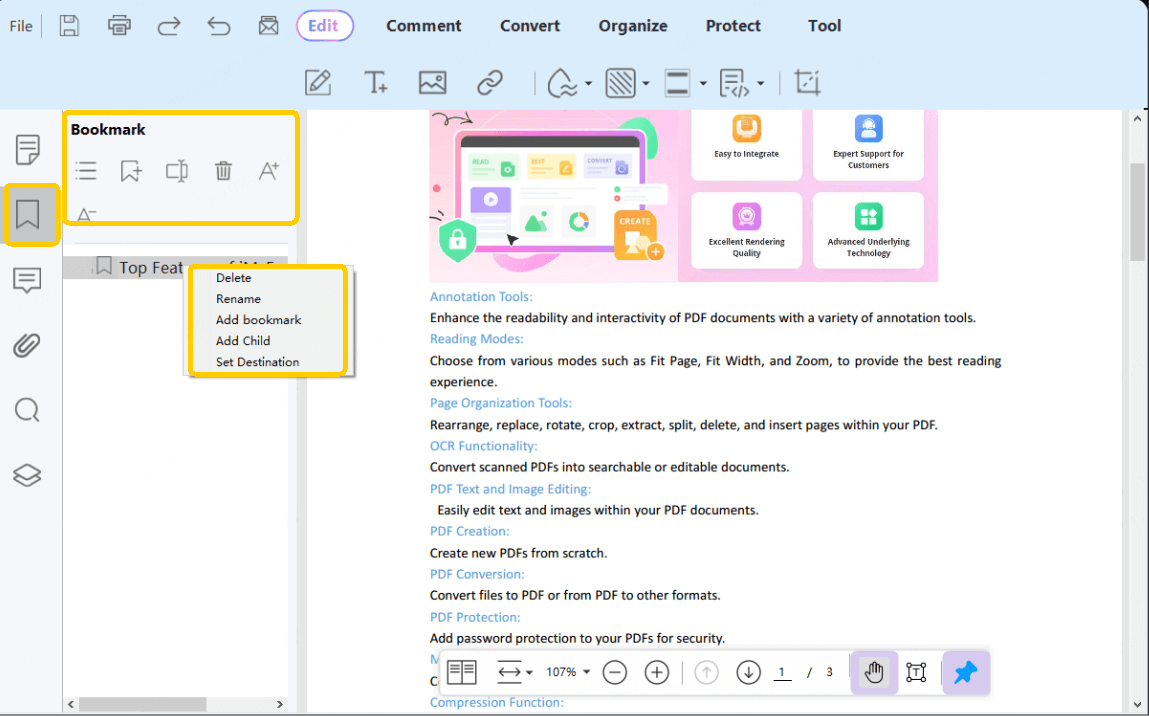
Bookmark Panel allows you to Add Bookmark and Delete Bookmark to your PDF document by right-click on the outline item or click on the panel toolbar button.
How to add bookmarks in PDFacademy?
With PDFacademy, bookmarks can be created within the Bookmark panel. Additionally, PDFacademy allows you to manage bookmark orders and hierarchical relationships by dragging bookmark.
Step 1. Navigate to the page in which you want to add a new bookmark.
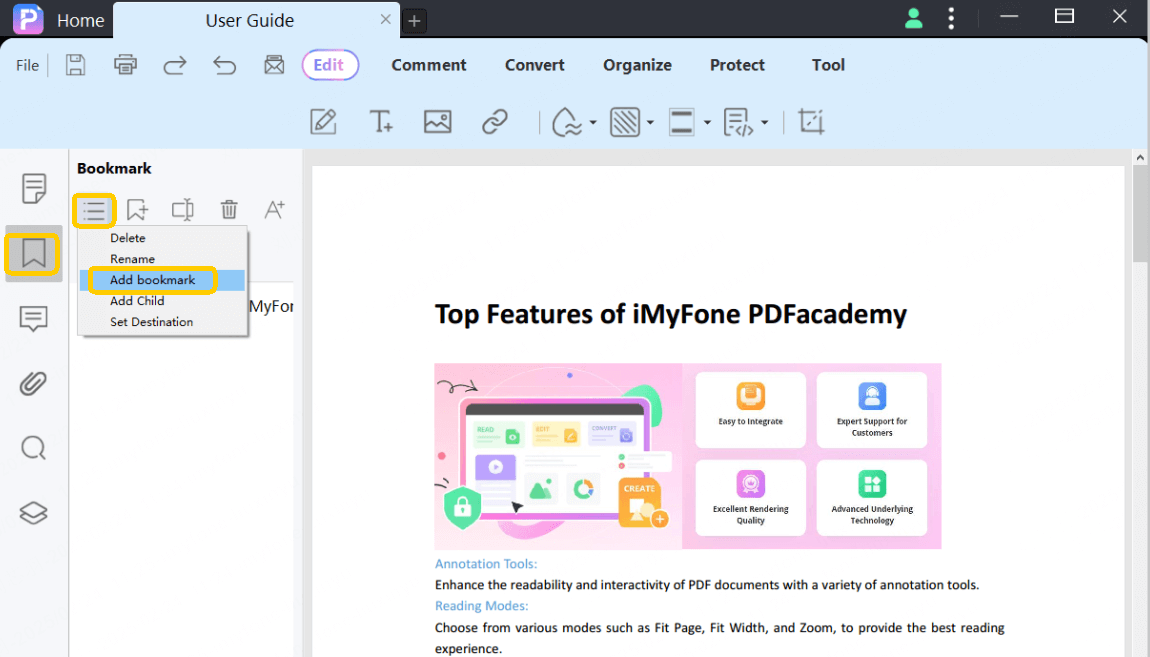
Step 2. Open the Bookmark panel and click "Add" button to insert new bookmark.
Step 3. Open one file and click the "Bookmark" button at the left side panel, and it will open the Bookmark panel to create new bookmark.
Annotation Panel
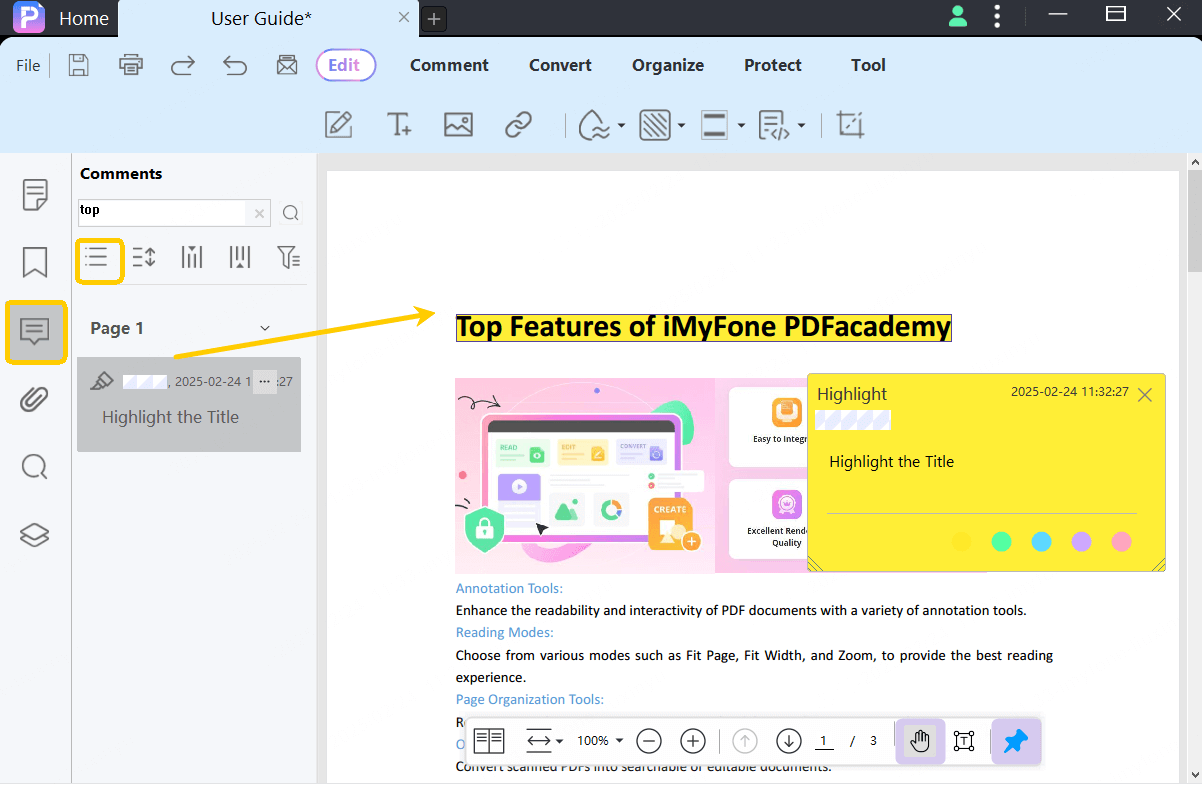
If PDF documents is annotated, you can find all annotations list on the Annotation Panel. You can delete annotations by click the option button and You can navigate to a specific page and select the annotation by clicking on the annotation.
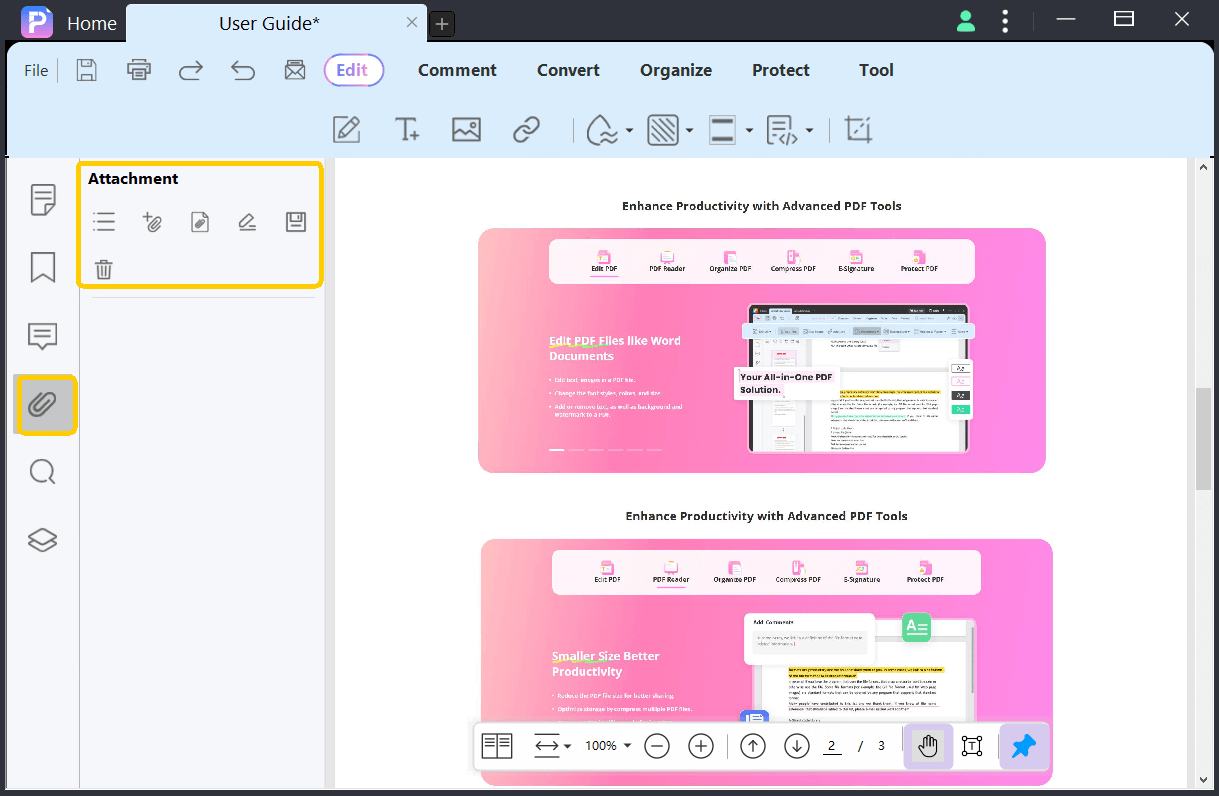
Attachment panel
The Attachment Panel allows you to:
Access the attachments of PDF documents
Navigate to where the files are stored
Edit descriptions
Open, delete, or save attached files
Add more attachment files
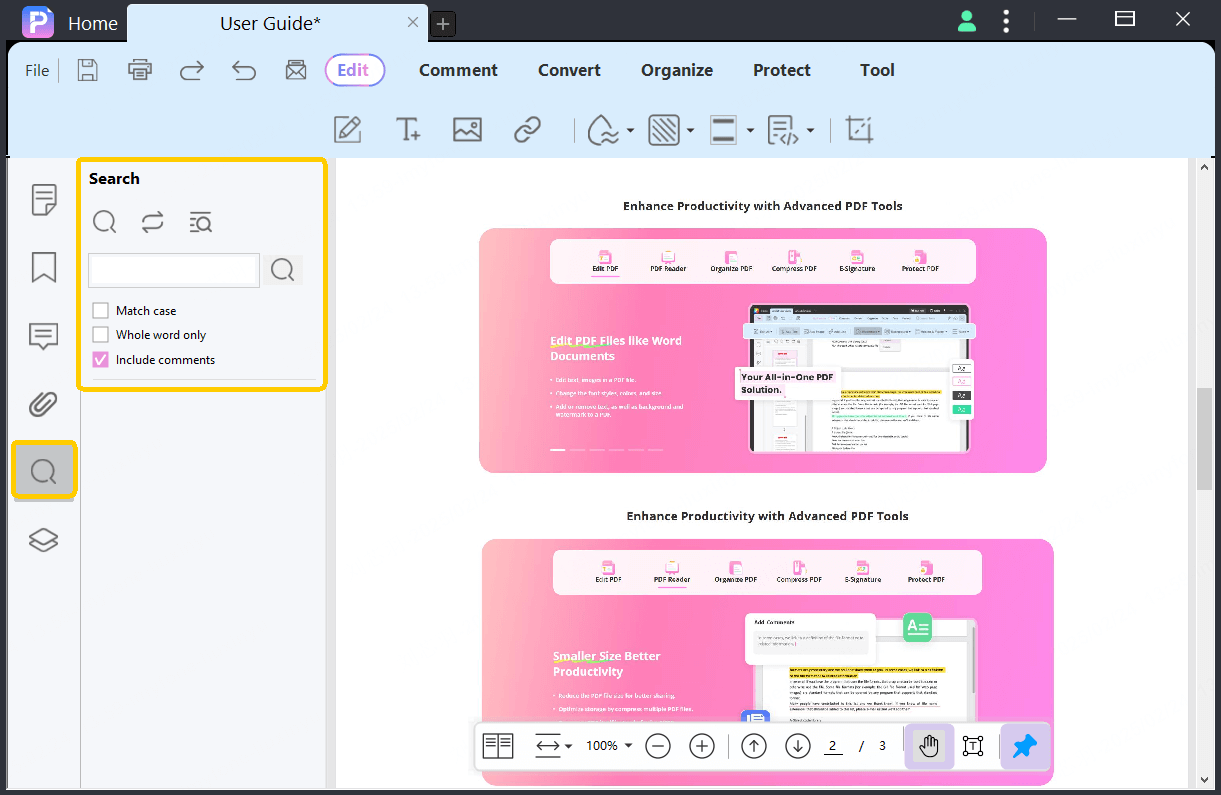
Search panel
Search Panel supports a powerful built-in search tool that allows you search text in PDF documents, and replace text by specified new text.
Click the Search Panel in the left navigation column then enter the keyword in “Find What” box and press Enter key to start the search process.
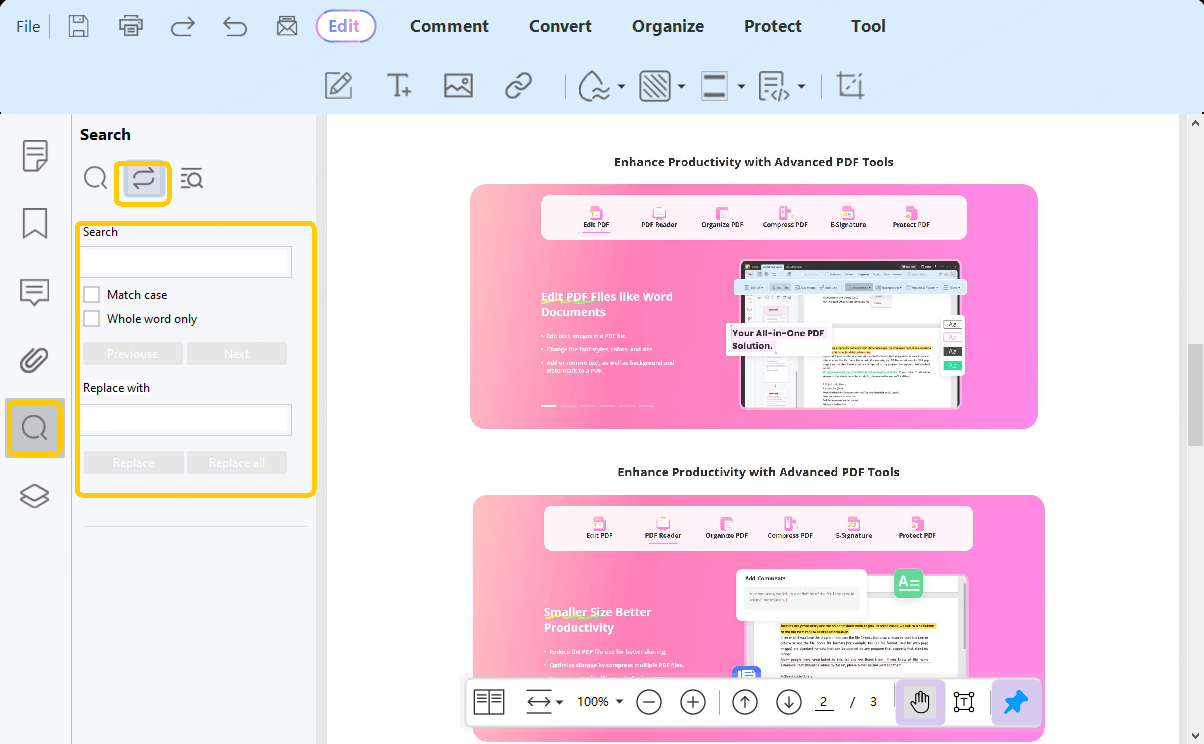
[Search & Replace]→Click the replace button, and then Enter the text you want to search for in the”Search” box and the text you want to replace it with in the “Replace with” box.
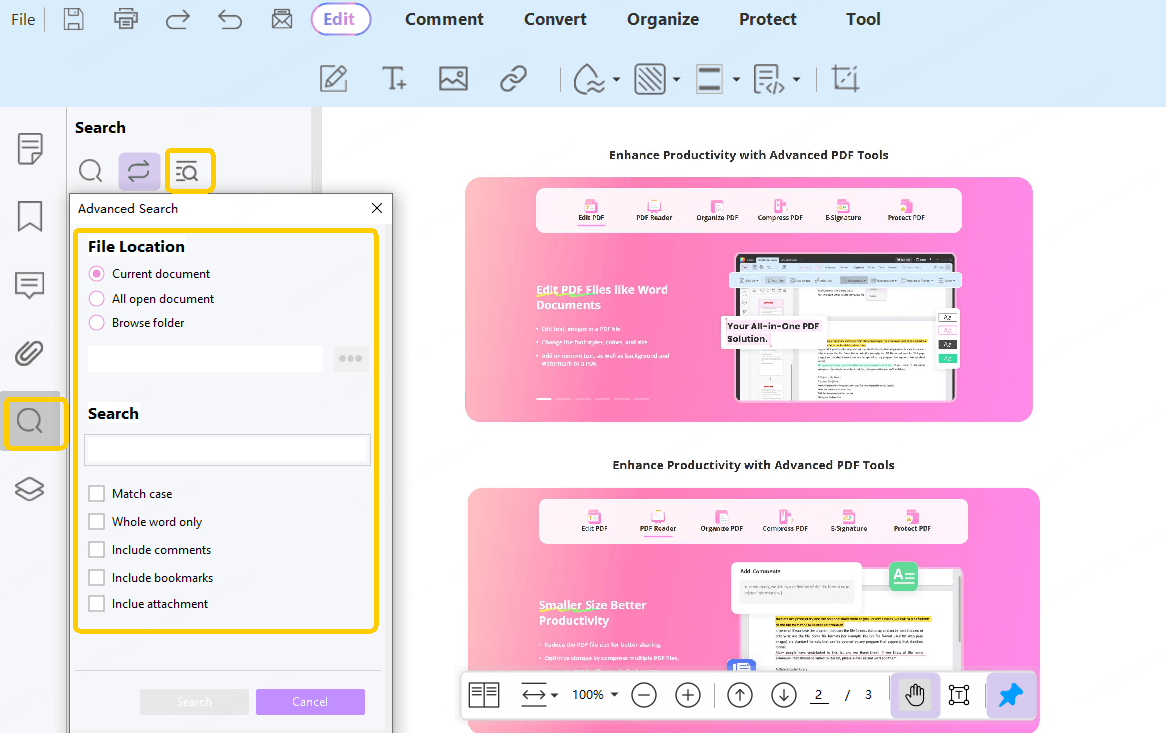
[Advance Search]→It supports you to search text in multiple PDF documents.
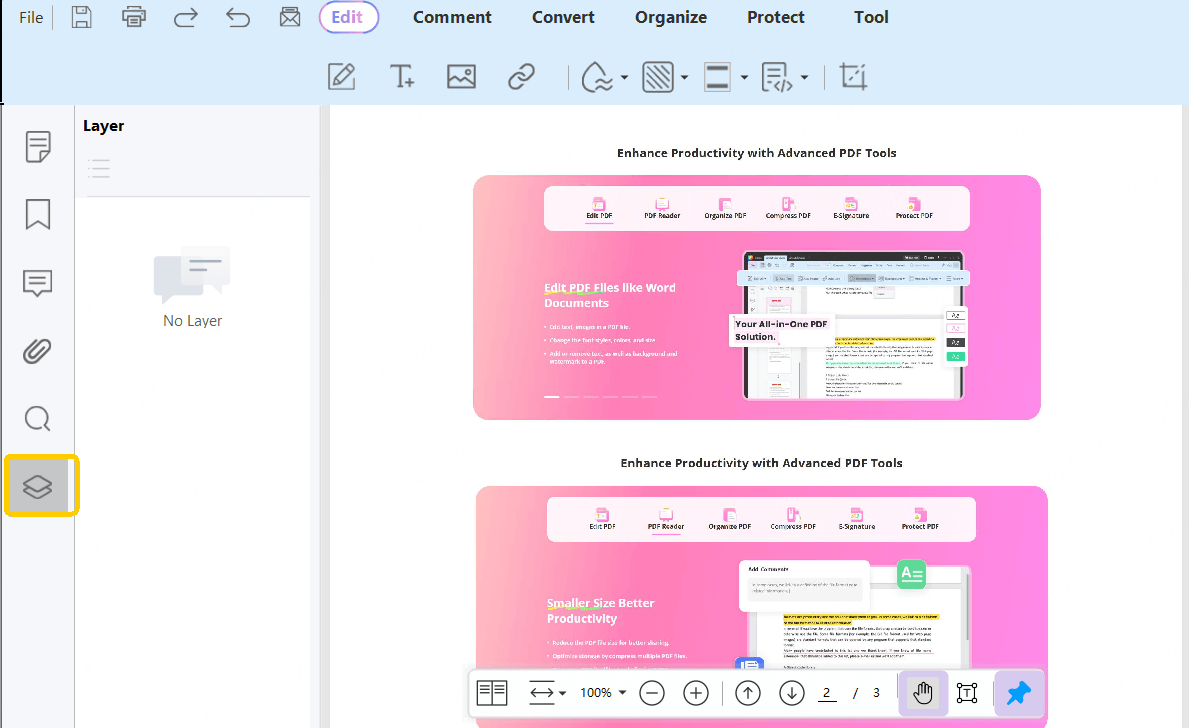
Layer panell
If PDF document contain multiple layer, you can view specified layer by click the layer item list on Layer Panel.
Page Display Modes
PDFacademy offers two Page Display modes, Single Page Scrolling and Two Page Scrolling. It usually show Single Page Scrolling mode as default.
[Single Page Scrolling]: Scroll your PDF in a continuous vertical column.
[Two Page Scrolling]: Scroll your PDF in a continuous vertical column side-by-side.
To change the Page Display mode, click the book-style buttonon Navigation Bar as following.

Zoom and Rotate View
To zoom and rotate view, you can click the zoom buttons on Navigation Bar:

Besides, you can also right-click the page view and then select the following items:
Zoom in: zoom in view.
Zoom out: zoom out view.
Rotate view: Rotate view clockwise.
(Tip: Press “Ctrl” and scroll the mouse to zoom view.)
PDFacademy is a powerful PDF tool suit that allows users to modify text, images, path, links, and other elements within a PDF. This guide will show you how to do that.
Add or Edit Text in PDF
PDFacademy allows you to edit all PDF page objects (text object/path object/image object). Whether you need to delete, modify text, or add new text, PDFacademy can handle it all and ensure a smooth editing experience without altering the text layout.
[Modify / Delete Text in PDF]
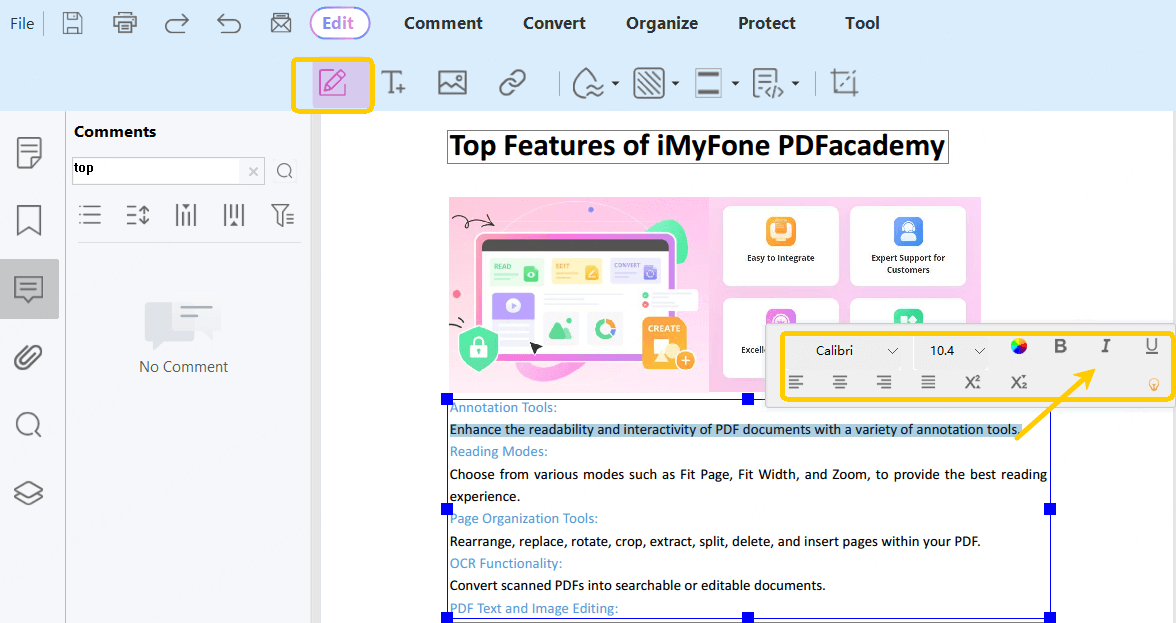
Select “Edit” tab on main tool panel, and click “Edit All” button, you will enter editing mode.
In this mode, the text in PDF will be organized as paragraph, each paragraph using a gray border rectangle around it.

- [To Edit Text]:
Click in the paragraph bounding-box, and then select the text, a Text Format Panel will be popup, you can modify the font, font size, font color, bold, italic and alignment on the Text Format Panel.
- [To Delete the Text]:
Place the cursor at the end of the text or middle of the text and press the backspace key on keyboard.
- [To Replace the Text]:
Drag your cursor to select text, then type the new word you'd like to use.
If you're already in "Comment" or "Organize Page" mode, you can select Hand Tool on Floating Navigation Bar to change the mode.
[Add Text to PDF]
Step 1. Select “Edit” tab on main tool panel, and click “Add Text” button.
Step 2. Click any blank place in the PDF file and start typing. You can set the style of the new adding text, including the font, font size, color, and alignment of the text, etc.
If you want to exit editing mode, click outside the text box.

Add or Edit Images in PDF
PDFacademy allows you to edit all PDF page objects (text object/path object/image object). Whether you need to delete, modify text, or add new text, PDFacademy can handle it all and ensure a smooth editing experience without altering the text layout.
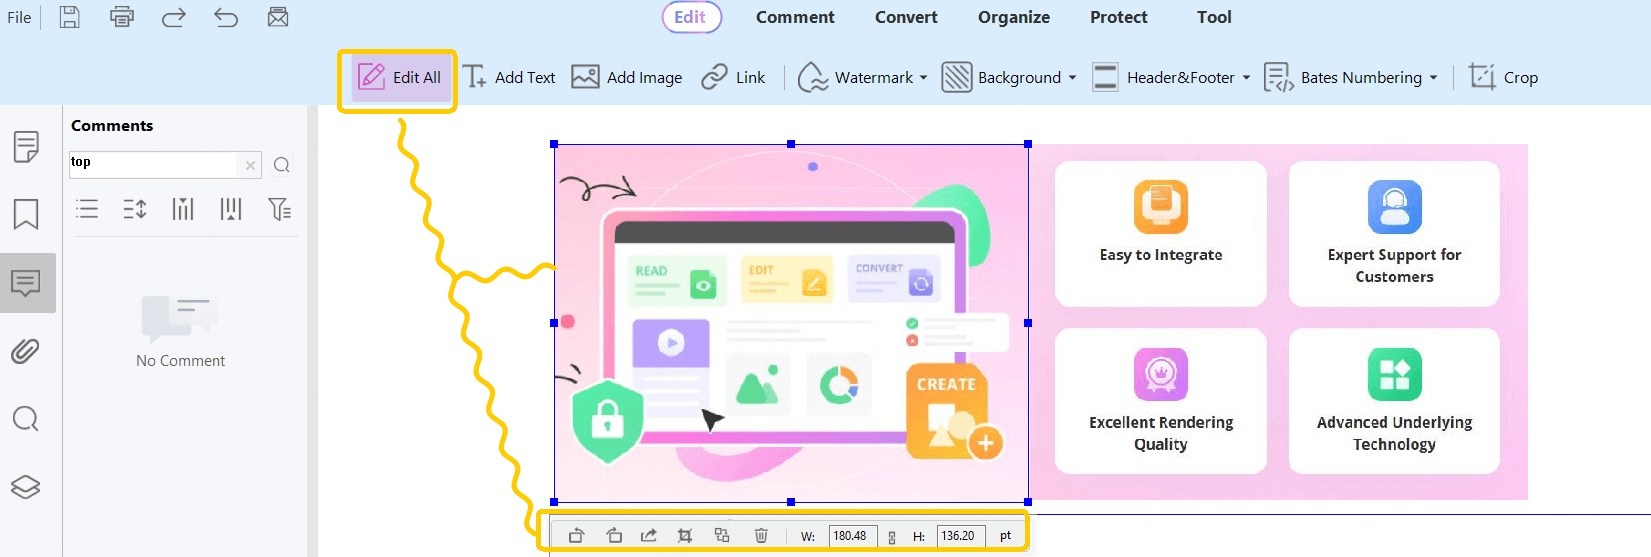
[Edit Images in PDF]
Step 1. Select the “Edit” tab and click “Edit All” button, you will enter the content editing mode.
Step 2. Click on the images you want to edit, and then a floating image panel will pop up. You can rotate, extract, replace, crop or delete the image.
To resize the image, dragging its corner or enter the desired size on floating image panel manually. Press “Shift” key for constrain proportions.
Alternatively, right-click on the image to find the tools for editing images: cut, copy, delete, crop, replace, rotate, export and moving by the z-order.

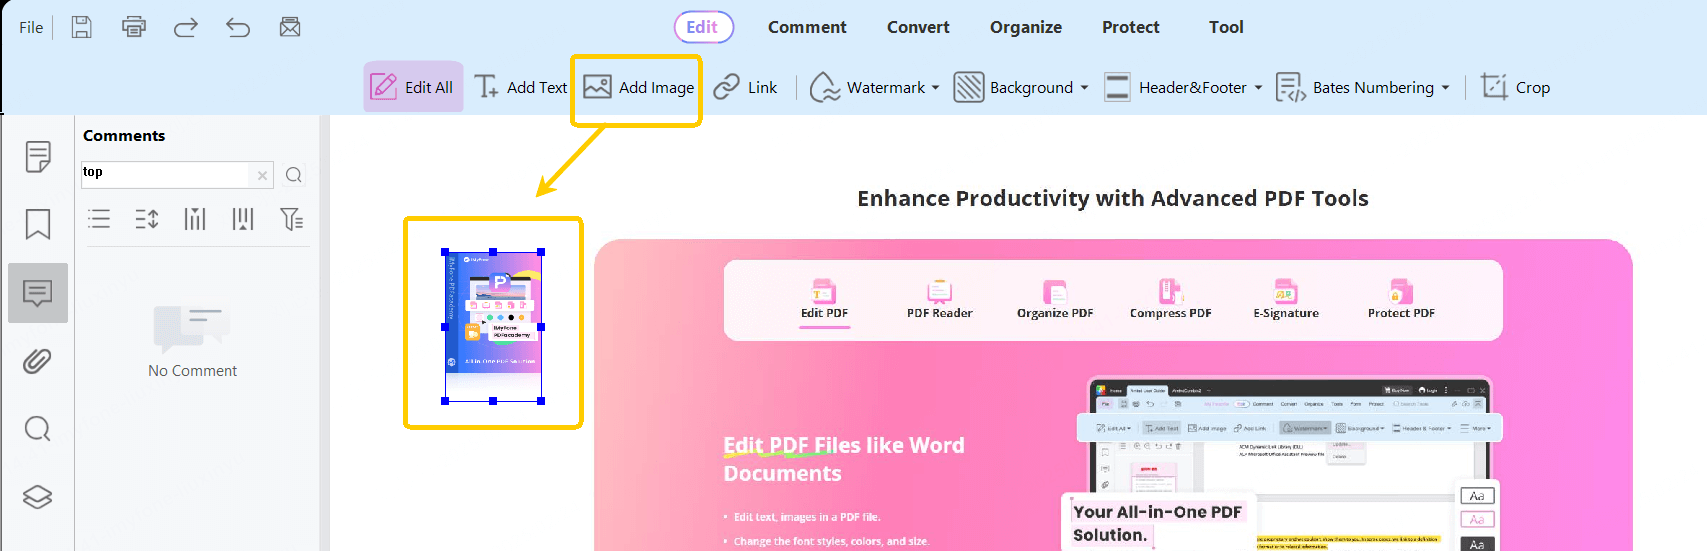
[Add an Image]
You can adding images (.PNG, .JPG, .JPEG, .Bmp, .Tiff) to PDF by using PDFacademy.
Step 1. Select the “Edit” tab and click “Add Image” button. A file dialog will be popup to help you to select the image file.
Step 2. Click on the place you want to add the image. You can then click on the image to adjust its position and size as needed.
Add, Edit and Remove Links in PDF
You can use the link to navigate to the relevant or specified page and access the information you need.
[Add Link]
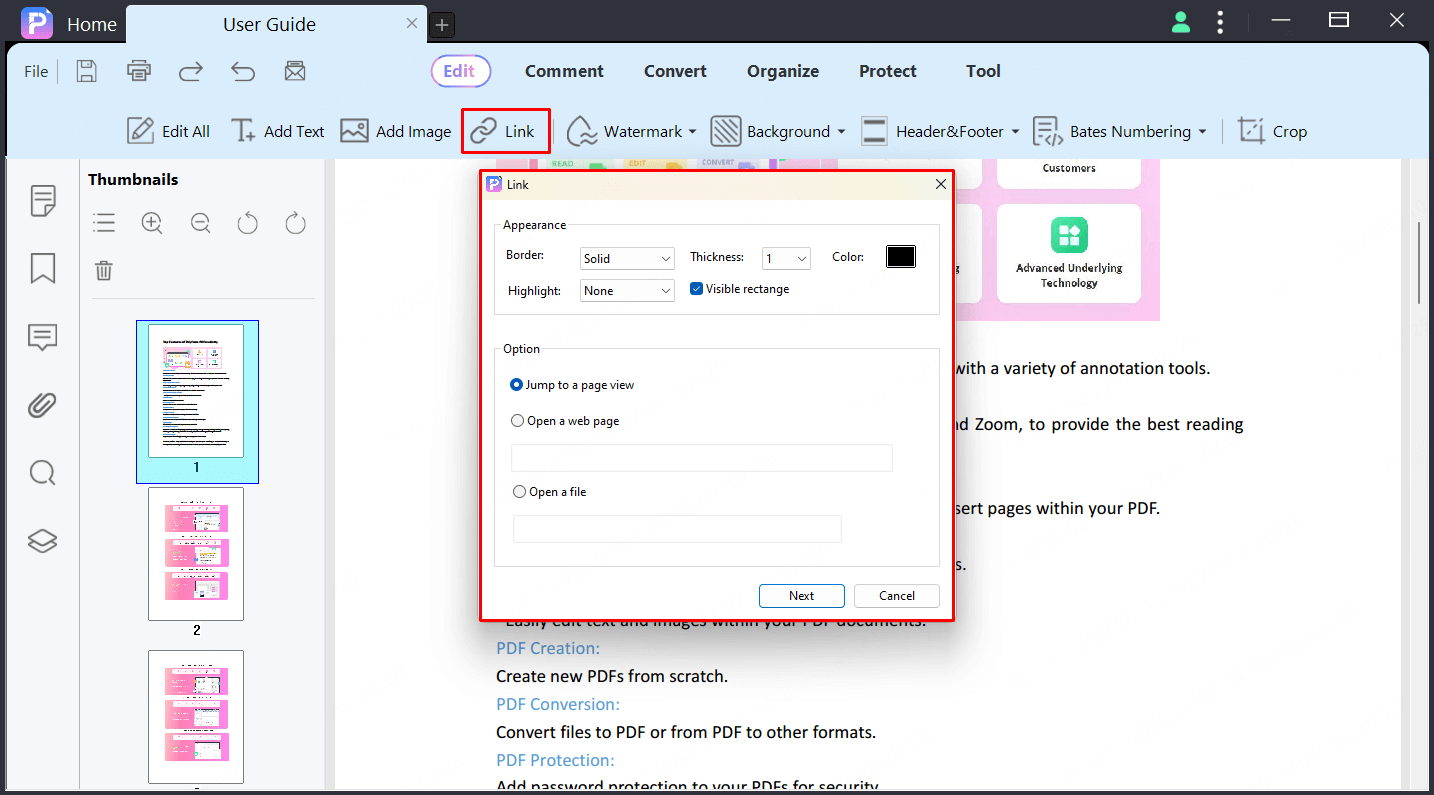
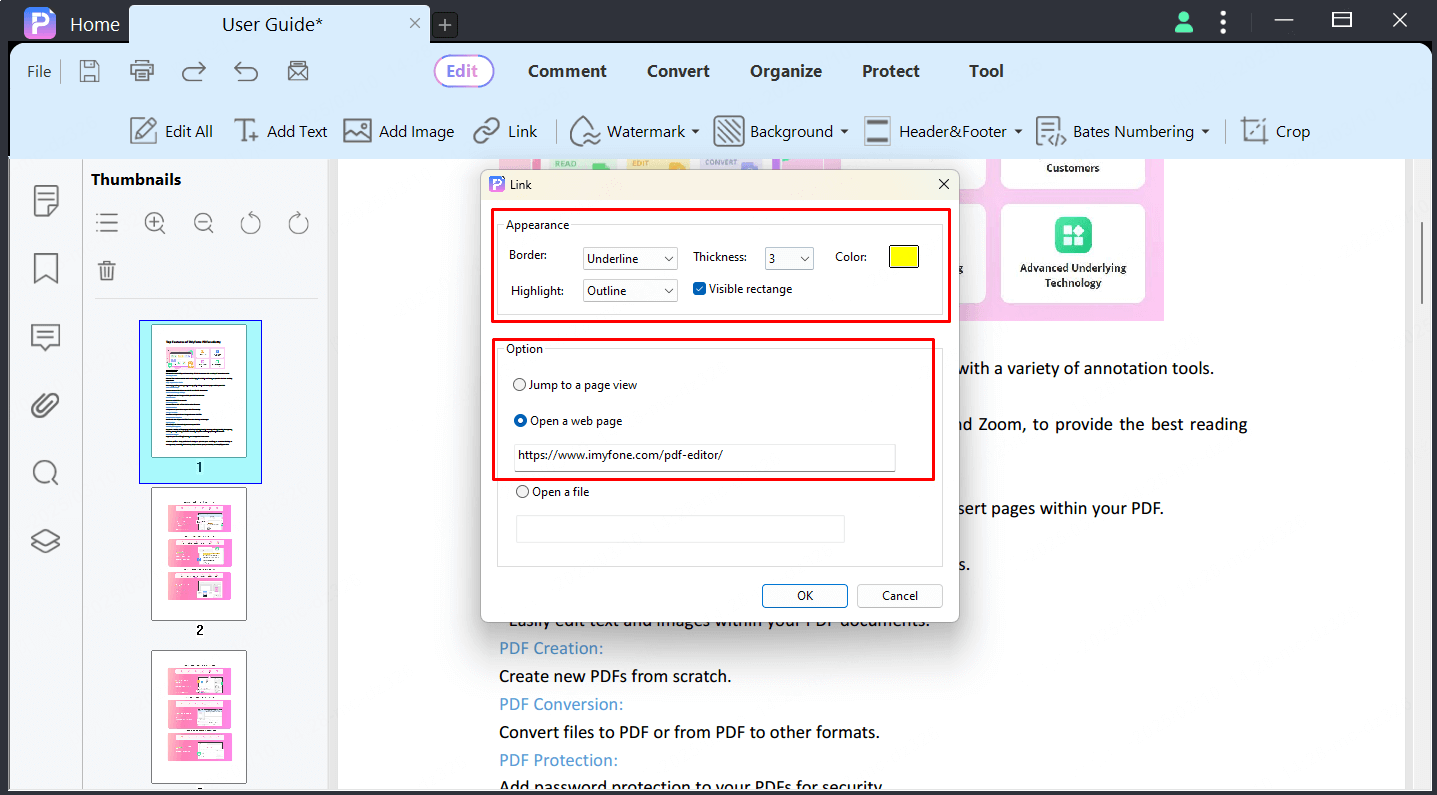
To add a link, choose the "Edit " tab and click “Add Link” button. Then, position the cursor on the place you want to add the link, hold and drag your mouse button to draw a rectangle. A dialog box will pop up, allowing you to set the link's action and appearance.
[Edit Link]
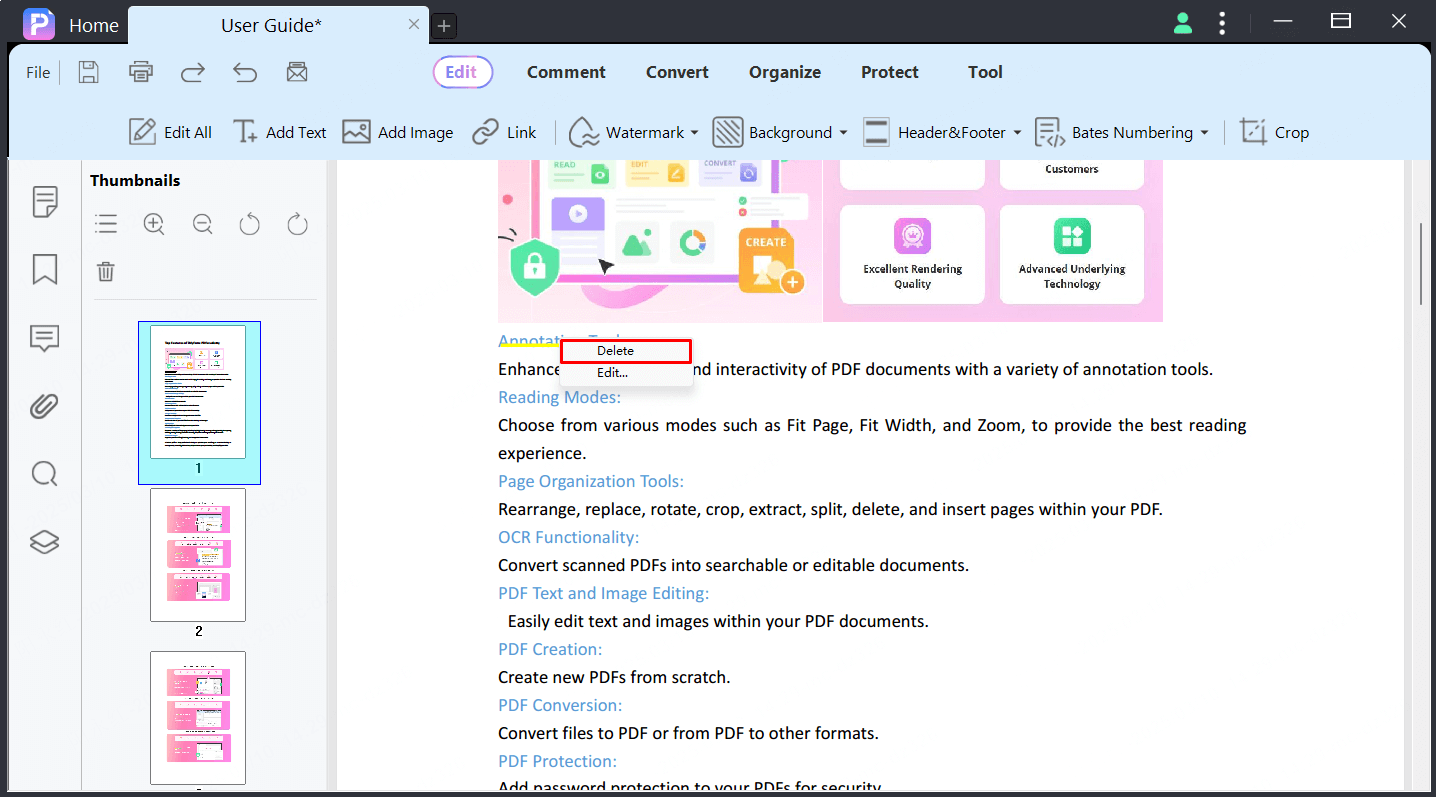
Right-click any added link on your PDF. In the popup menu, set the "Boder," "Thickness," and "Color" to edit the added link.
[Delete Link]
To delete a link from a PDF, right-click on it and select the option of "Delete."
Add, Update and Remove Watermark in PDF
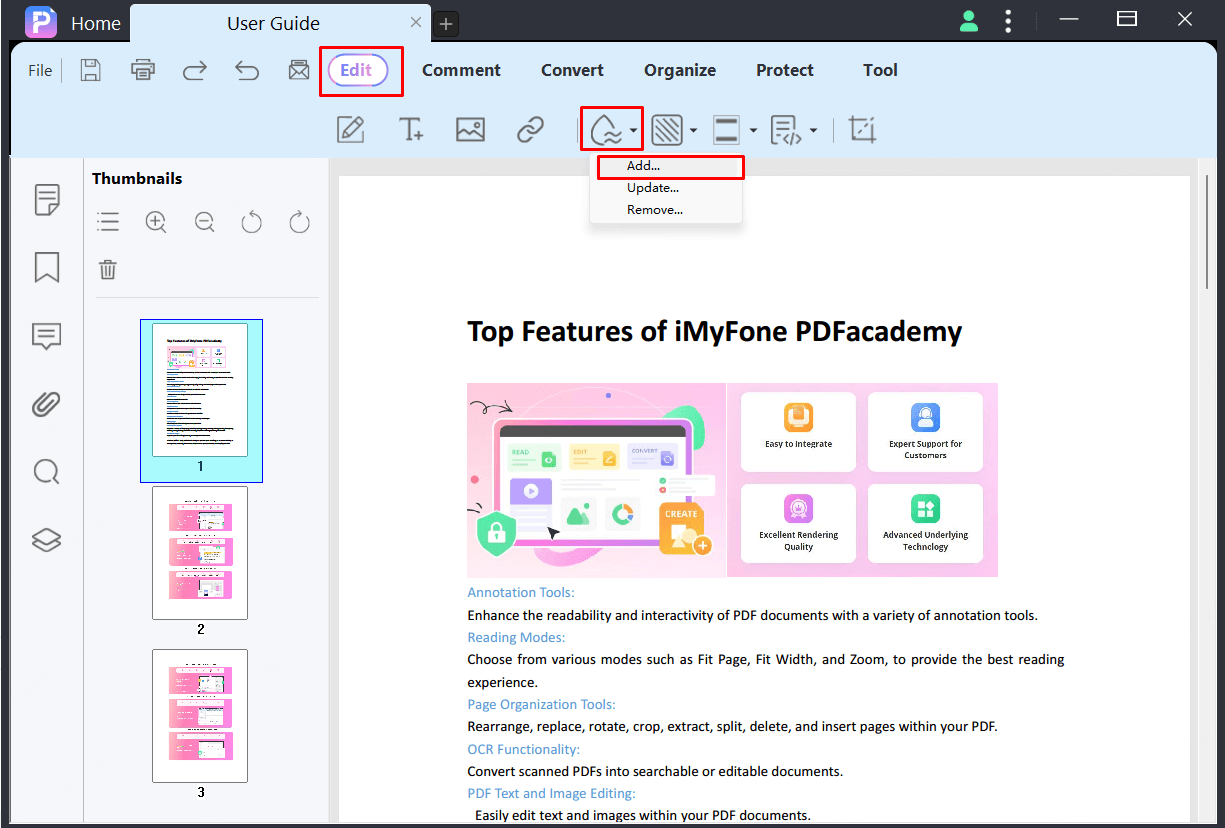
Select “Edit” tab and the page-design buttons will show on the edit toolbar.
[Add Watermark]
Step 1. Add a watermark for a single PDF.
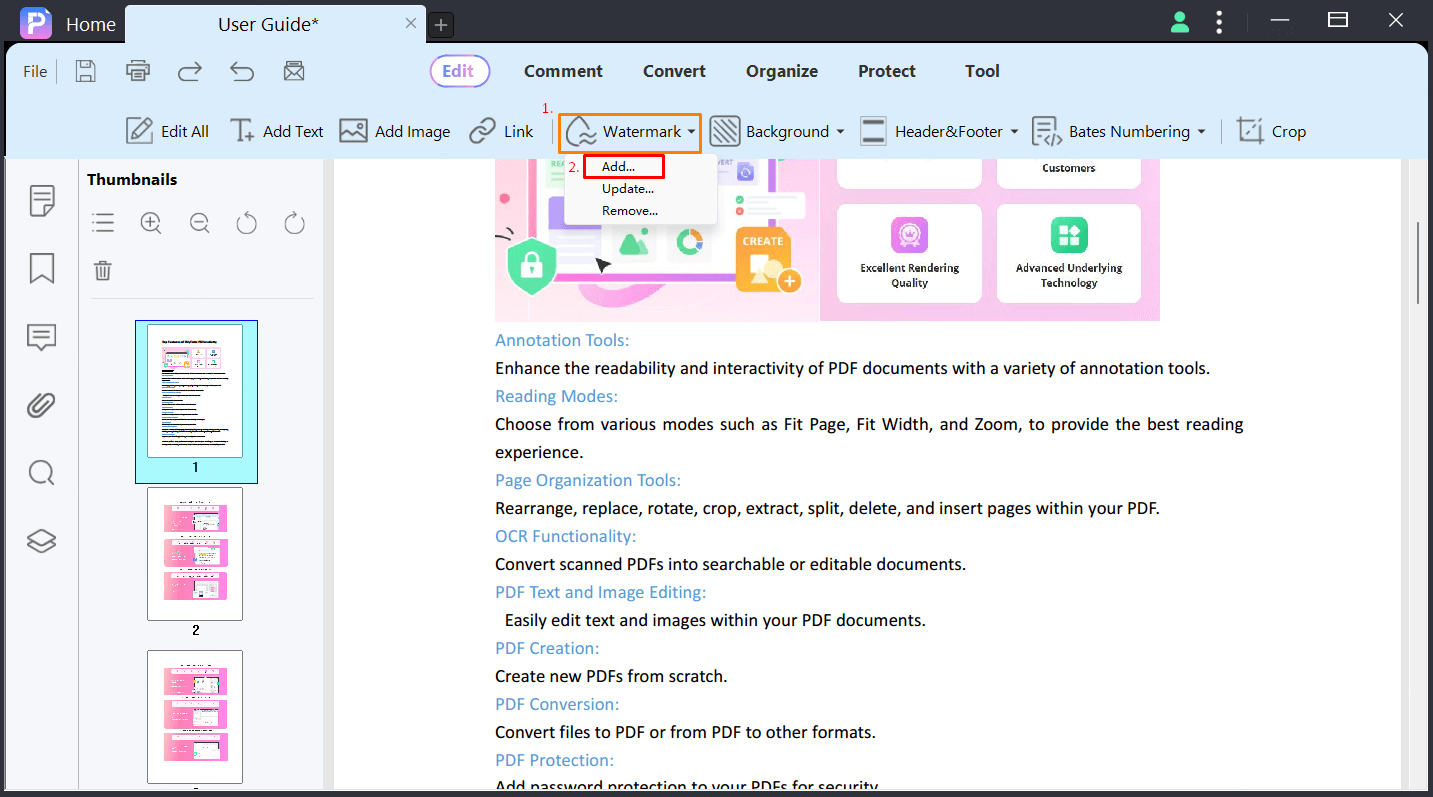
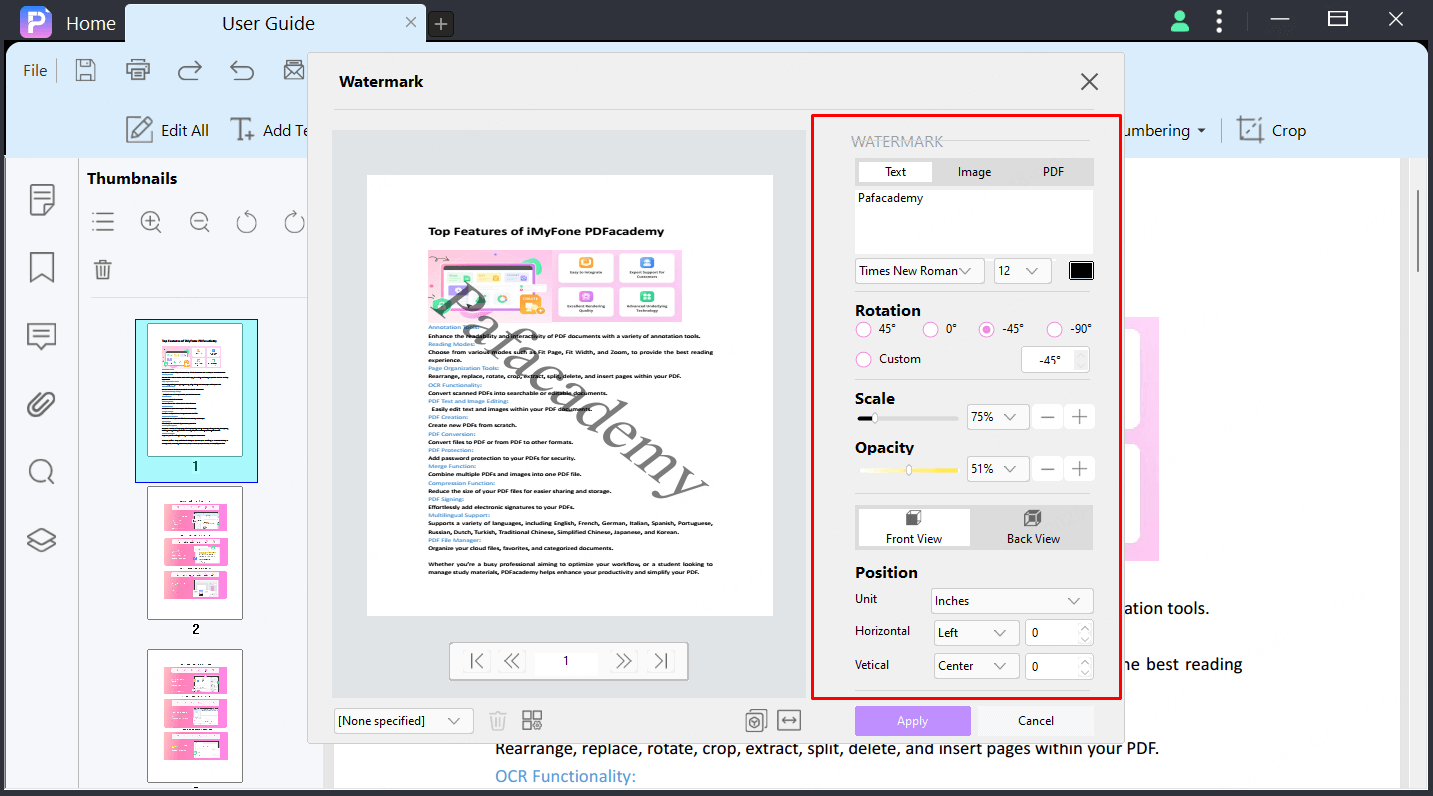
After opening your PDF file in the PDFacademy, please click the "Edit" > "Watermark" > "Add Watermark" button.
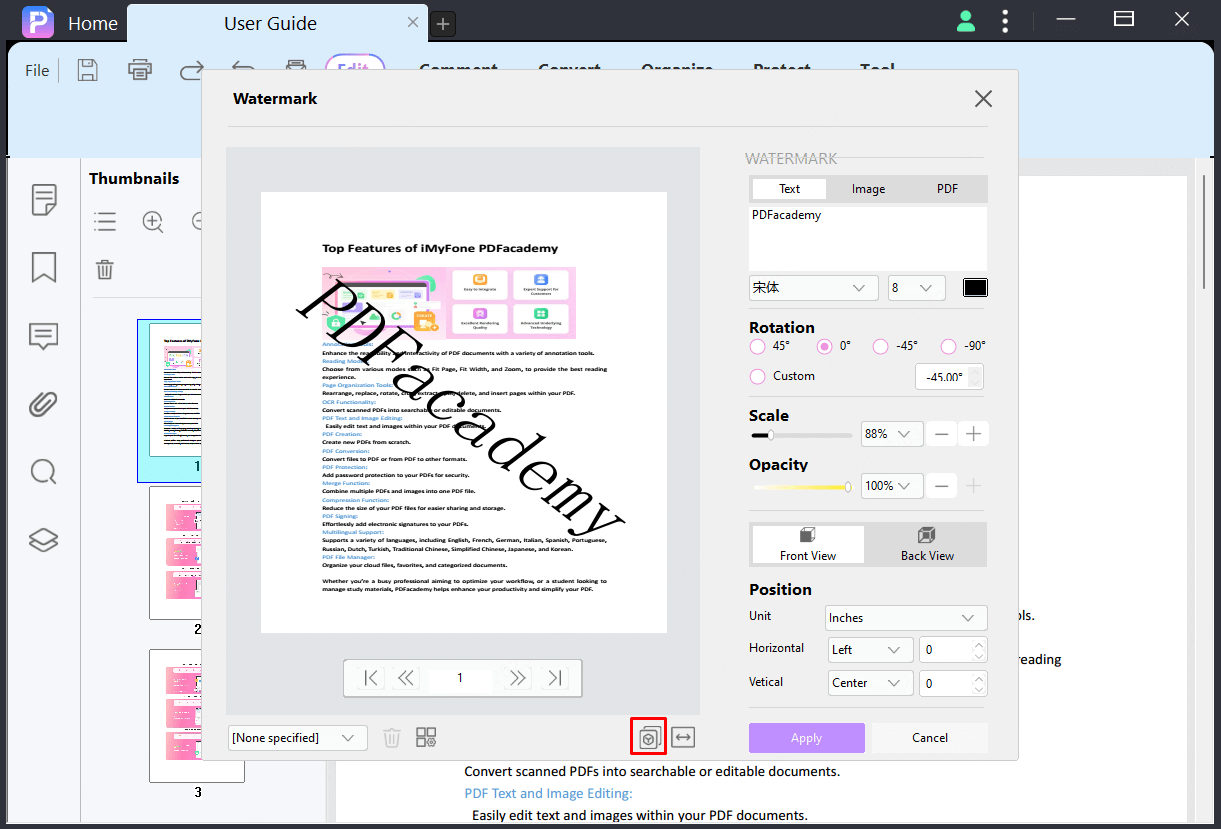
- Specify the source type of watermark you want to add. You can select "Text," "Image," and "PDF," depending on what kind of watermark will be created.
- For Text watermark, type the content and change the text style, including the font, font size, and color.
- Set the ratio and opacity of the watermark with the help of sliders.
- Work on the settings of the watermark and define if it should be present on the "Front" or the "Back."
Step 2.Click on the "Double-Arrow" icon and select the page range of the PDF.
You can set the page range manually or select the "Odd or Even Pages" option if required.
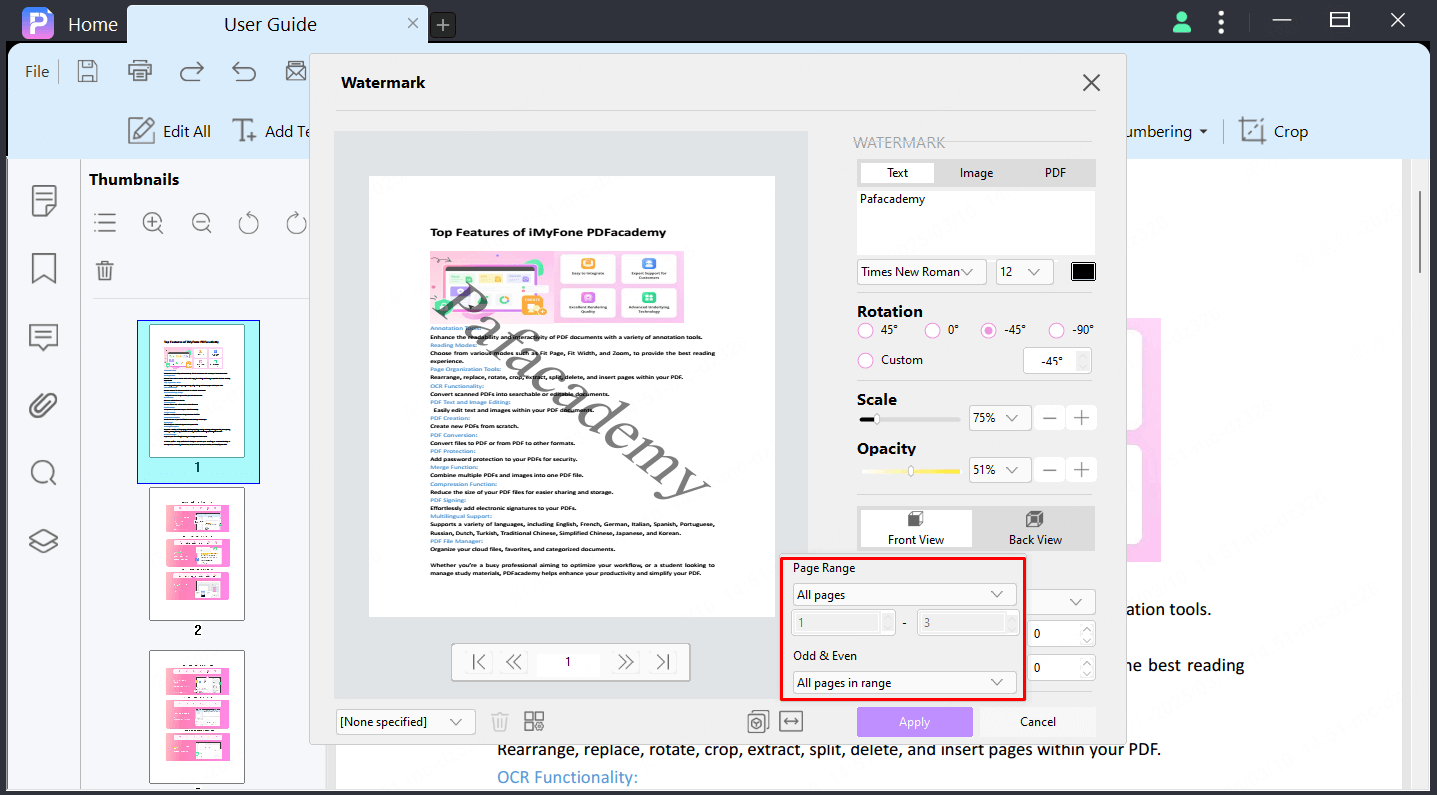
Step 3.Click the "Apply" button to apply the watermark.
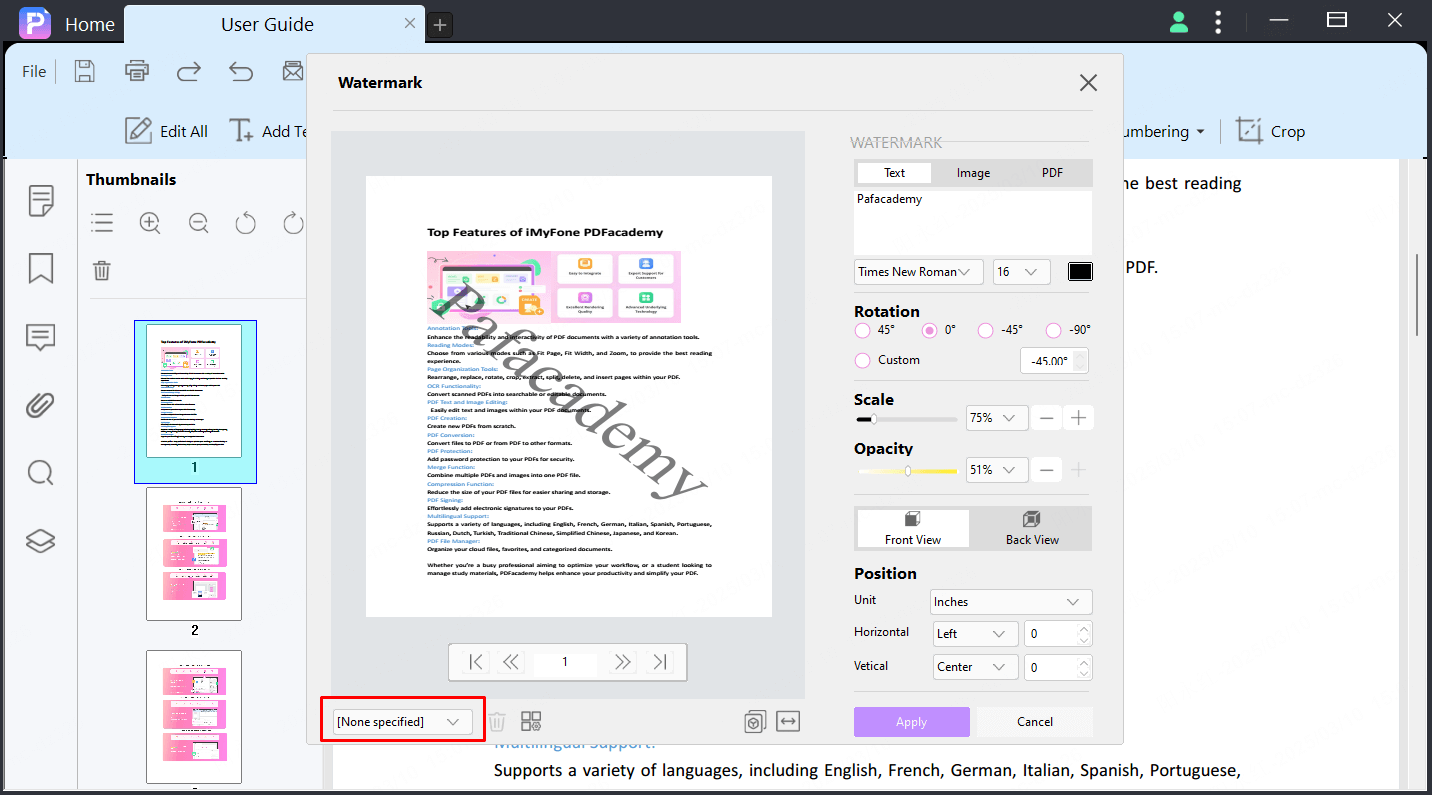
[Manage Watermark Template]
You can save current setting as a new template or select an exists template to create watermark or delete the selected template.
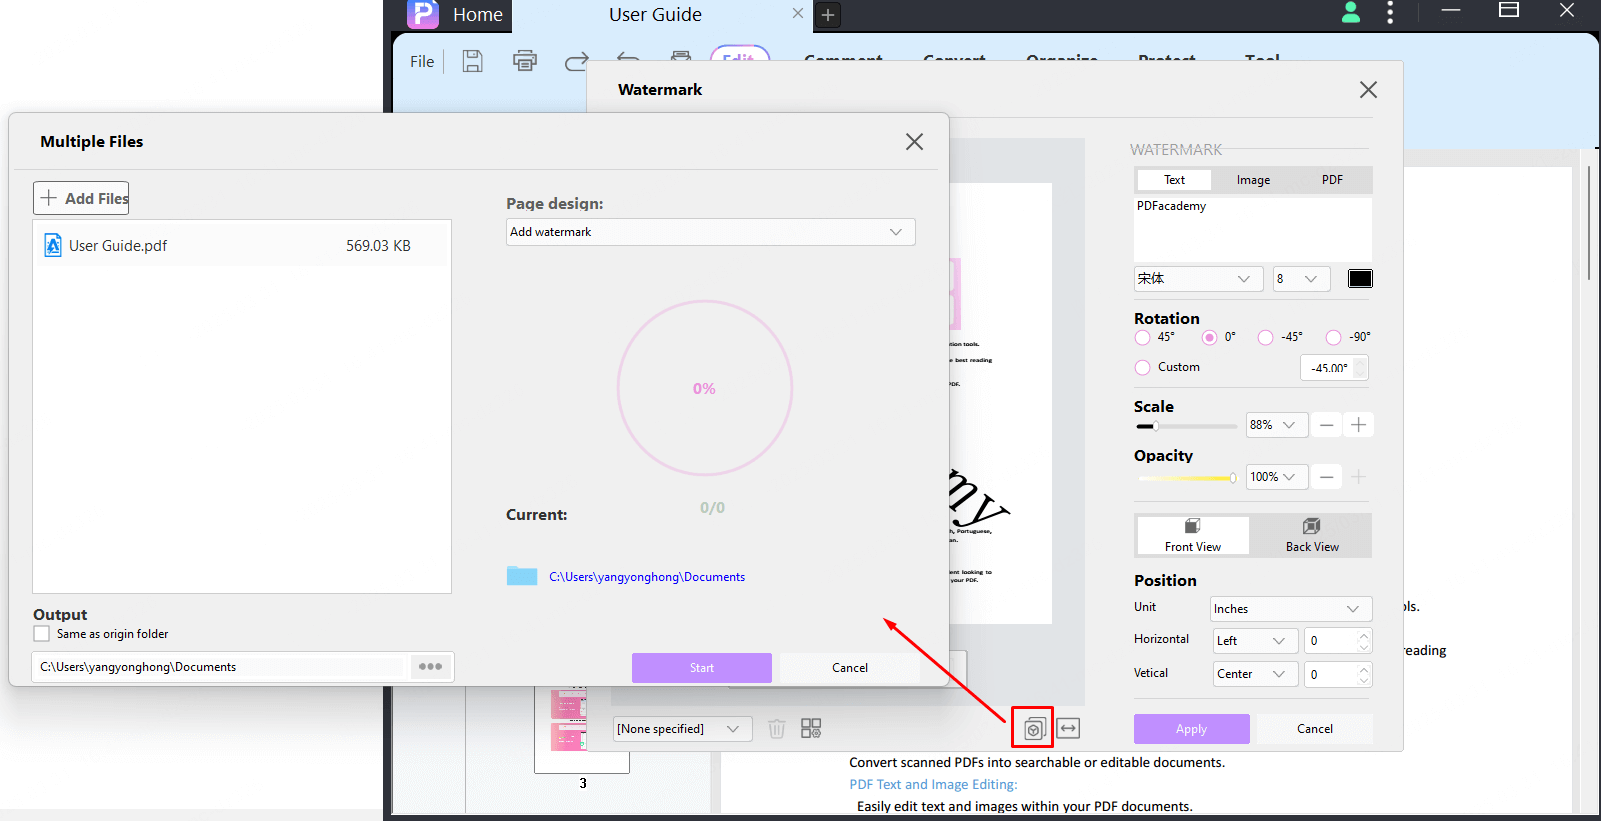
Add a watermark to multiple PDFs.
Click on this icon in the image to pop up the Multiple Files window.
Then click “Add Files” button on Multiple Files window to add PDF files, and select the “Add watermark” mode.
Click “Start” button to add a watermark to PDFs.
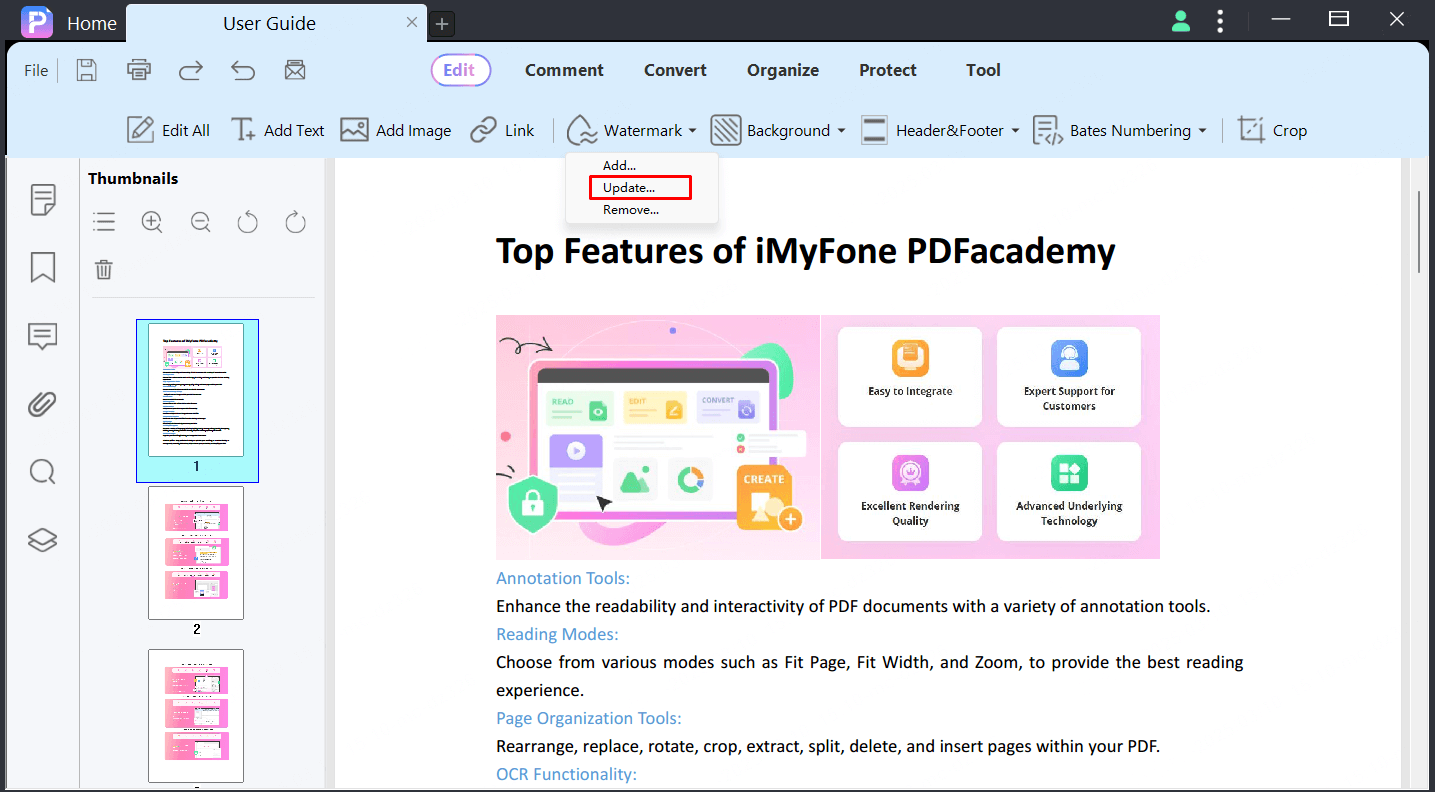
[Update Watermark]
You can update the exists watermarks. Choose the “Update” option to update your watermark.
In the update window, you can change all properties of the watermark same as adding watermark step. Once done, select "Apply" to make changes to the watermark.
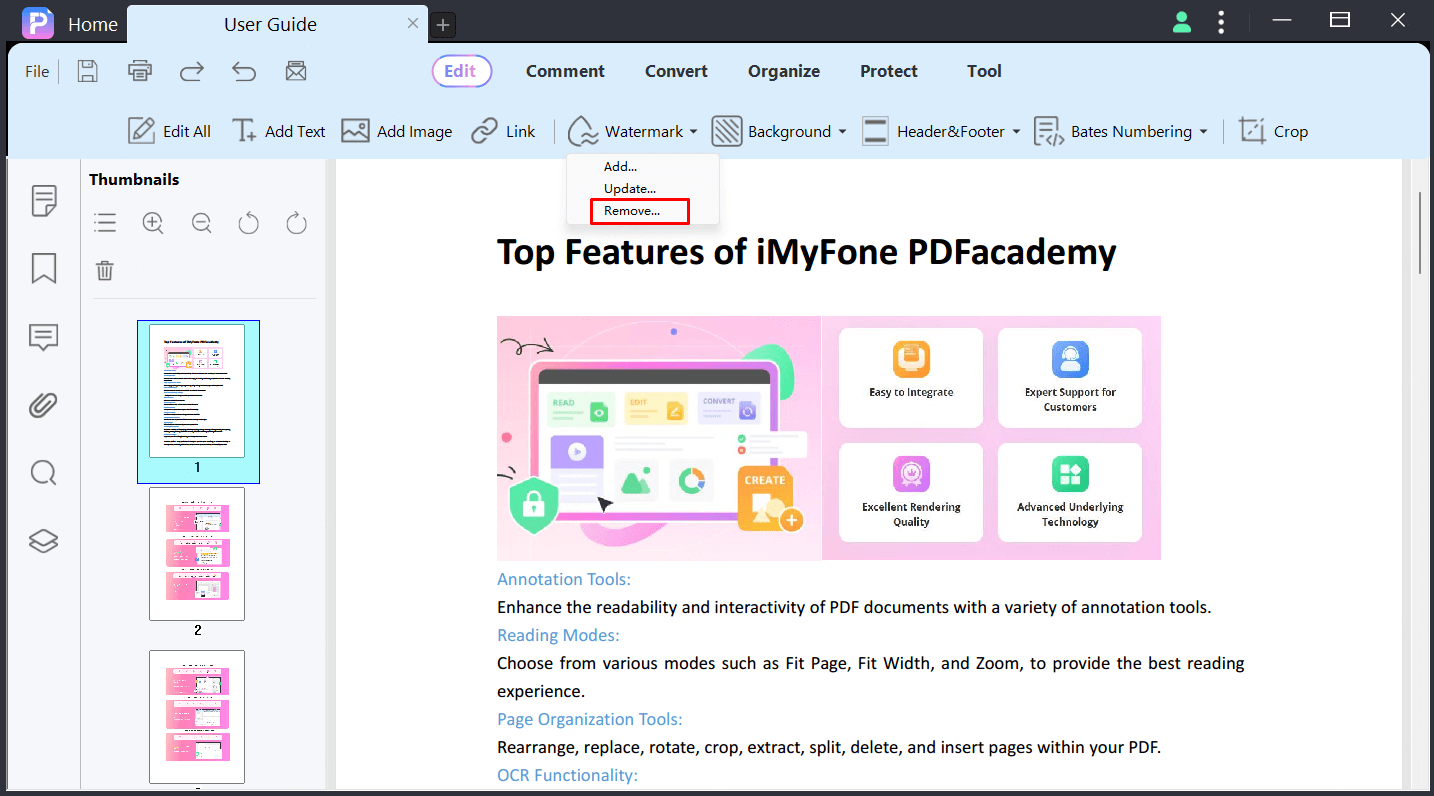
[Remove Watermark]
To remove watermark, please click the "Edit" > "Watermark" > "Remove" button.
Add, Edit and Remove Background in PDF
You can Select “Edit” tab on the edit toolbar to add backgrounds as color, image or pdf file to enhance the outlook of your PDF document if added.
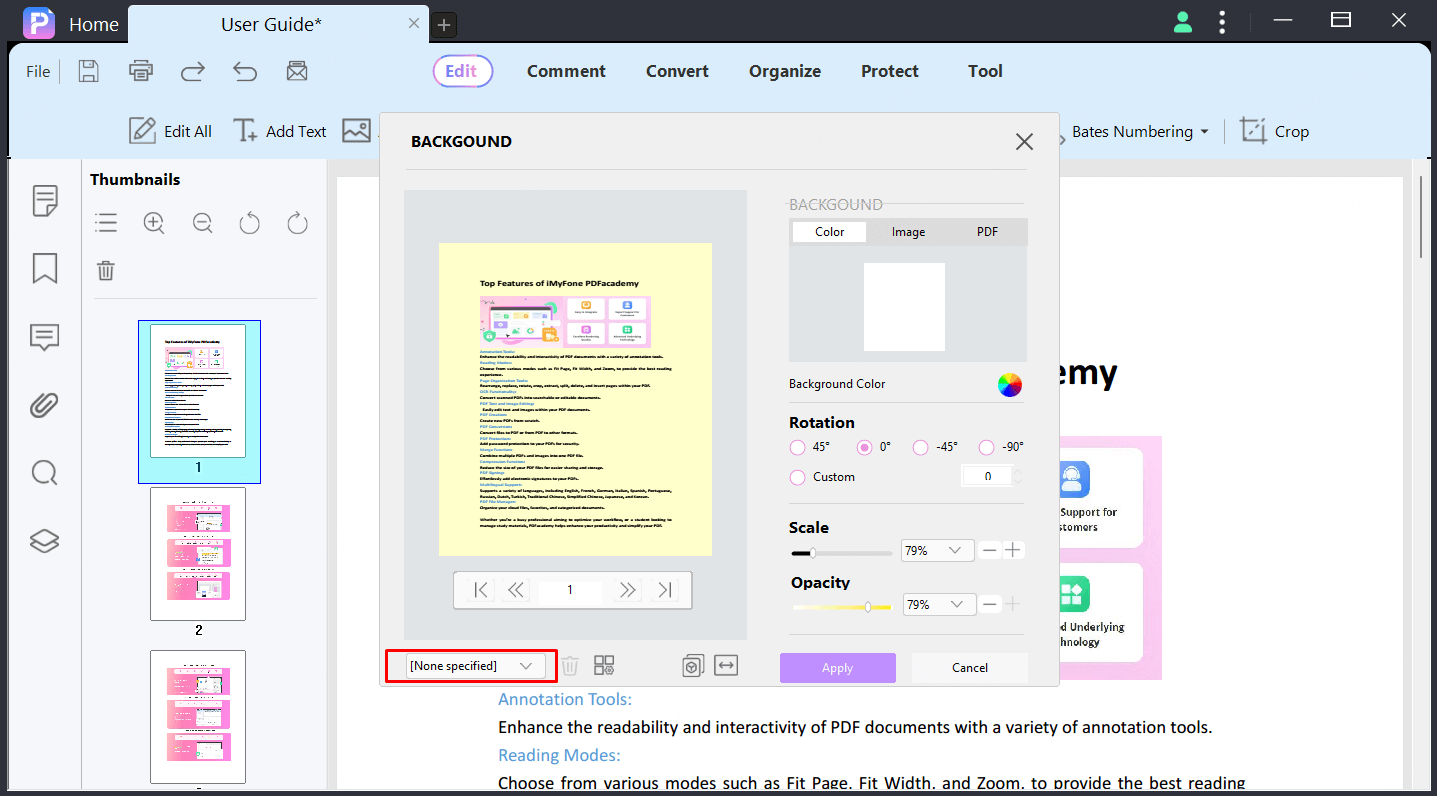
[Add Background]
Add a background for a single PDF. After opening your PDF file in the PDFacademy, please click the "Edit" > "Background" > "Add" button.
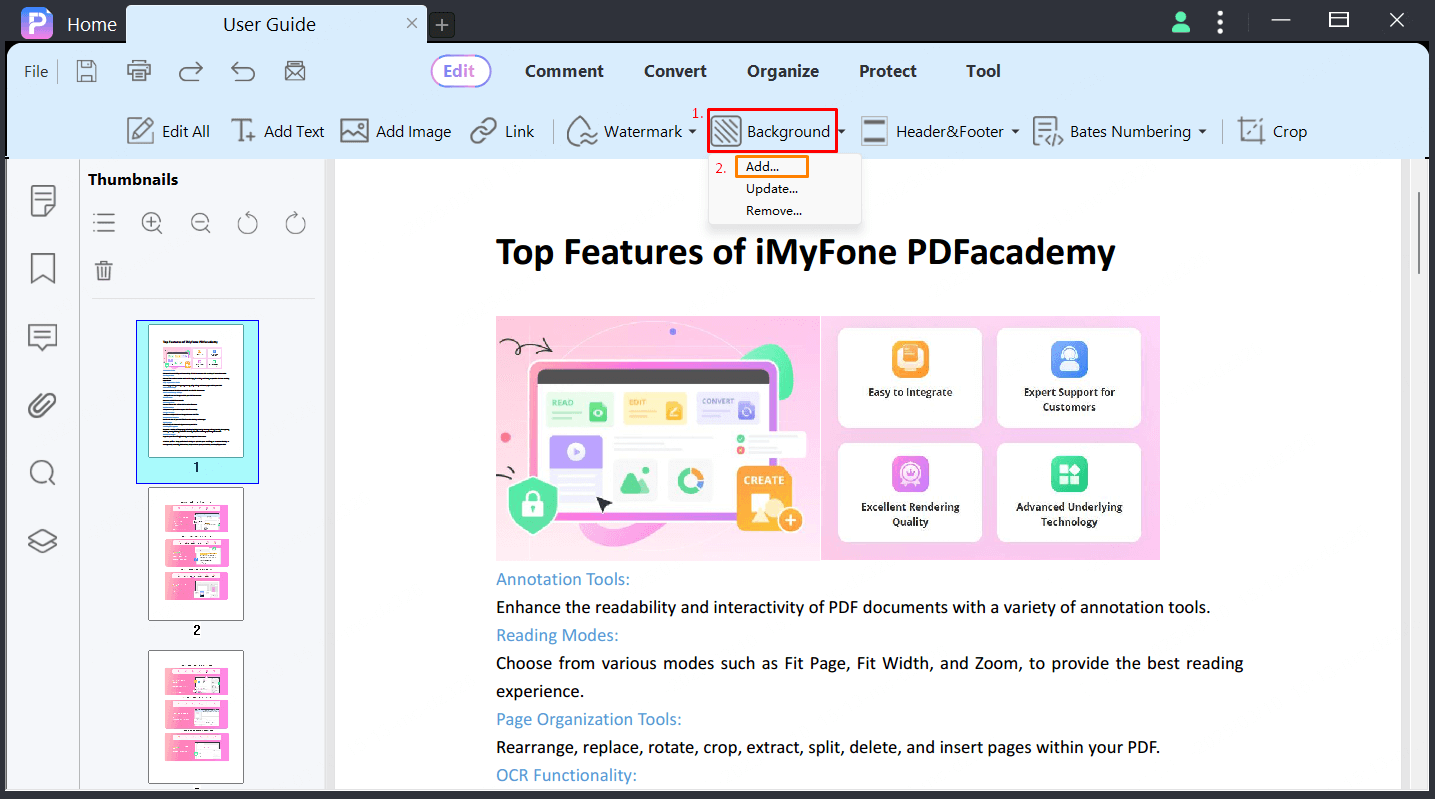
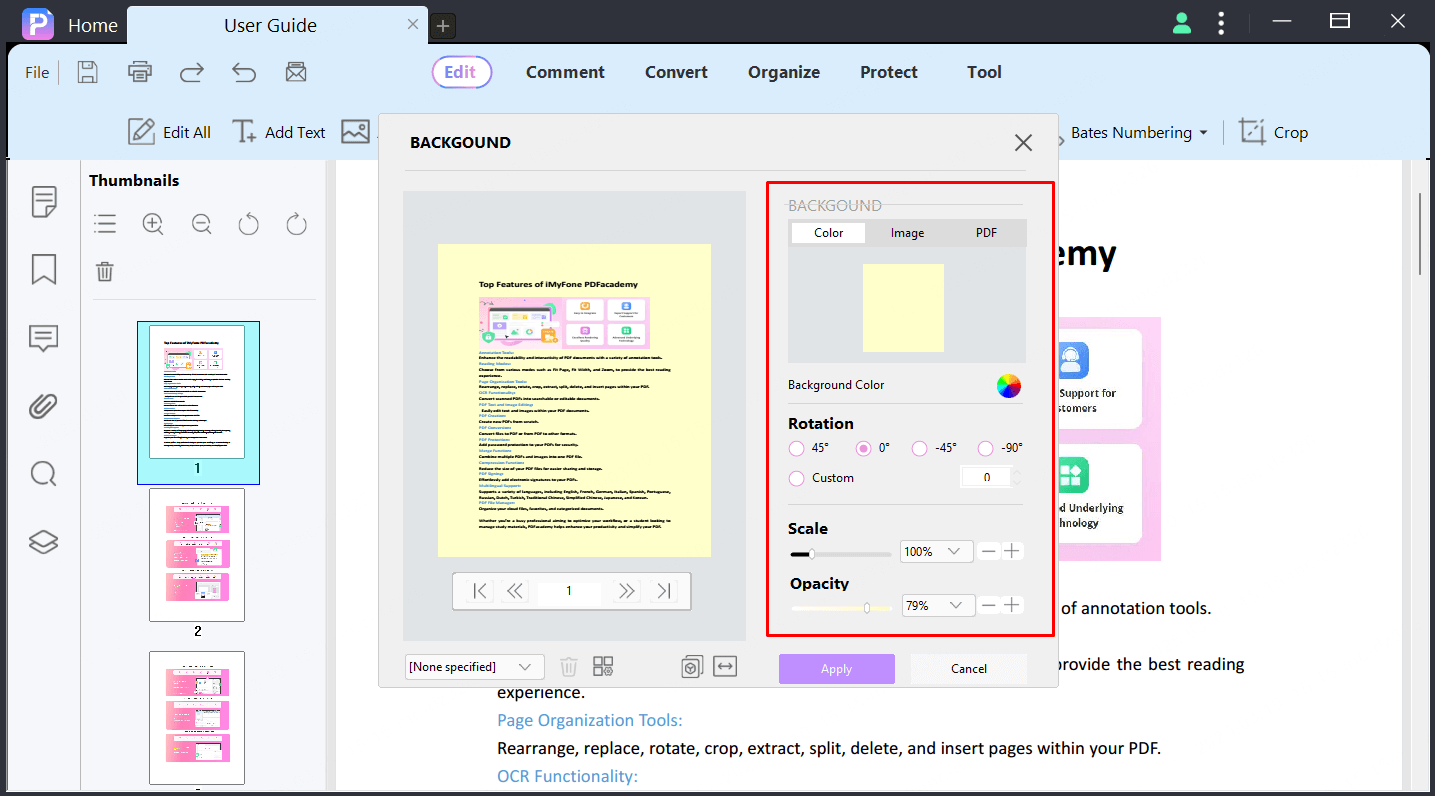
- Specify the source type of background you want to add. You can select "Color," "Image," and "PDF," depending on what kind of background will be added.
- Set the ratio, scale and opacity of the background with the help of sliders.
- Click on the "Double-Arrow" icon and select the page range of the PDF. You can set the page range manually or select the "Odd or Even Pages" option if required.
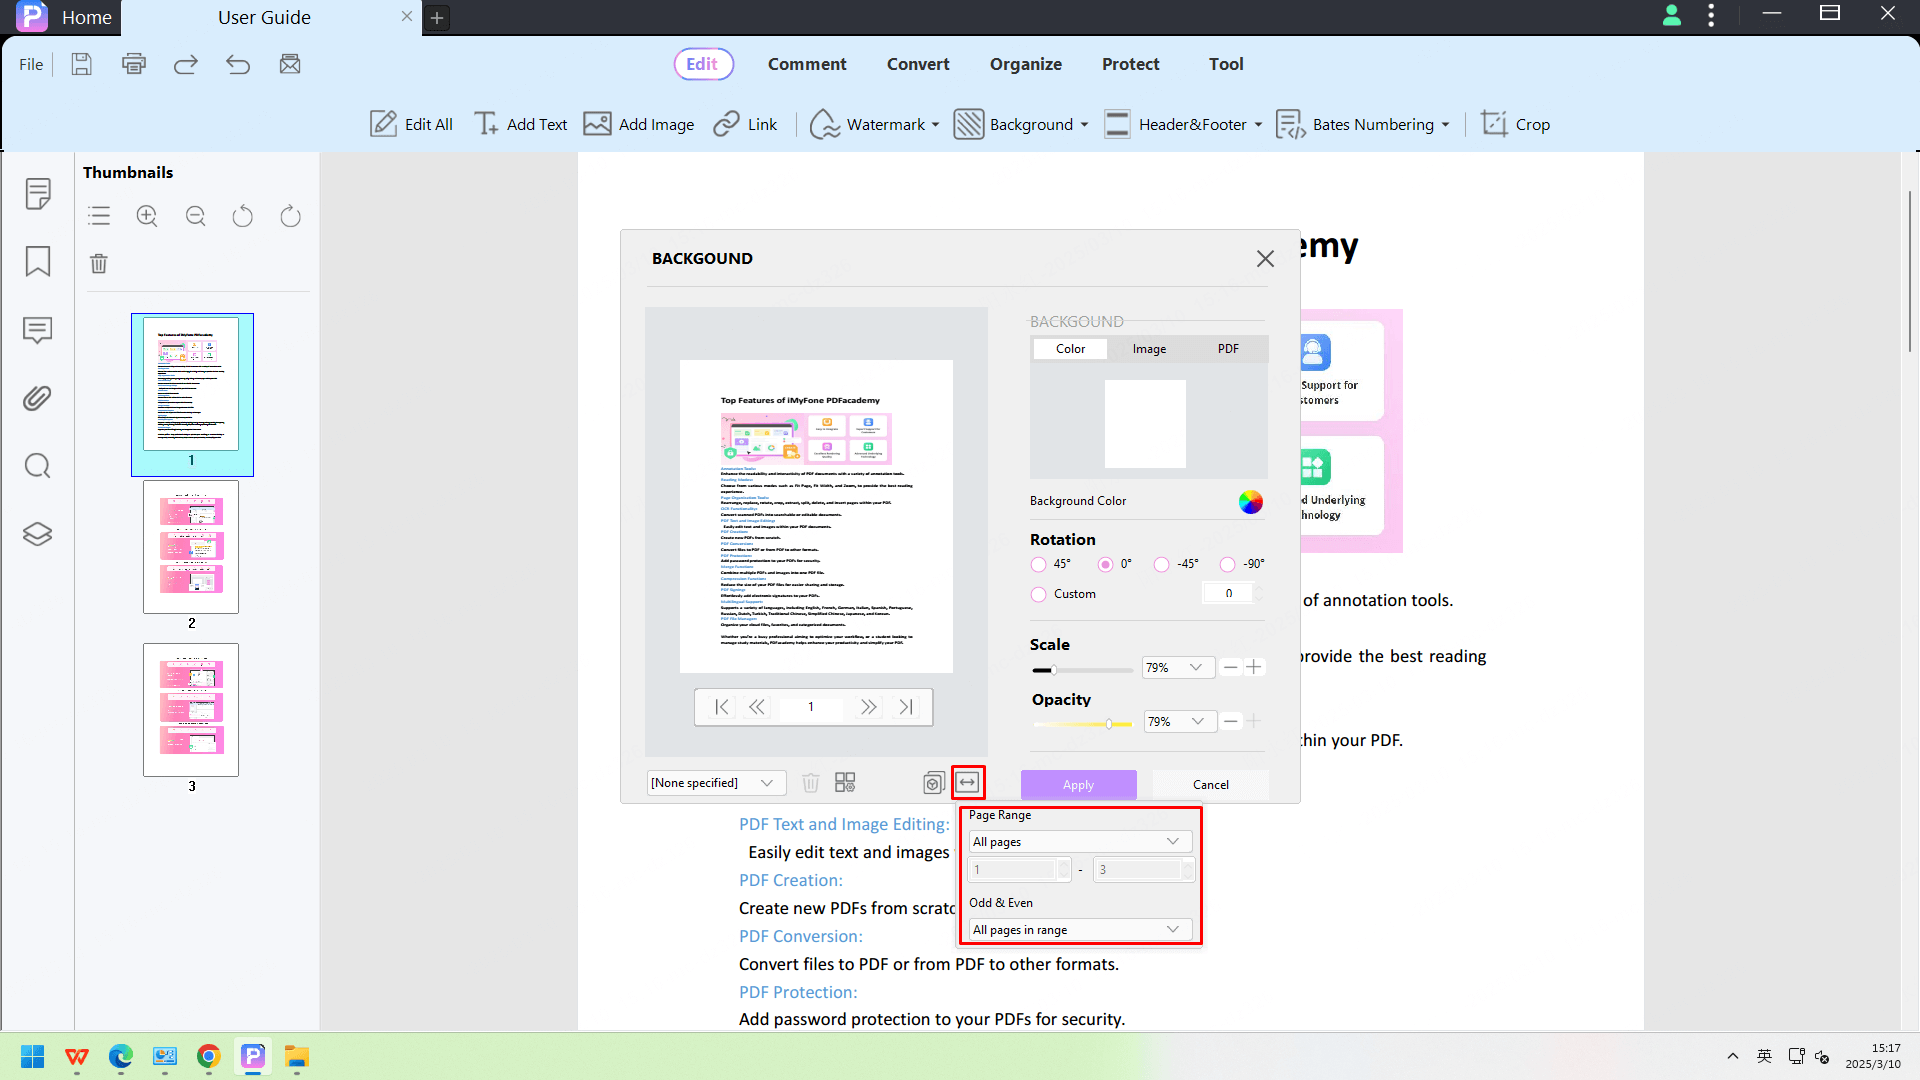
Once done, click "Apply" to create the background and apply it to the specific range selected.
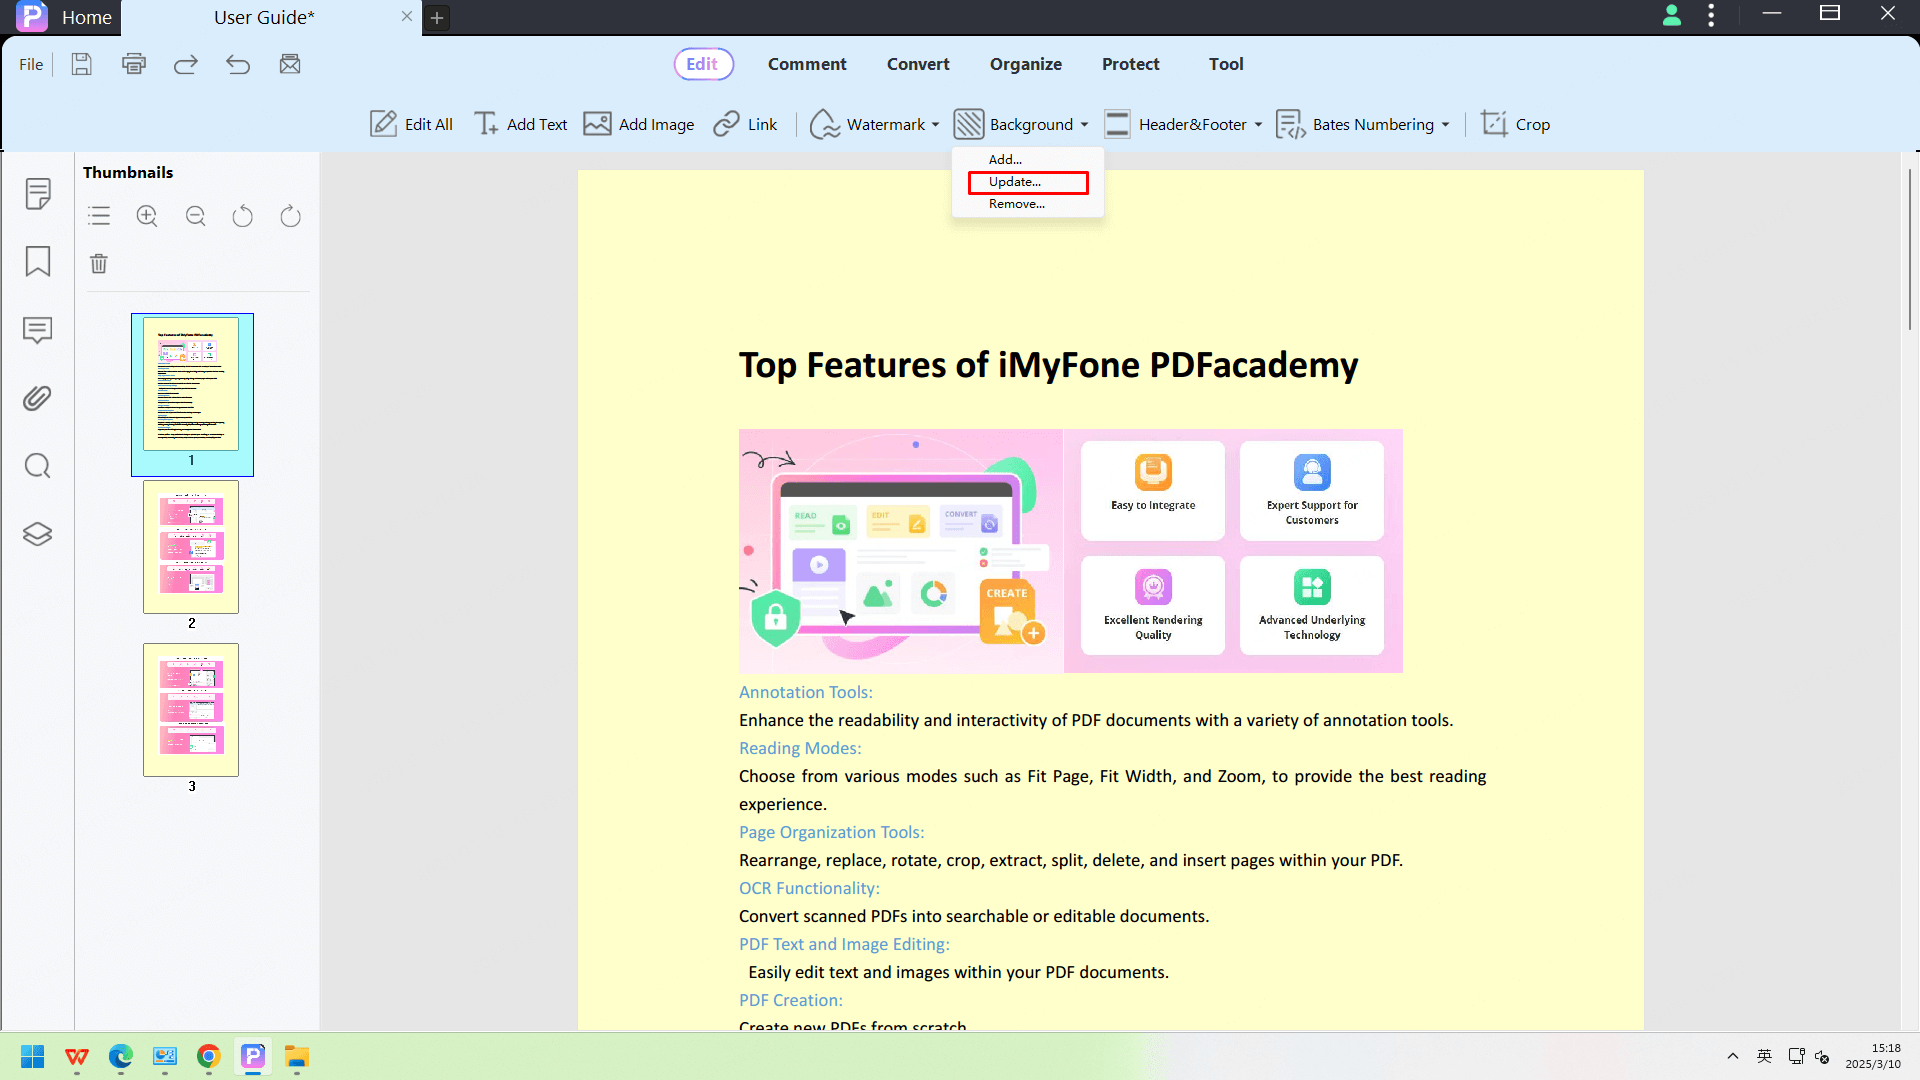
[Update Background]
You can choose the “Update” option to update your background.
In the update window, you can change all properties of the background same as adding background step. Once done, select "Apply" to apply changes to the background.
[Manage Background Template]
You can save current setting as a new template or select an exists template to create background or delete the selected template.
Click the icon to pop up the Multiple Files widow.
Then click “Add Files” button on Multiple Files window to add PDF files, and select the “Add watermark” mode.
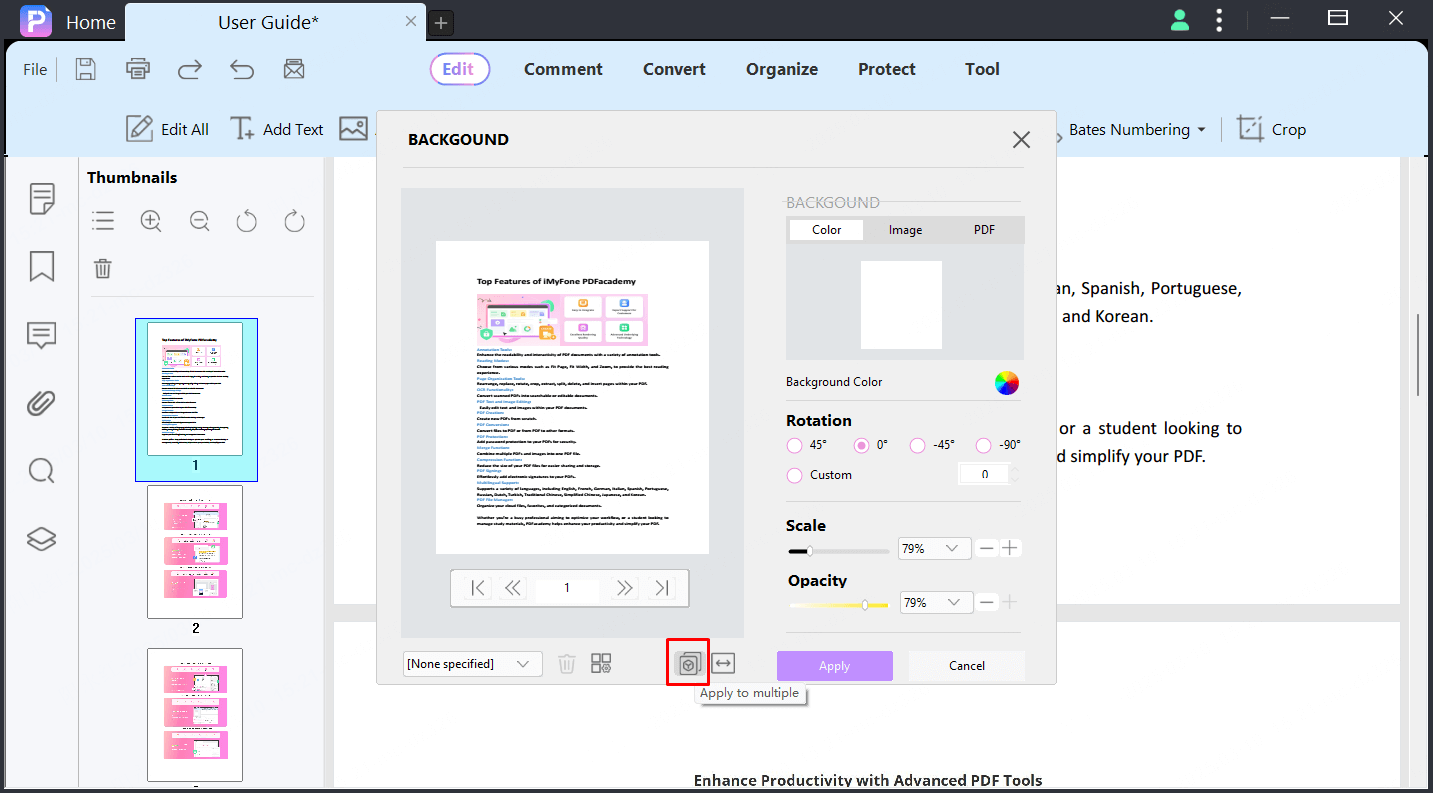
Click “Start” button to add watermark to PDFs.
Add,Update and Remove Header and Footer in PDF
Add Header & Footer in PDF
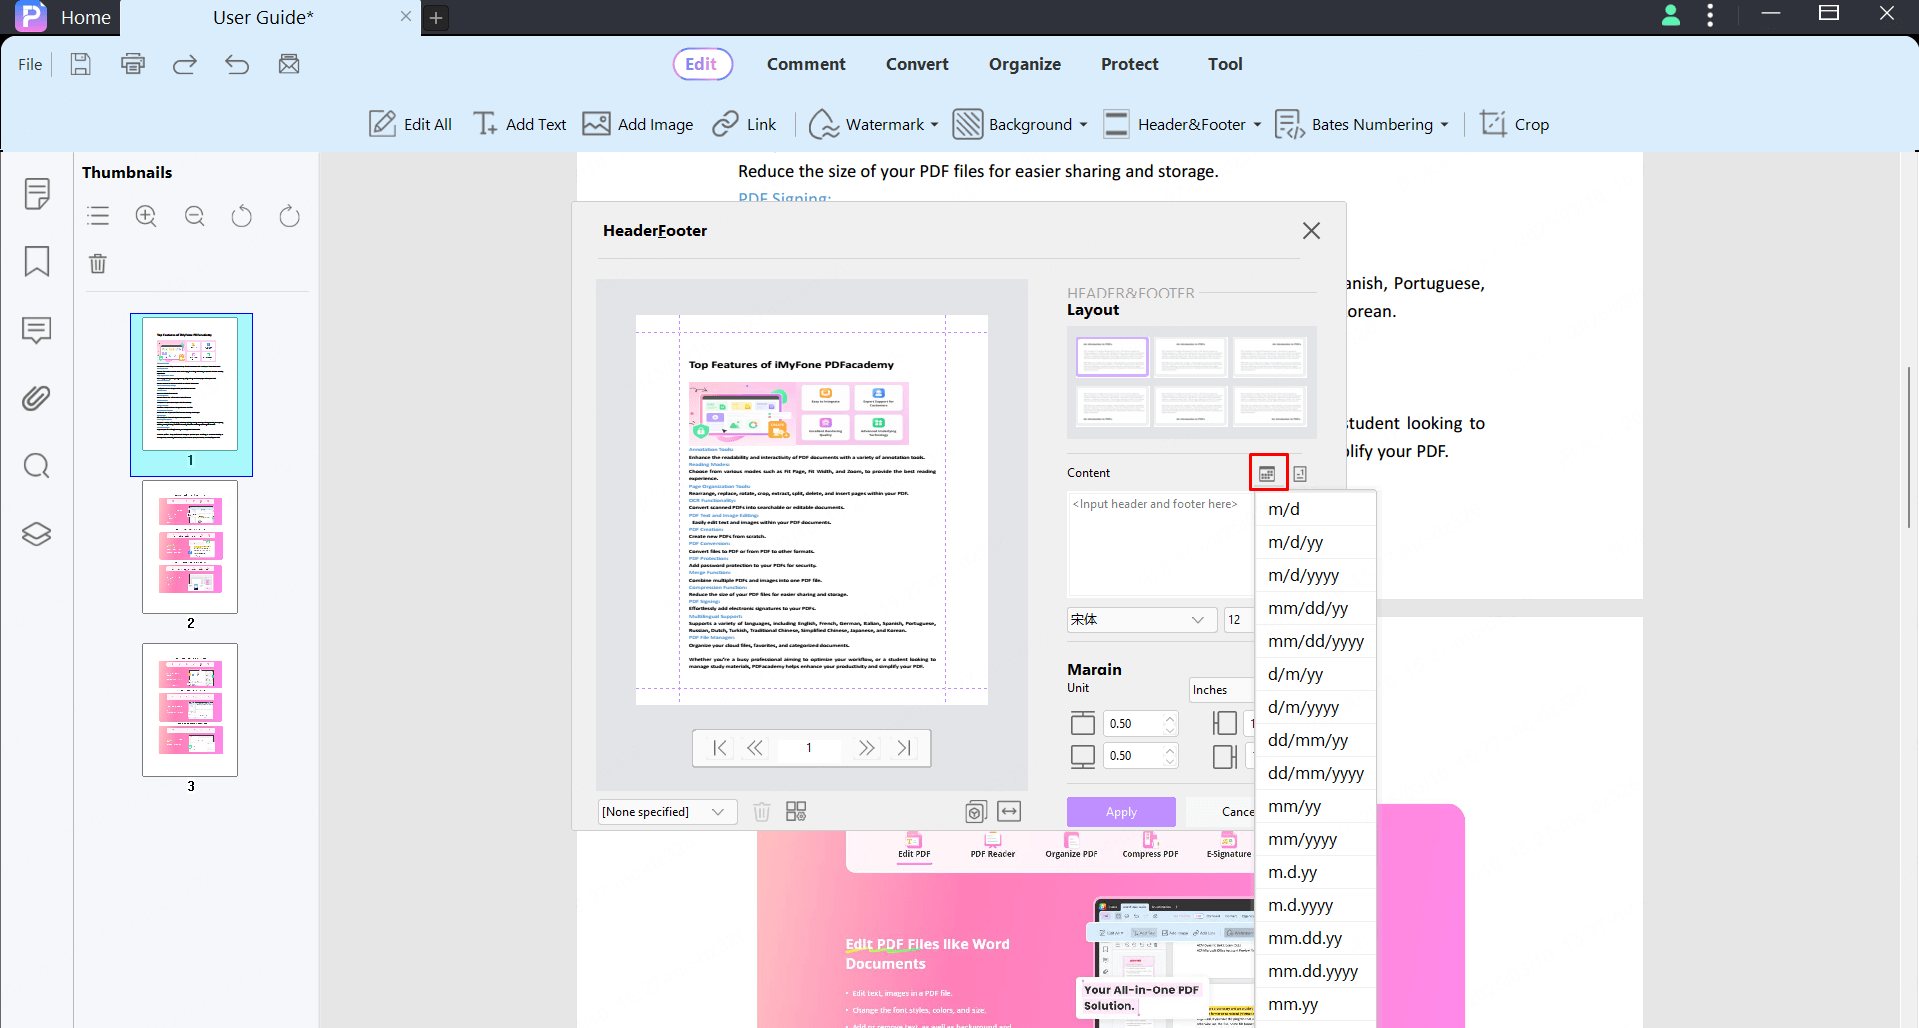
You can add Header and Footer to PDF by clicking the "Edit" > "Header & Footer" button. Then choose the “Layout” area where to put header and footer, design the Header and Footer contents in “Contents” area.
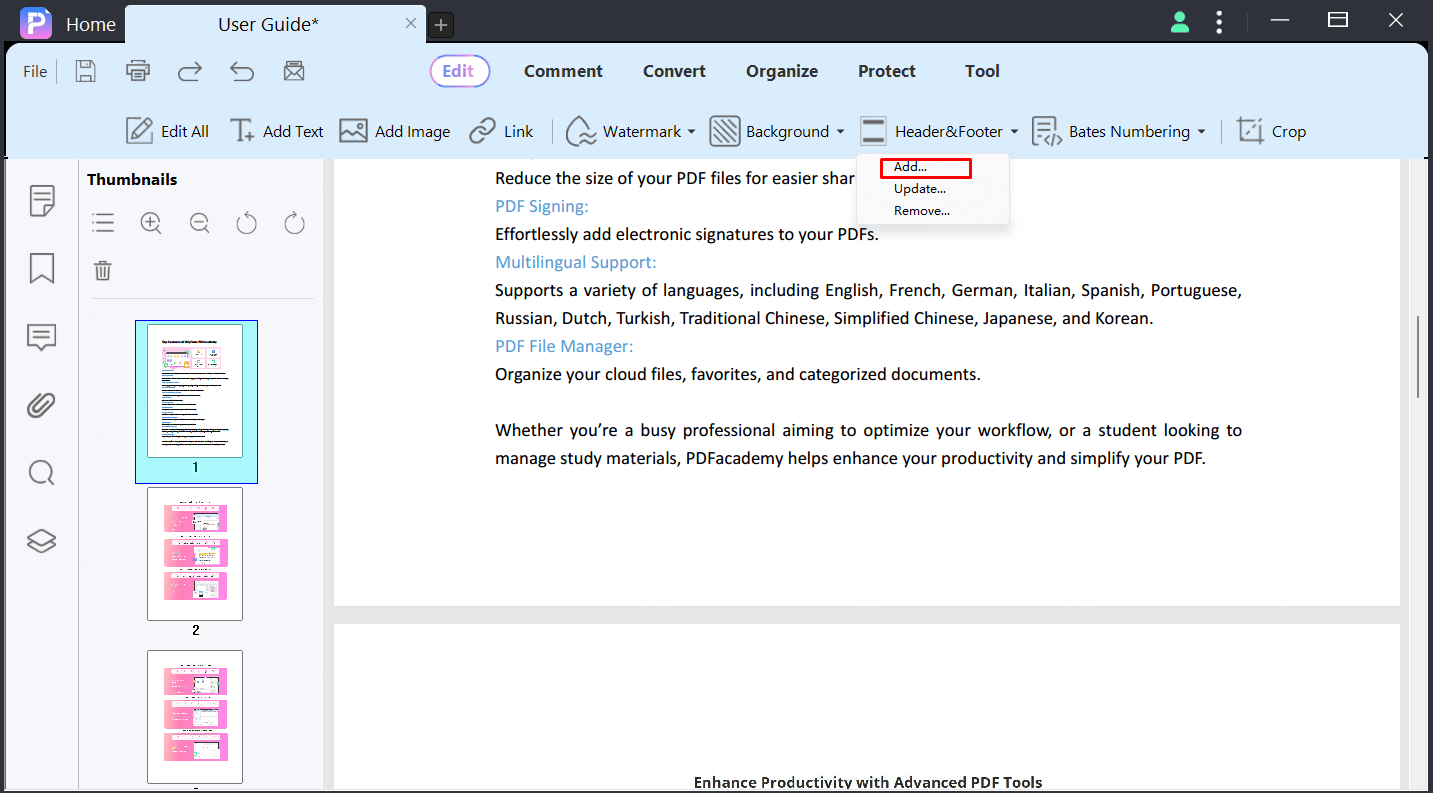
Besides, you can also select the date style, page number style in “Contents” area.
[Insert Date to PDF]
Click on the "Insert Date" button and select an appropriate format for the dates.
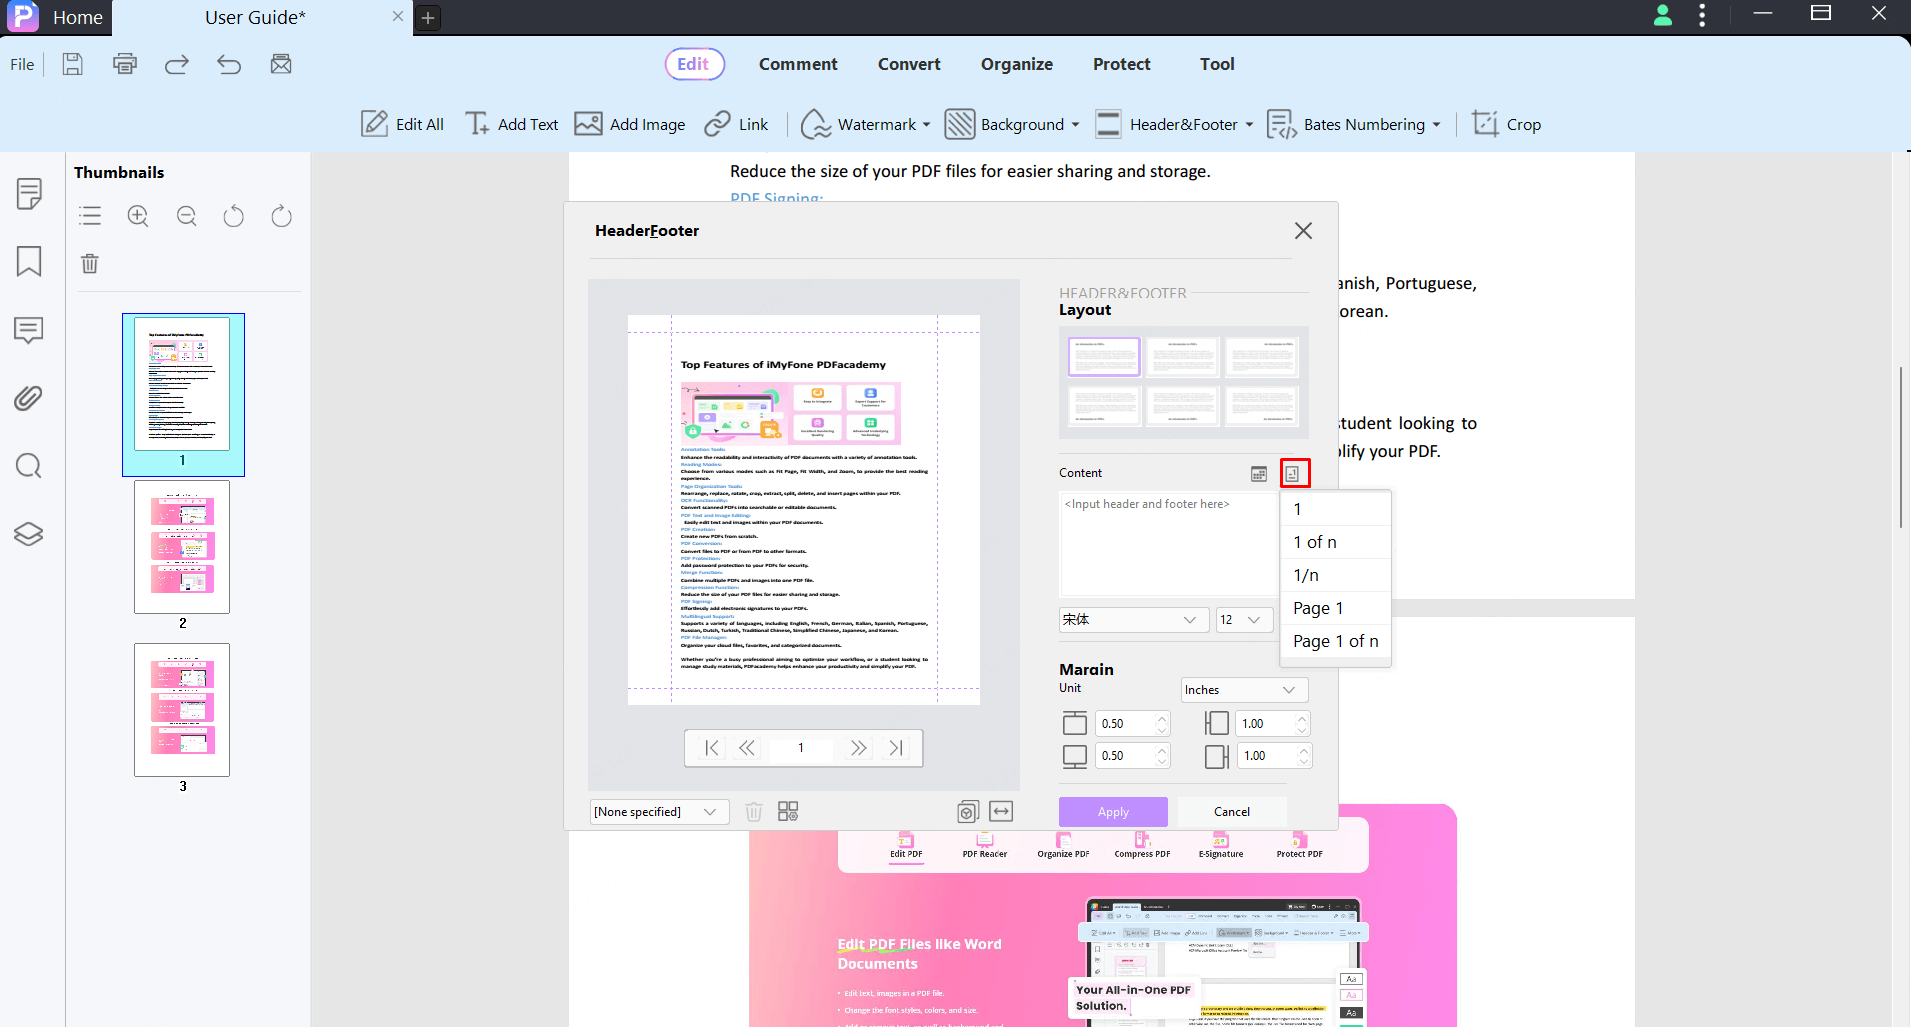
[Insert Page Number to PDF]
Click on the "Insert Date" button and select an appropriate format for the dates.
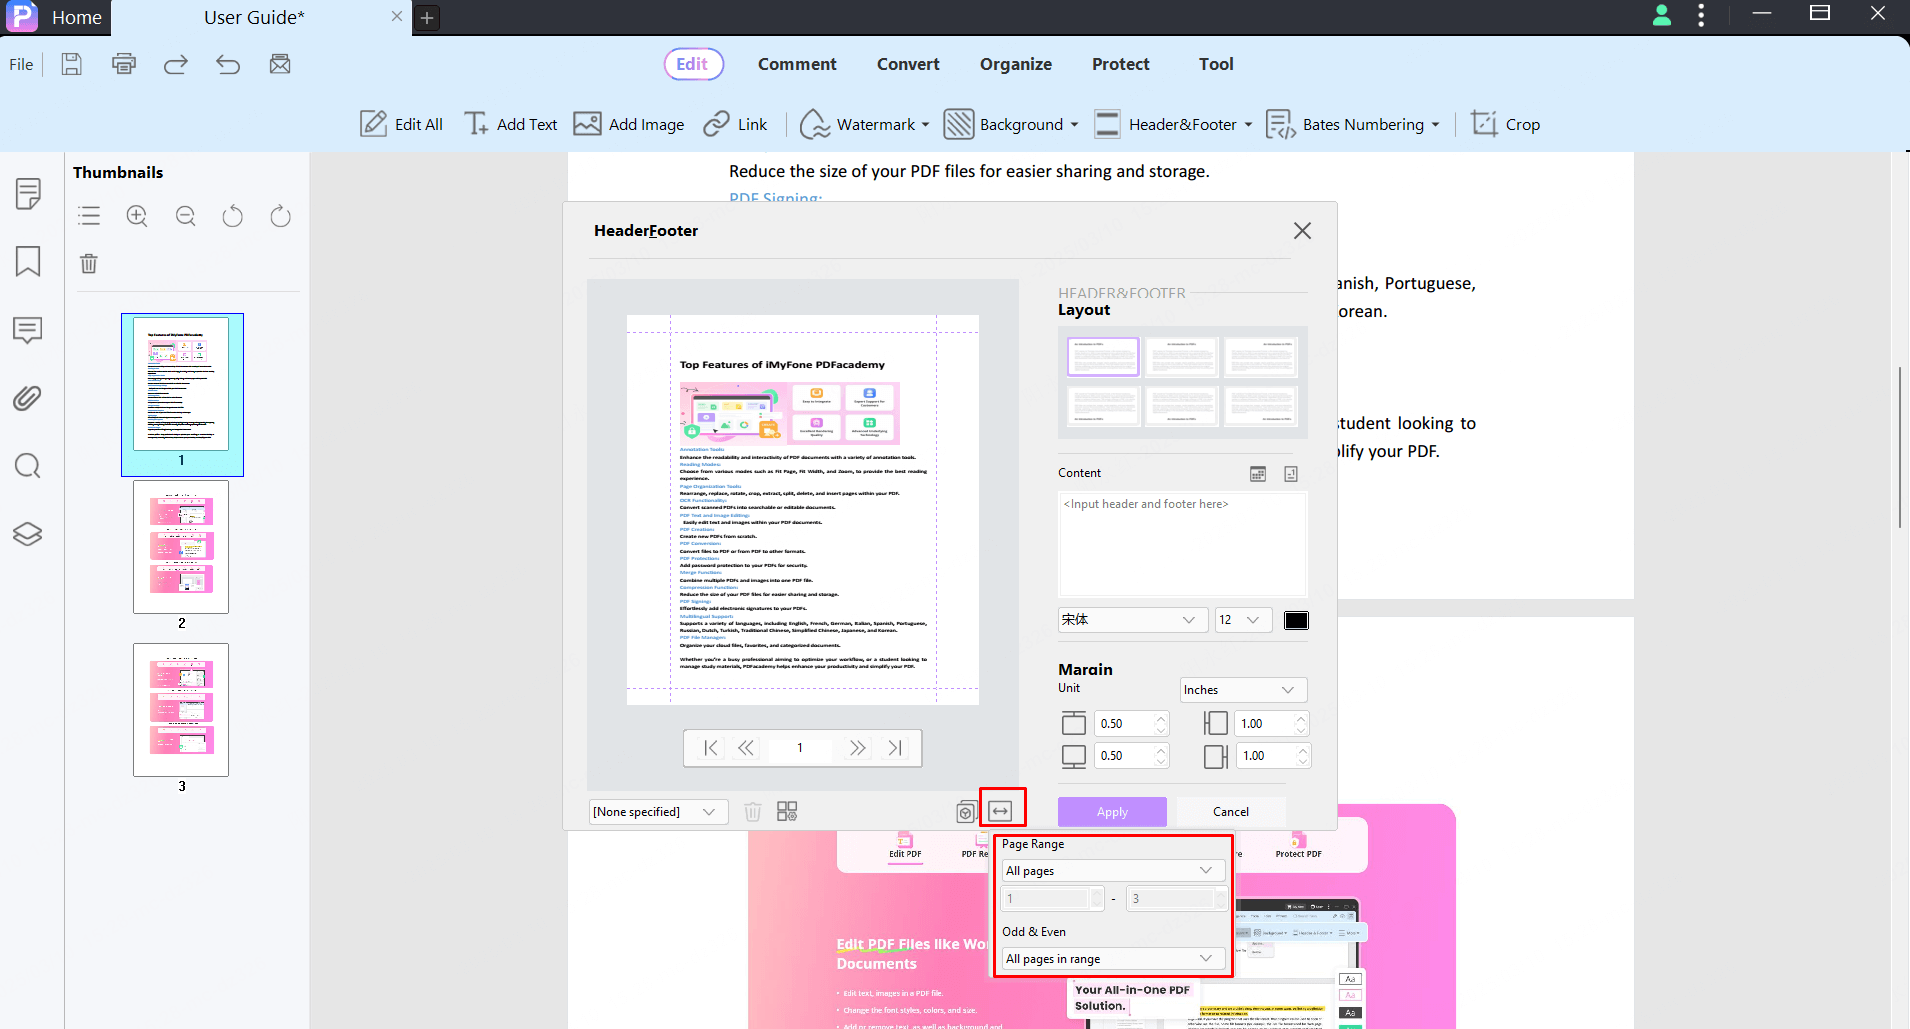
[Set Page Range]
Click on the "Double-Arrow" icon set the page range. Define the page range or set the odd and even pages. Set the margins for the header & footer at “Margin” area.
Update Header & Footer in PDF
You can update Header and Footer in PDF by clicking the "Edit" > "Header & Footer" > “Update” button.
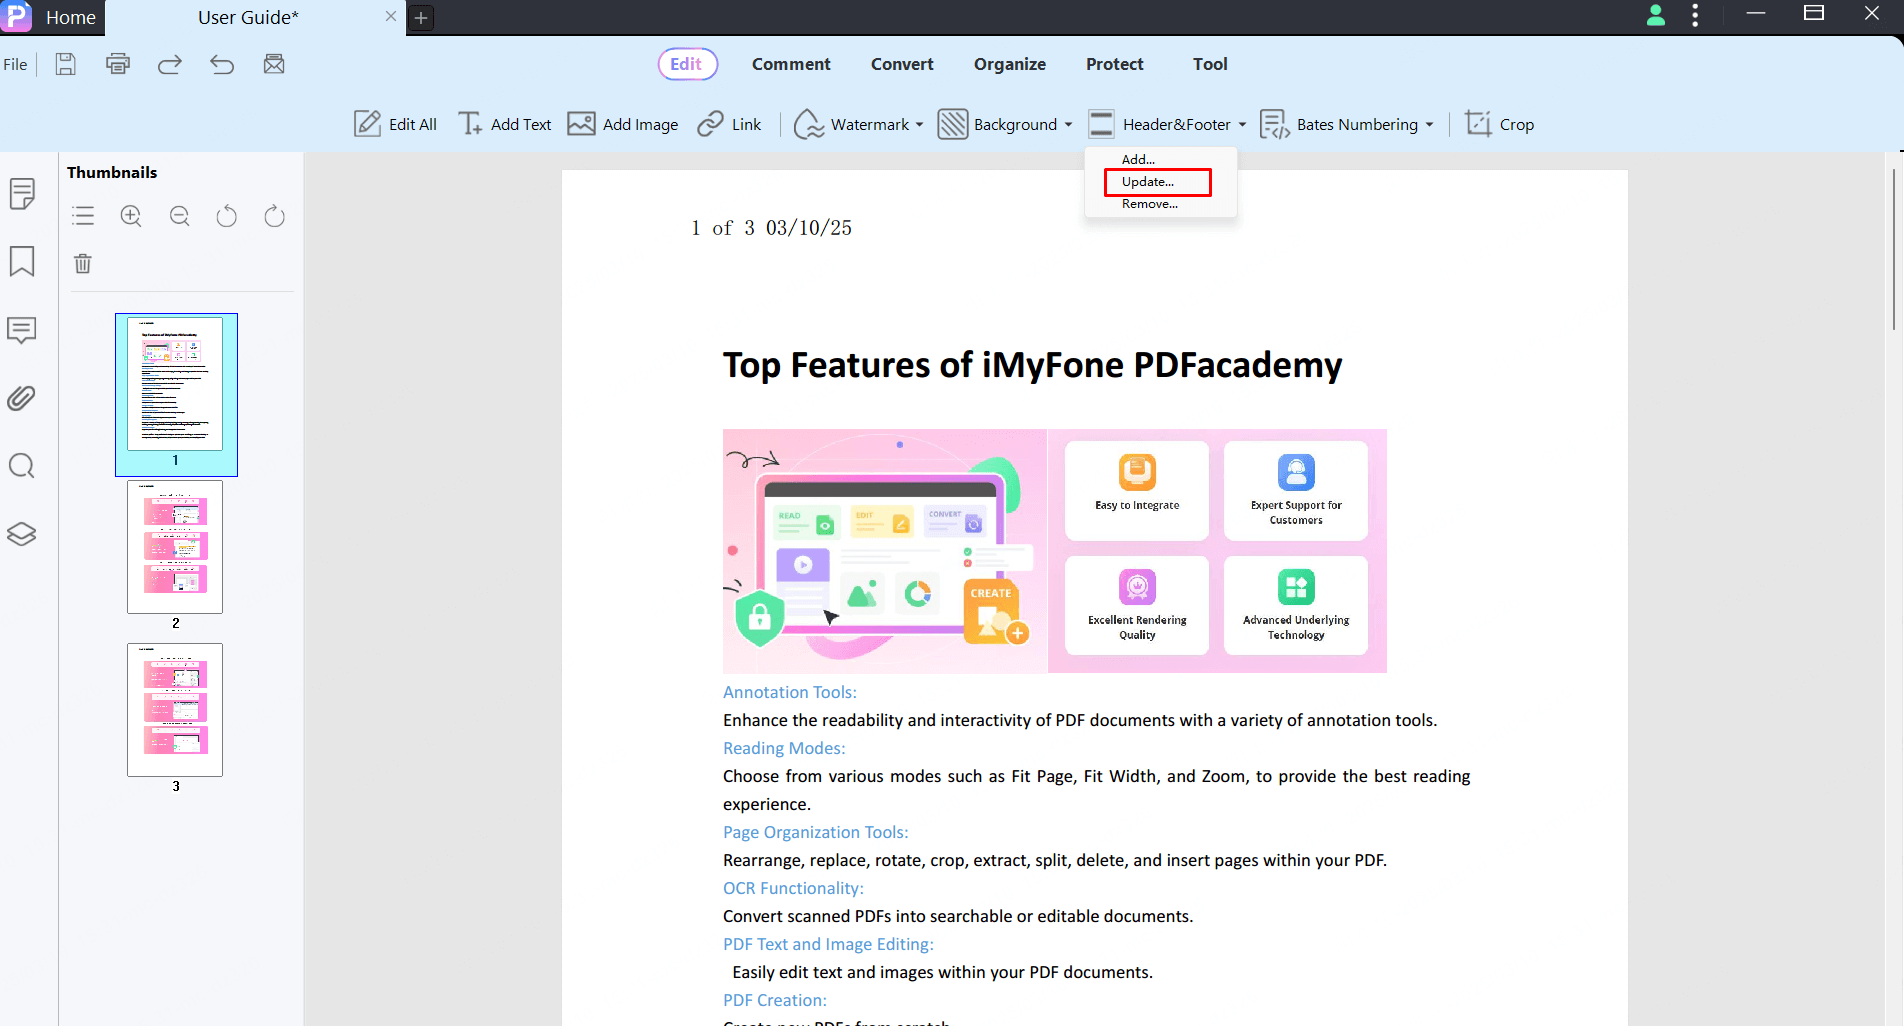
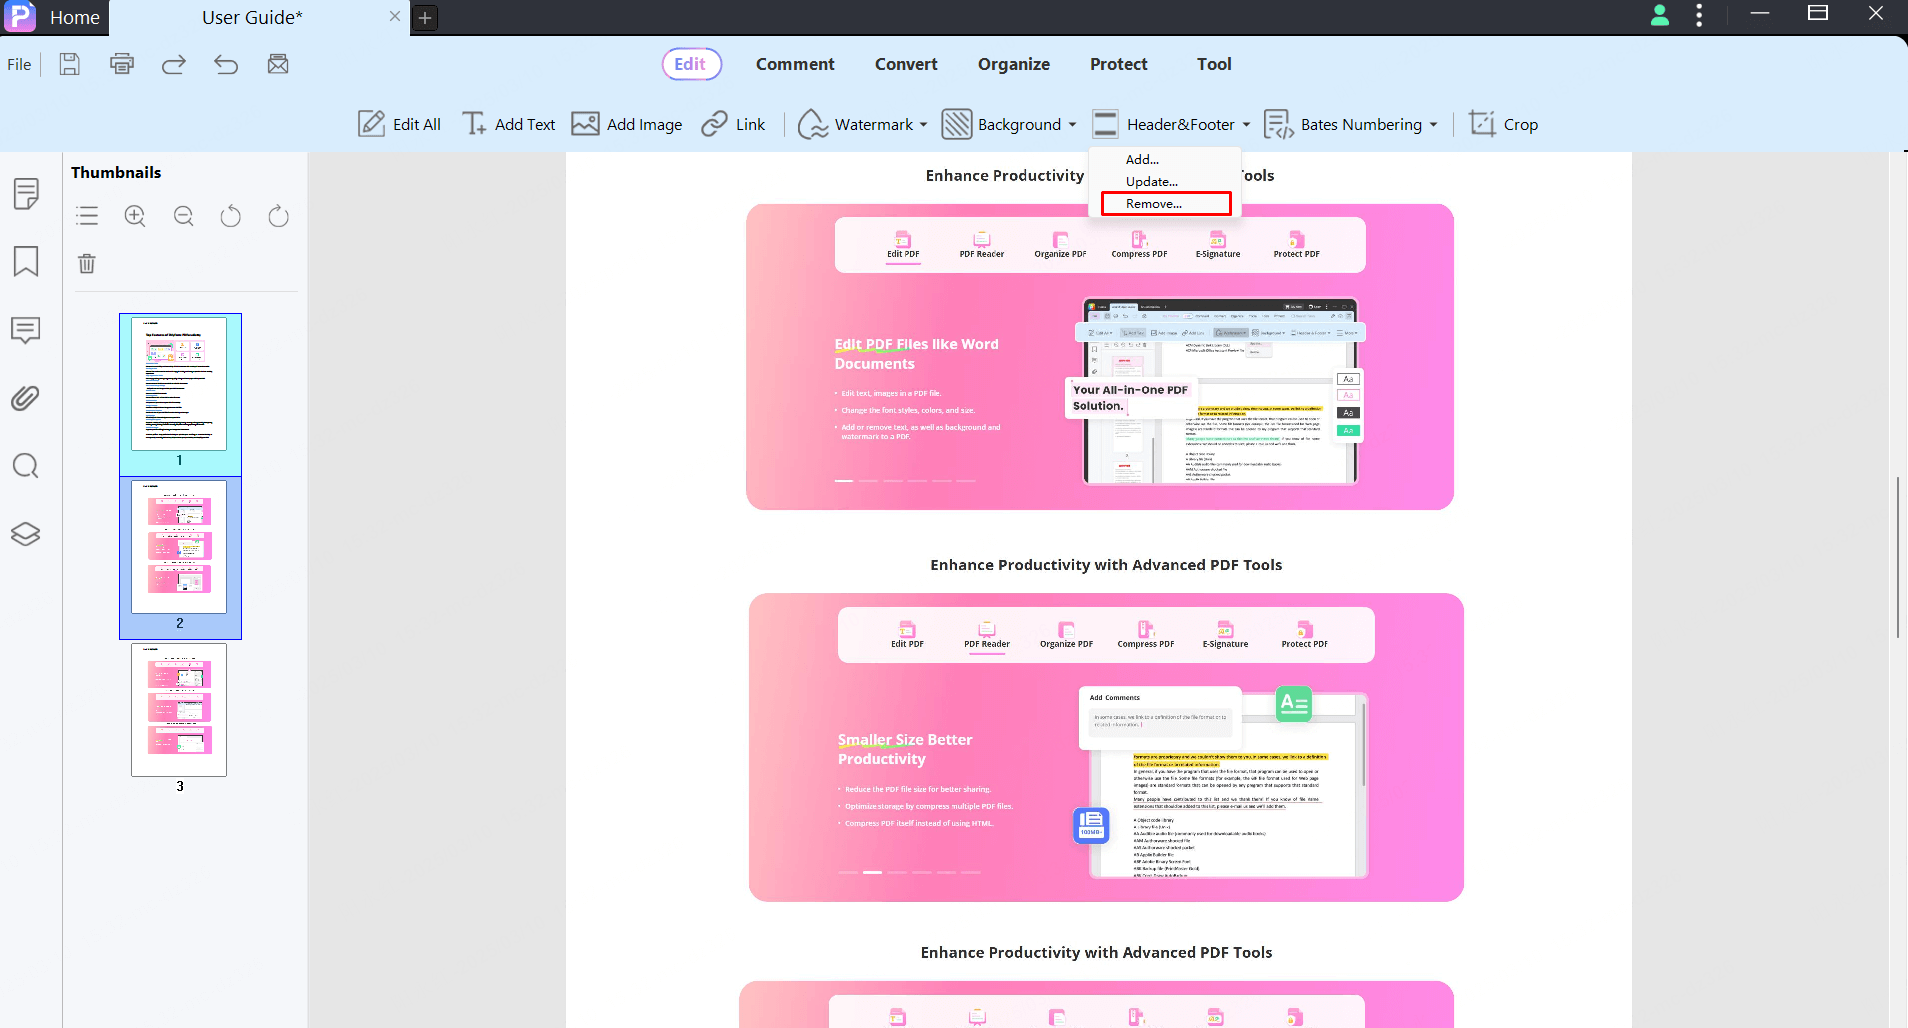
Remove Header & Footer in PDF
You can remove Header and Footer in PDF by clicking the "Edit" > "Header & Footer" > “Remove” button.
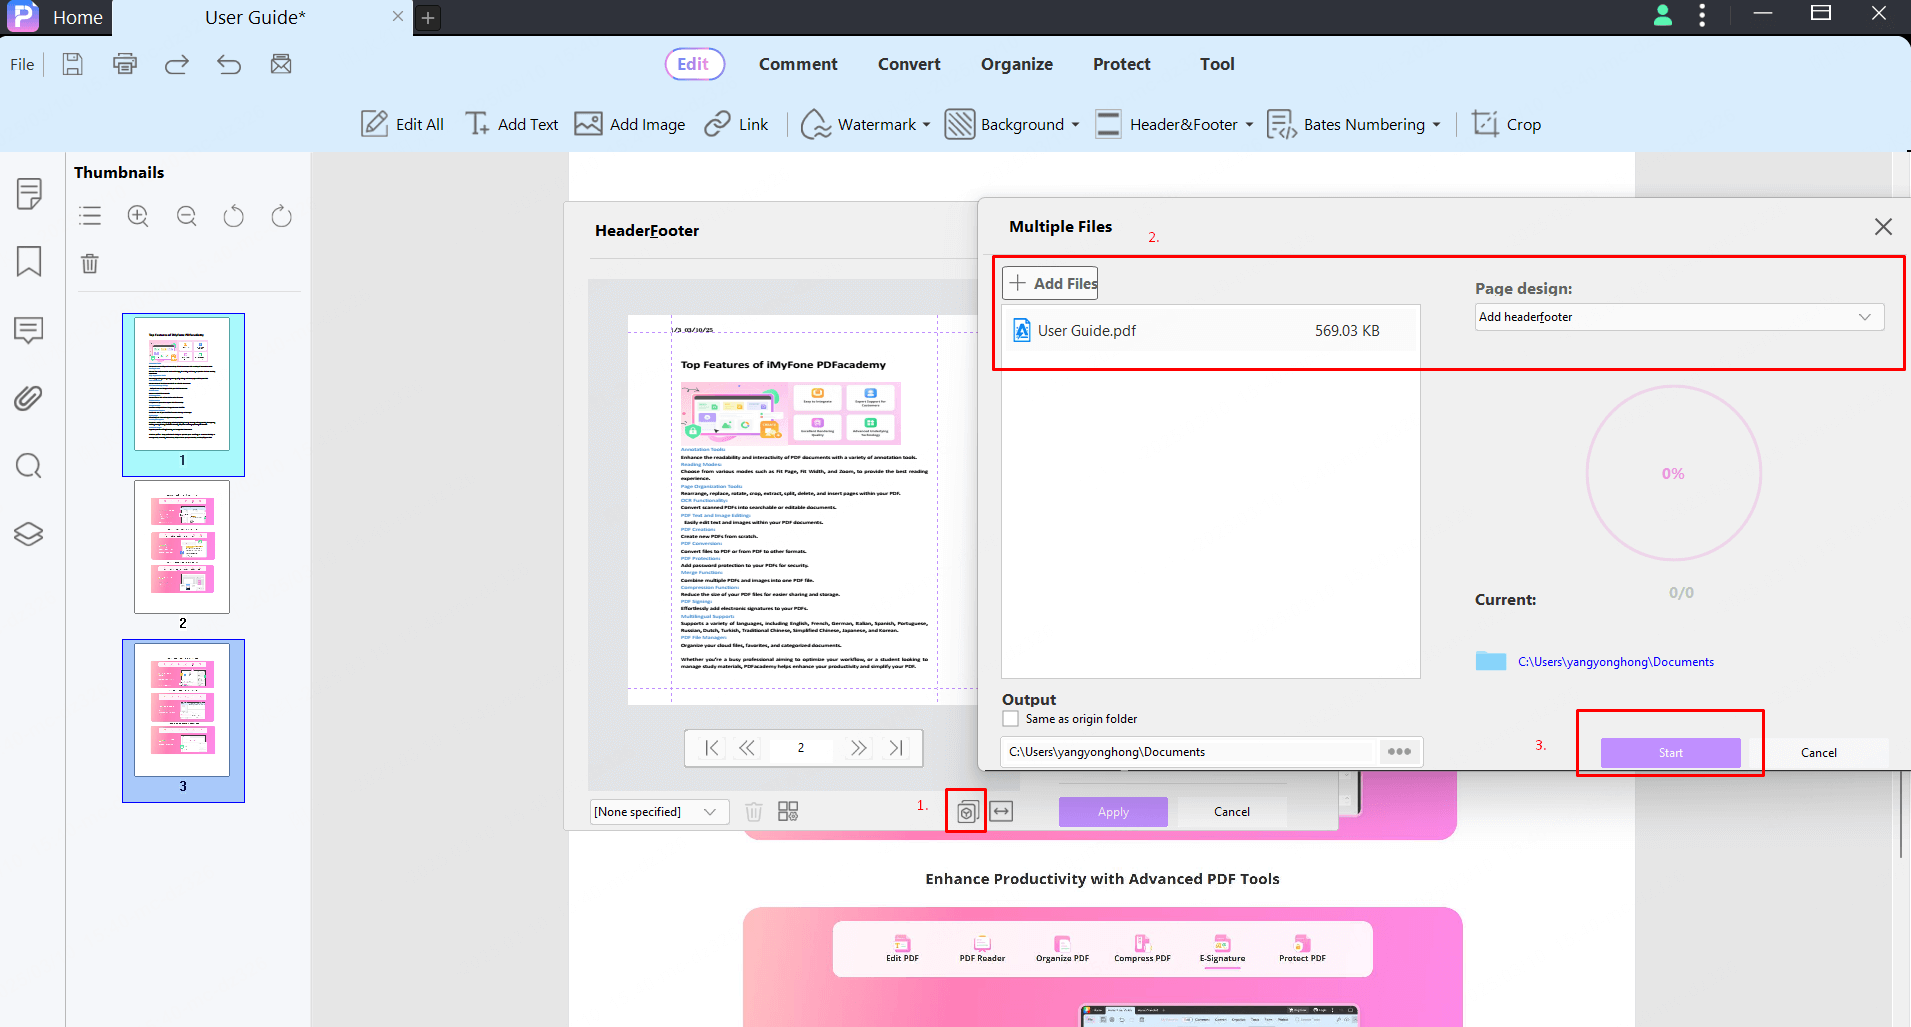
[Add Header & Footer in Batch]
To add header and footer in batch, click on “Apply to multiple” button at bottom of Header and Footer window.
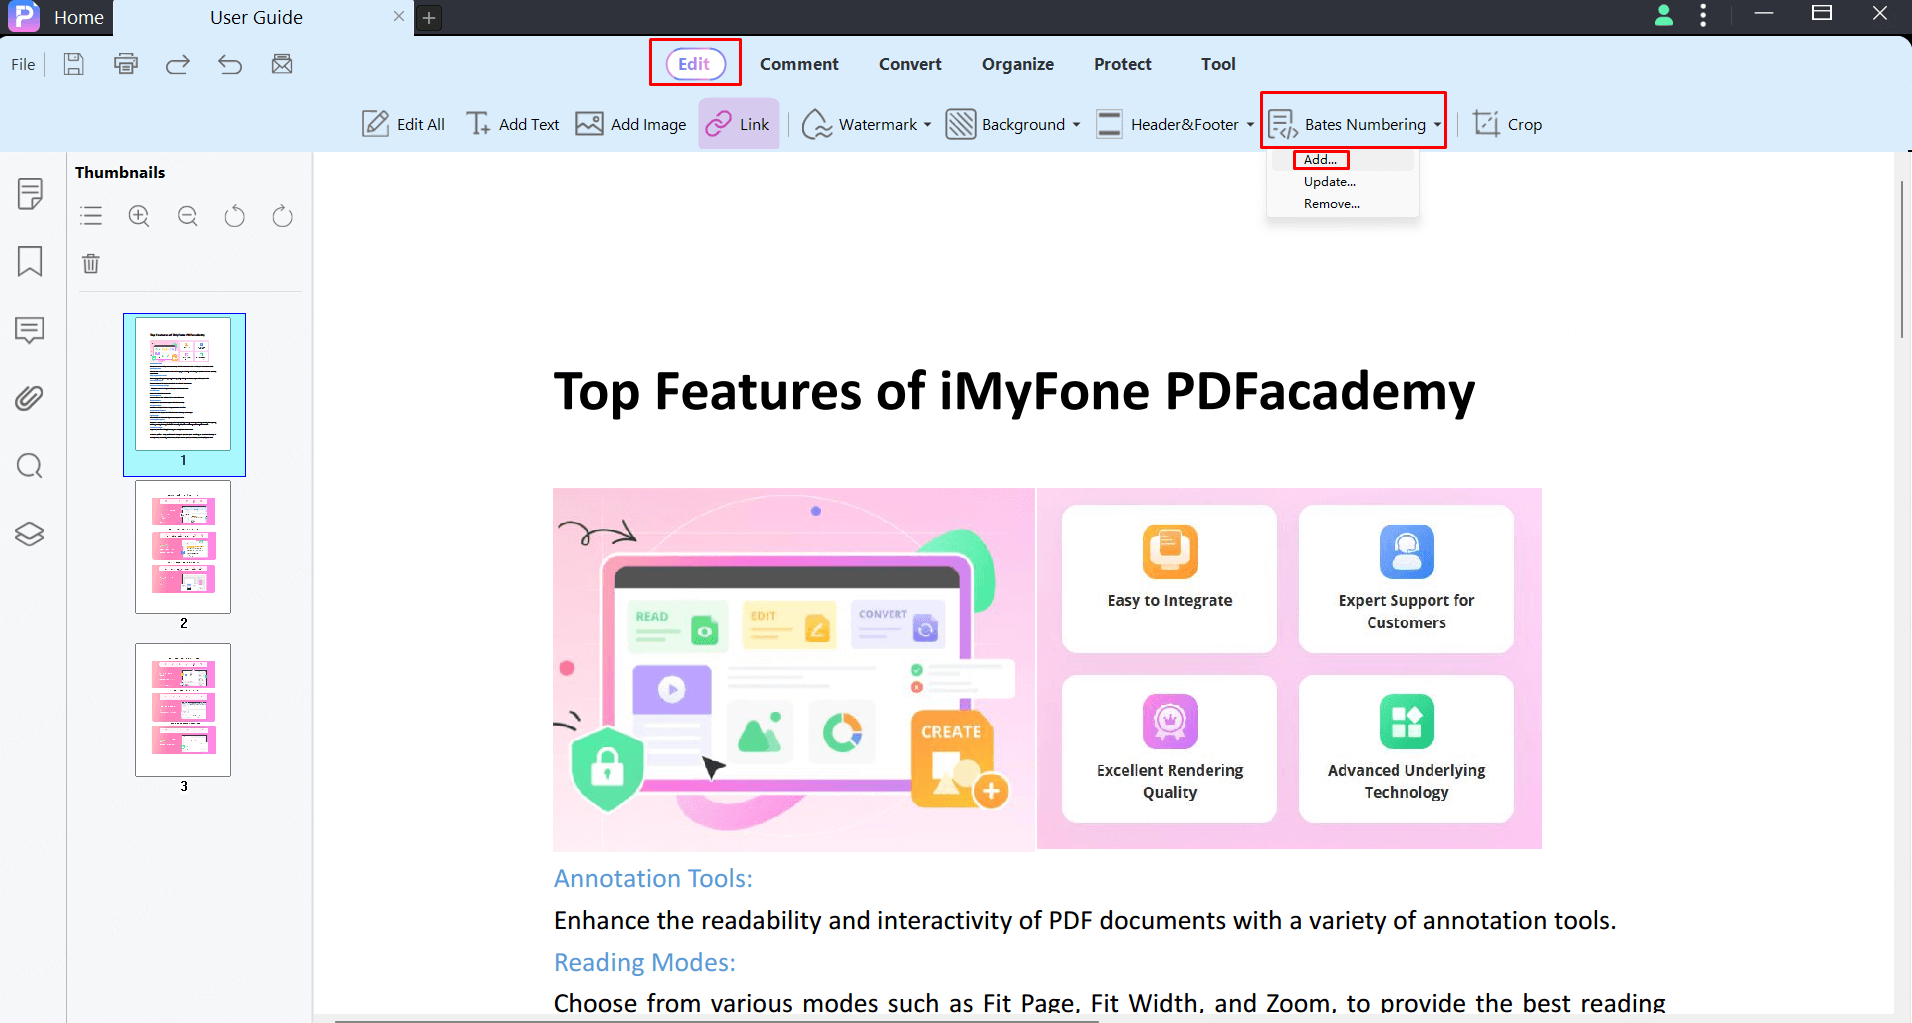
Bates Numbering in PDF
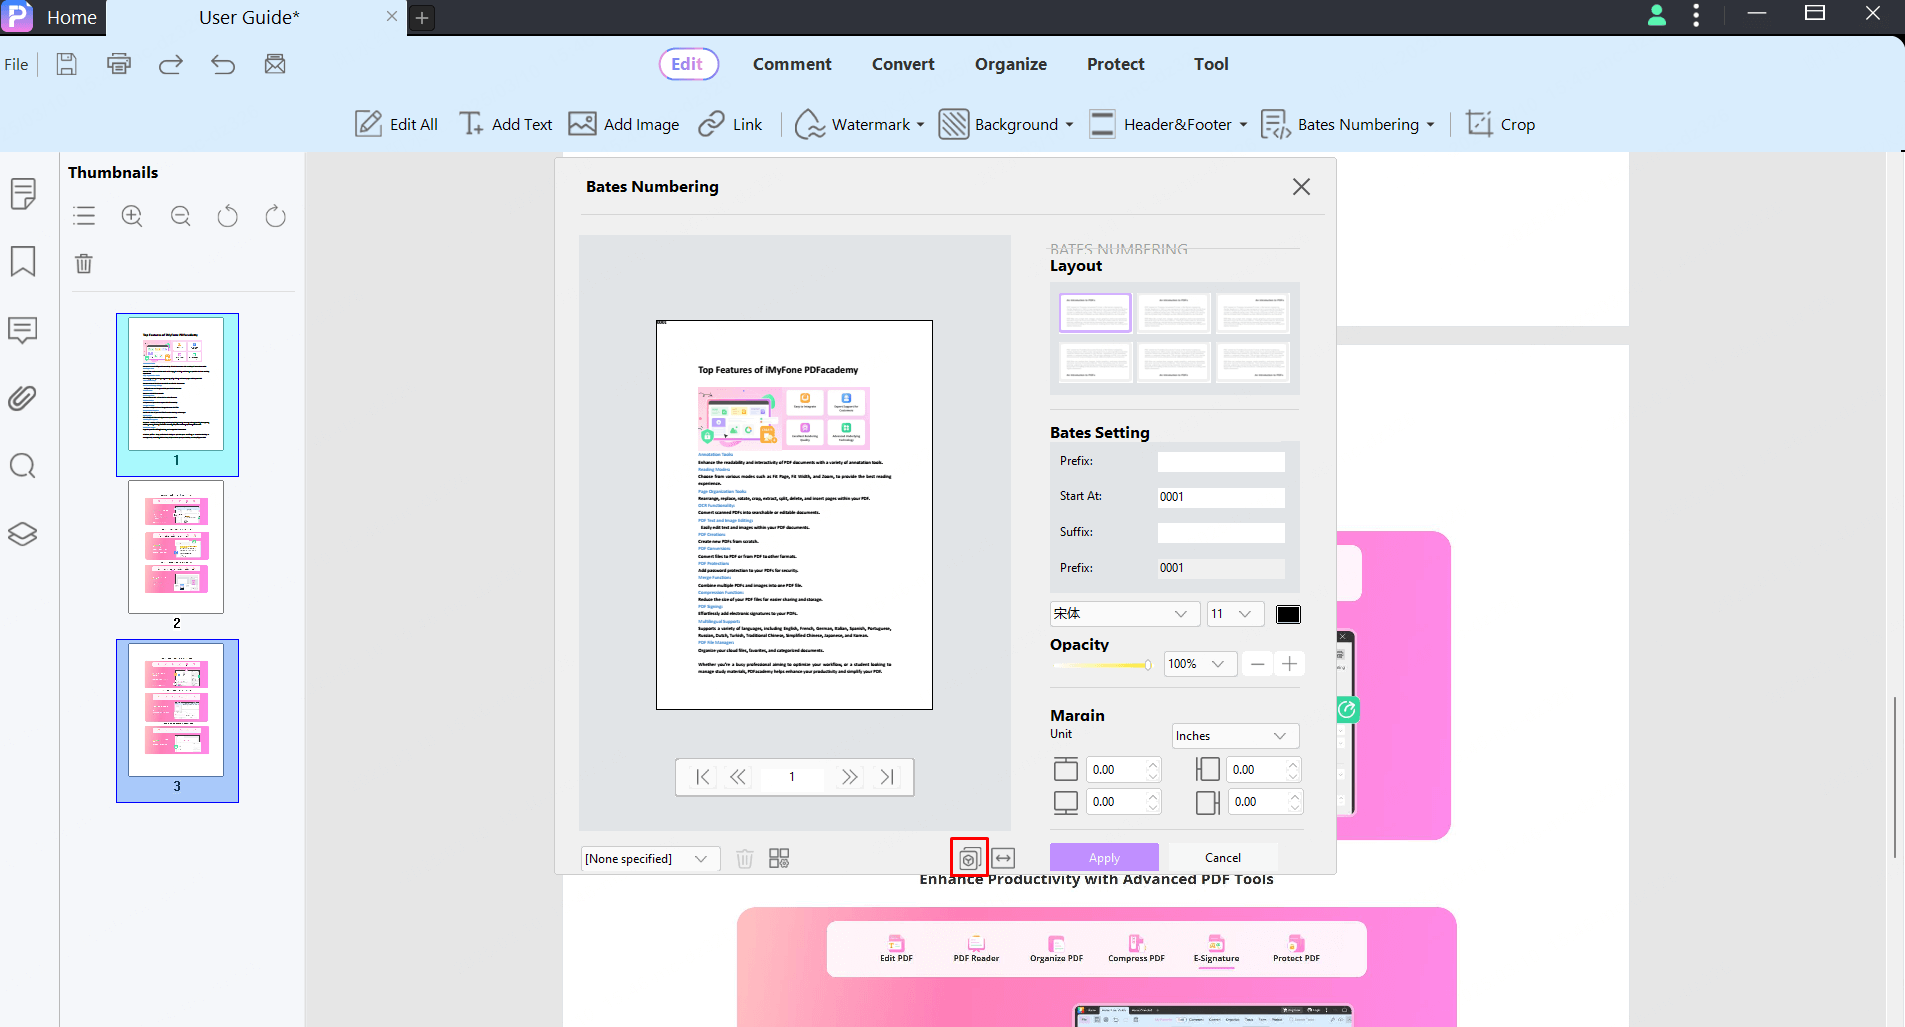
Click on the "Edit" > "Bates Numbering" button.
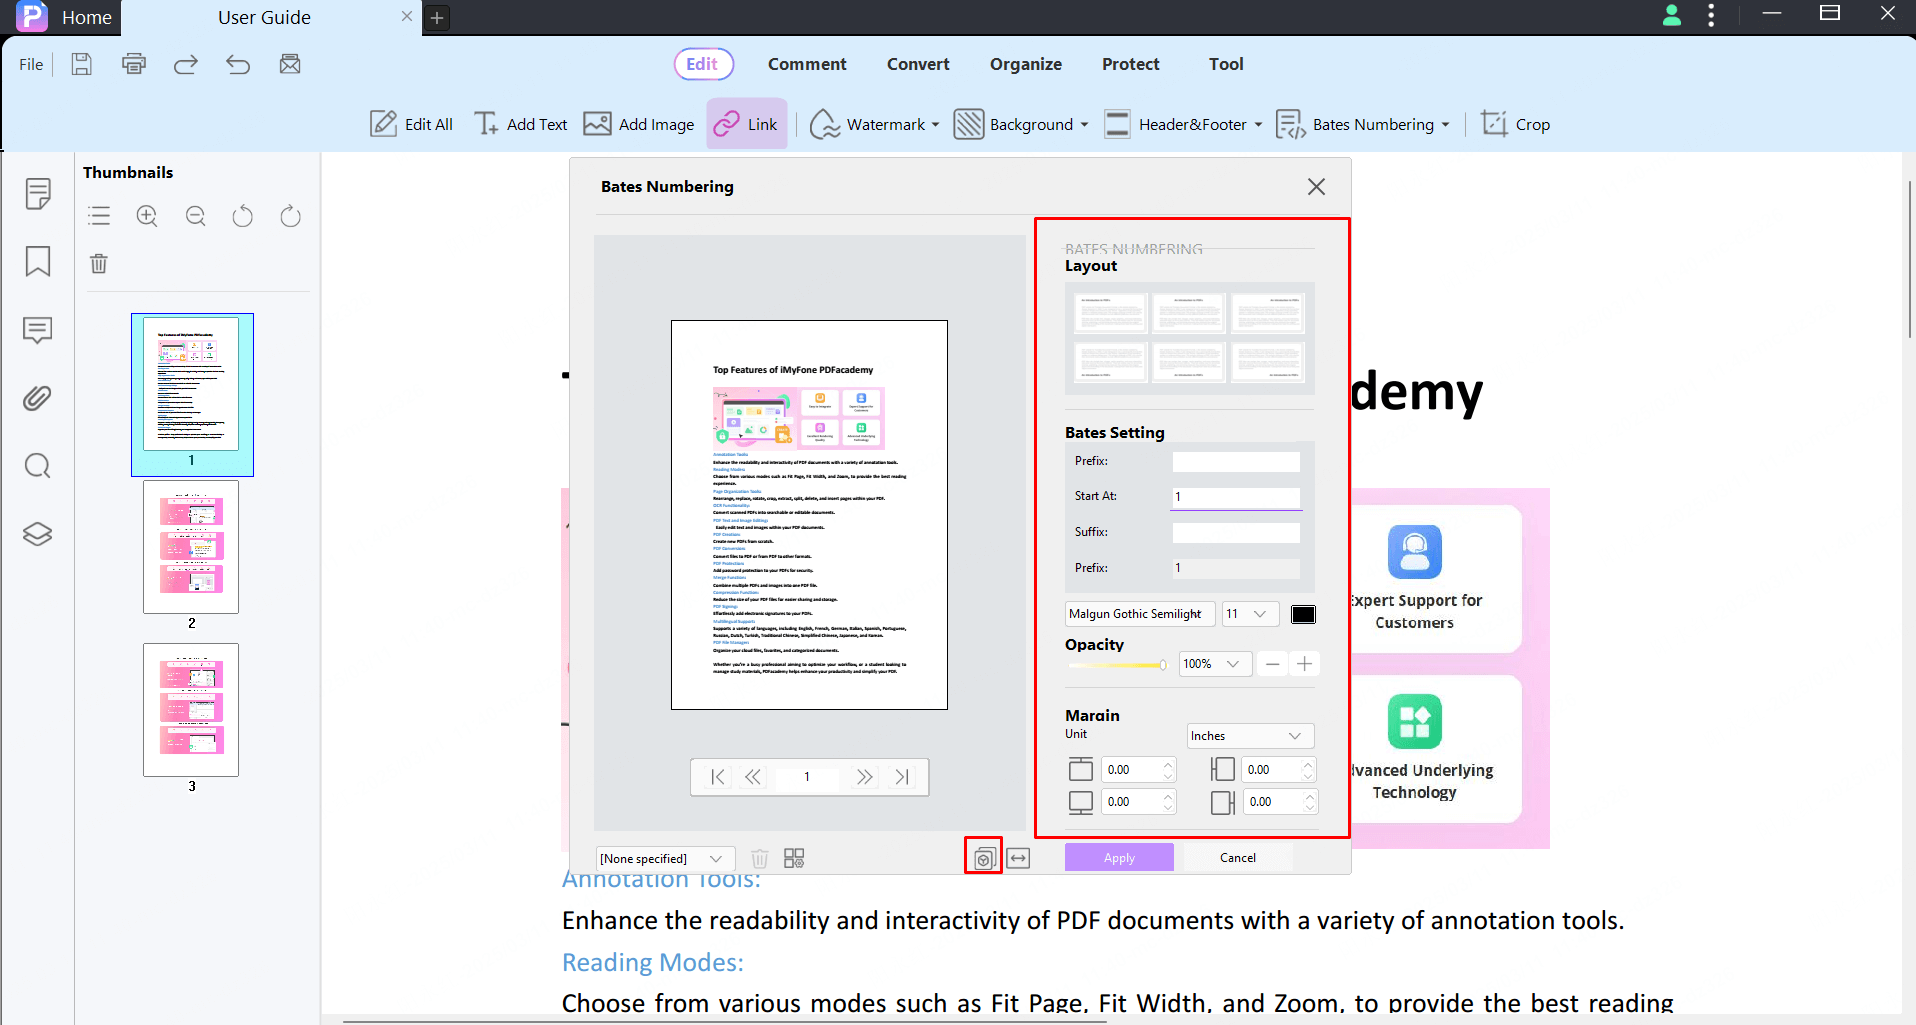
In the popup Bates Numbering window, Select the position where you want to place your bates numbering in “Layout” area.
You can set a Prefix, Start At, and Suffix for the bates numbering you want. And you can also select the font style, font size, font color, set opacity, margin, and page range to apply for the Bates number.
And last click "Apply" button to apply it to PDF.

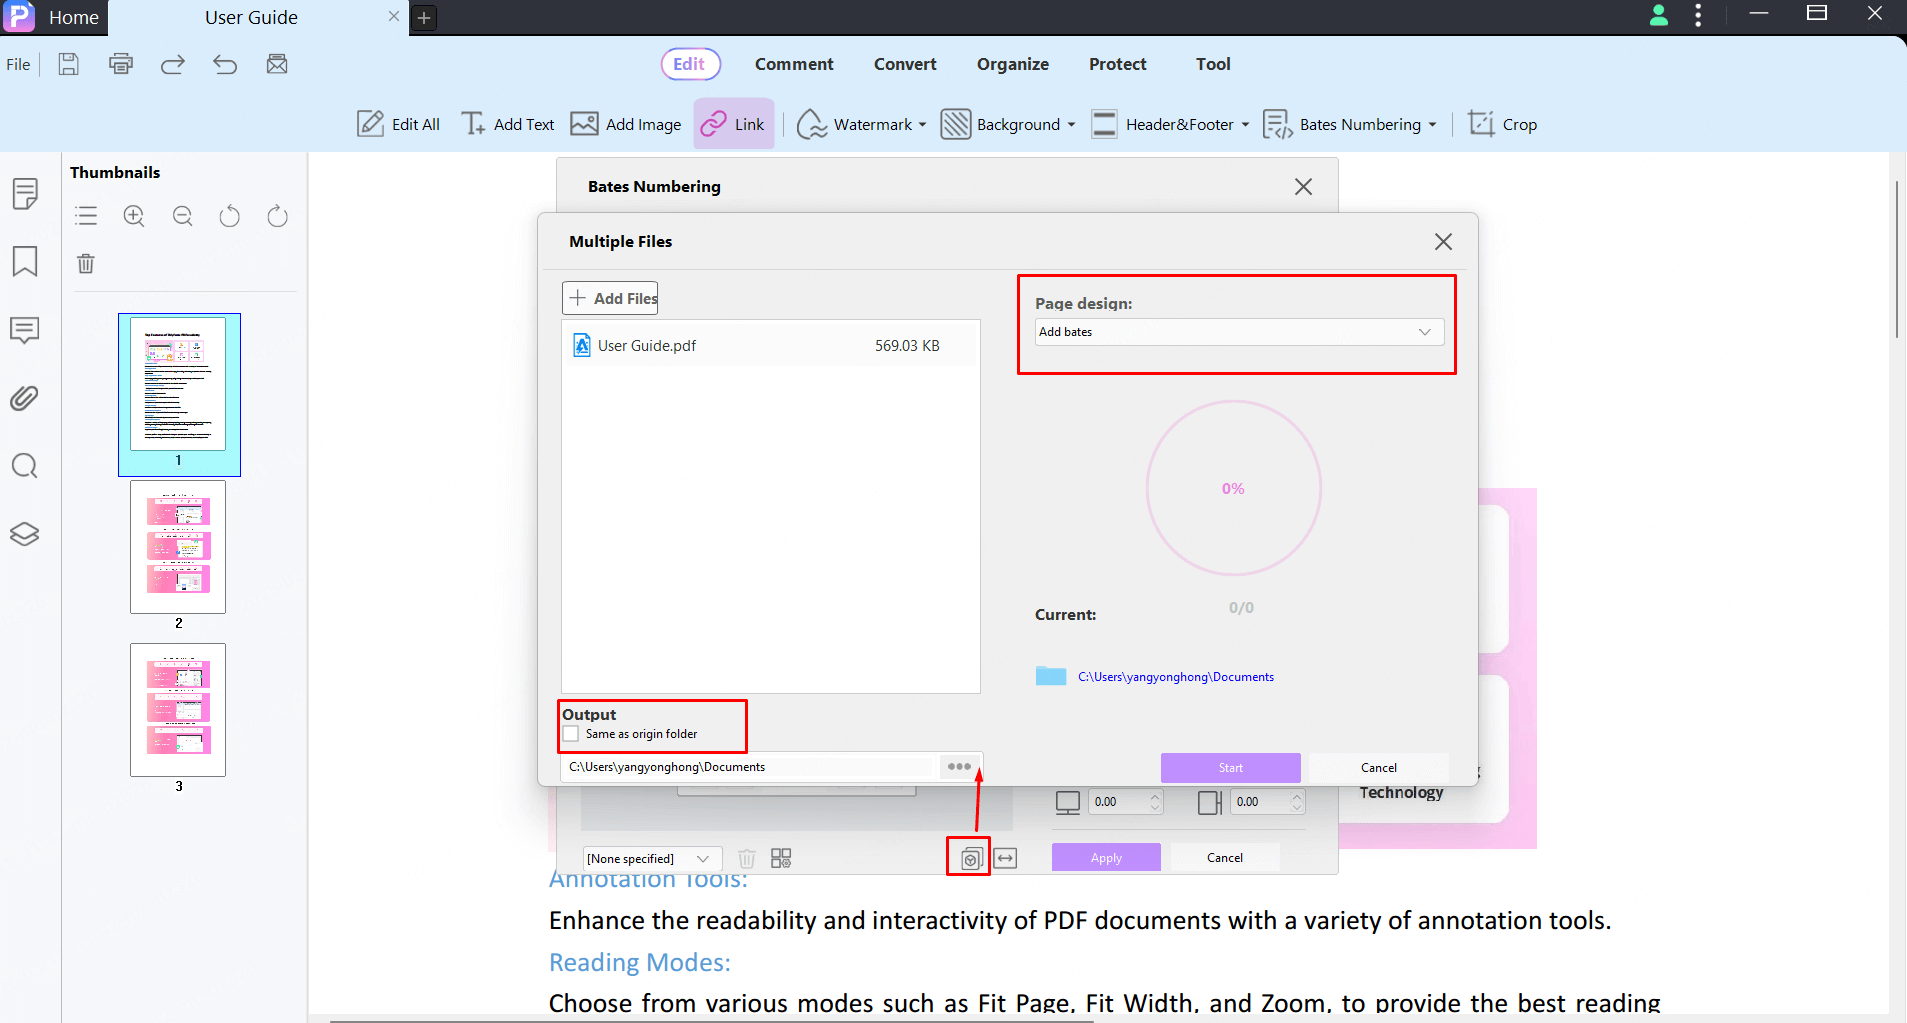
[Add Bates Numbering in Batch]
To add header and footer in batch, click on “Apply to multiple” button at bottom of Bates Numbering window.
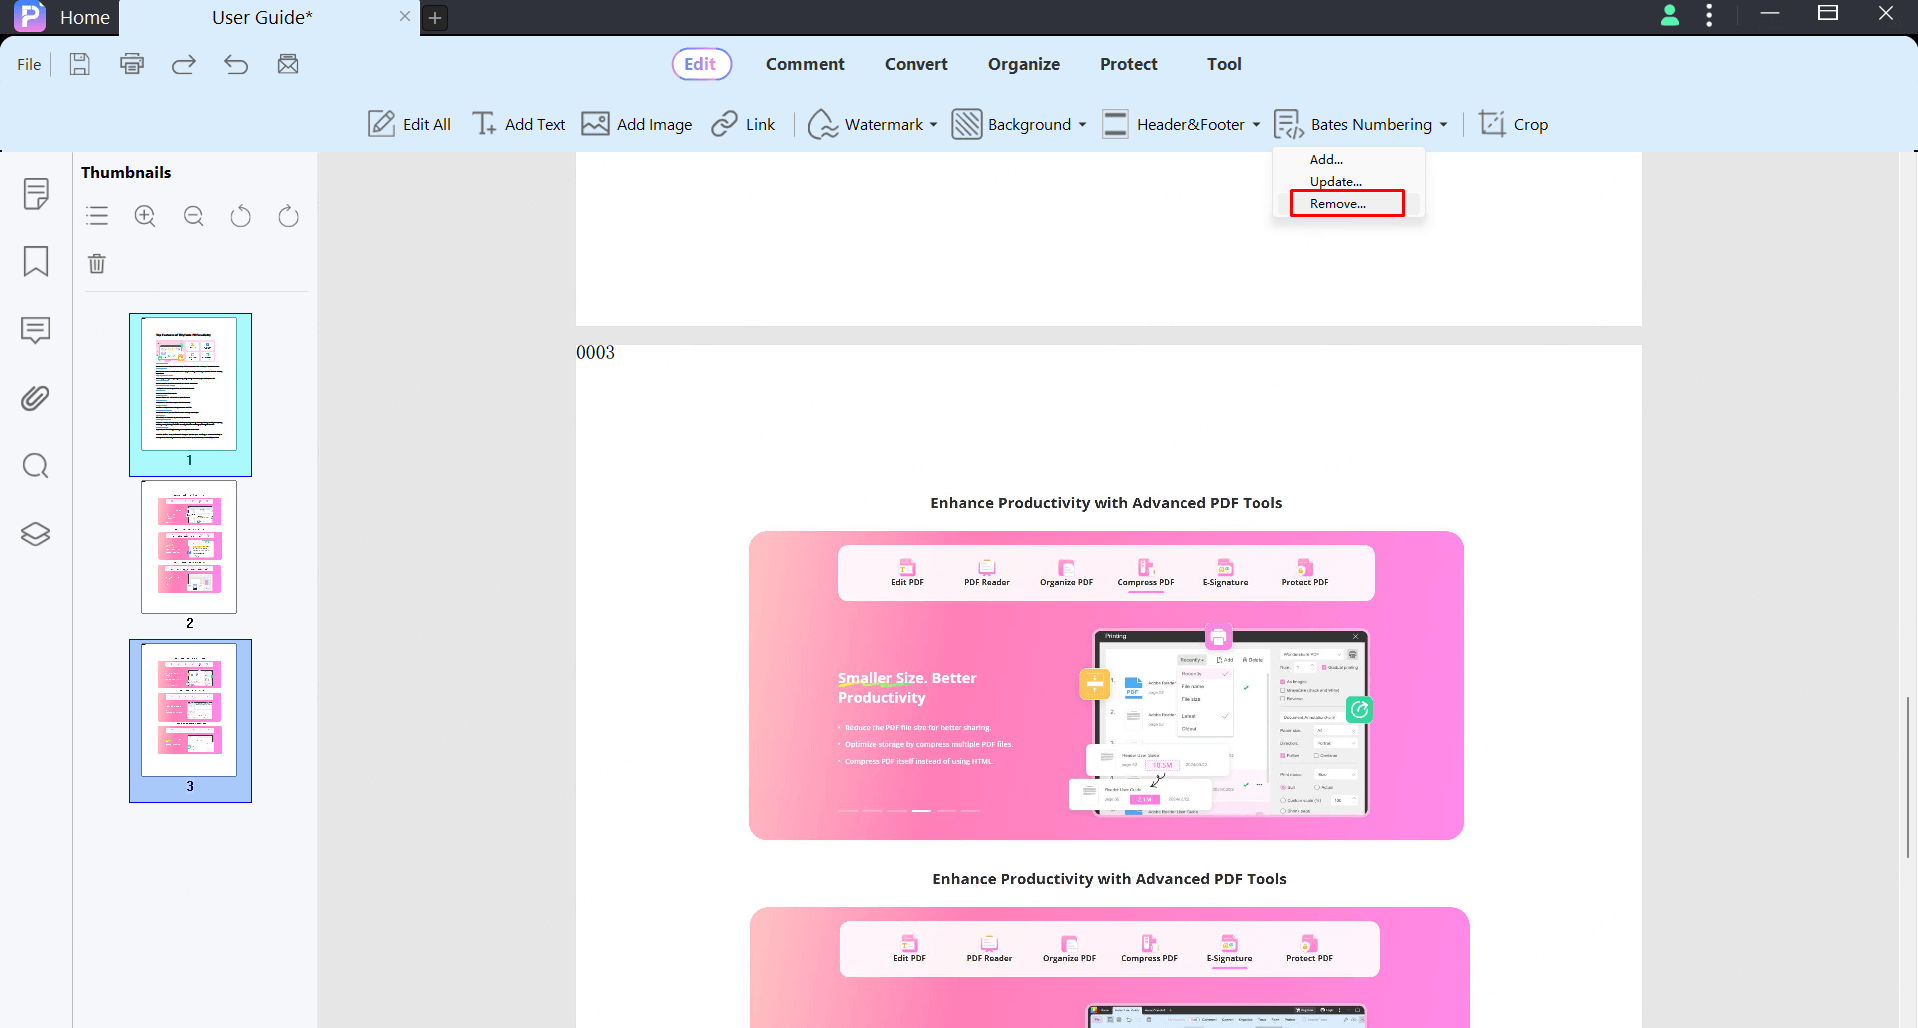
[Remove Bates Numbering in PDF]
You can remove Bates Numbering in PDF by clicking the "Edit" > "Bate Numbering" > “Remove” button.
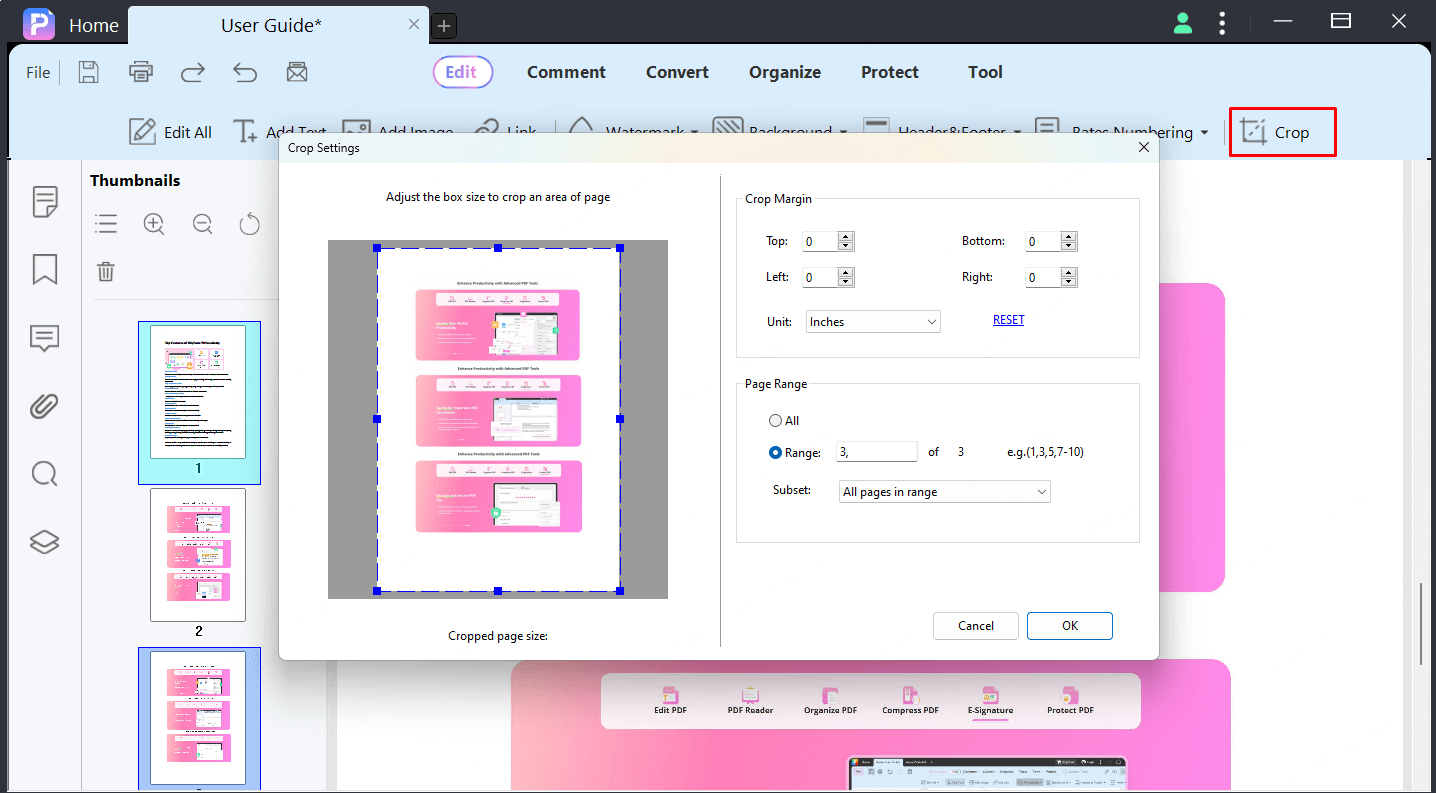
Crop PDF
Step 1. Click the "Edit" > "Crop" button, and then the "Crop Settings" window will pop up.
Step 2. Adjust the crop area by dragging the eight blue squares in the dashed box or by entering precise values in the "Crop Margins" section.
Step 3. Select the page range you want to crop.
Finally, click the "OK" button to apply the crop settings to your PDF document.
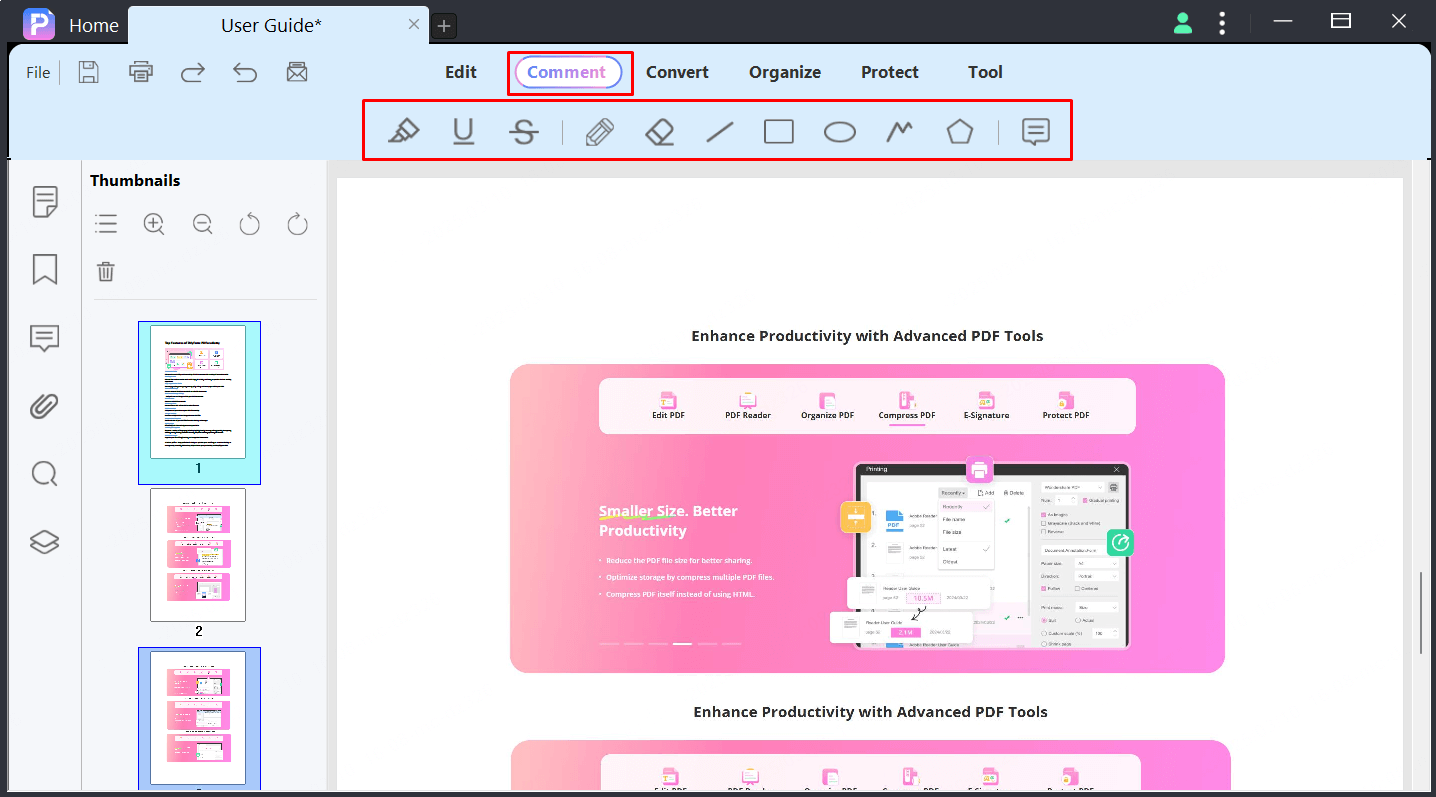
Annotate PDF
PDFacademy offers various comment tools to enable users to add comments to PDF page, edit, delete, and move the comments easily.
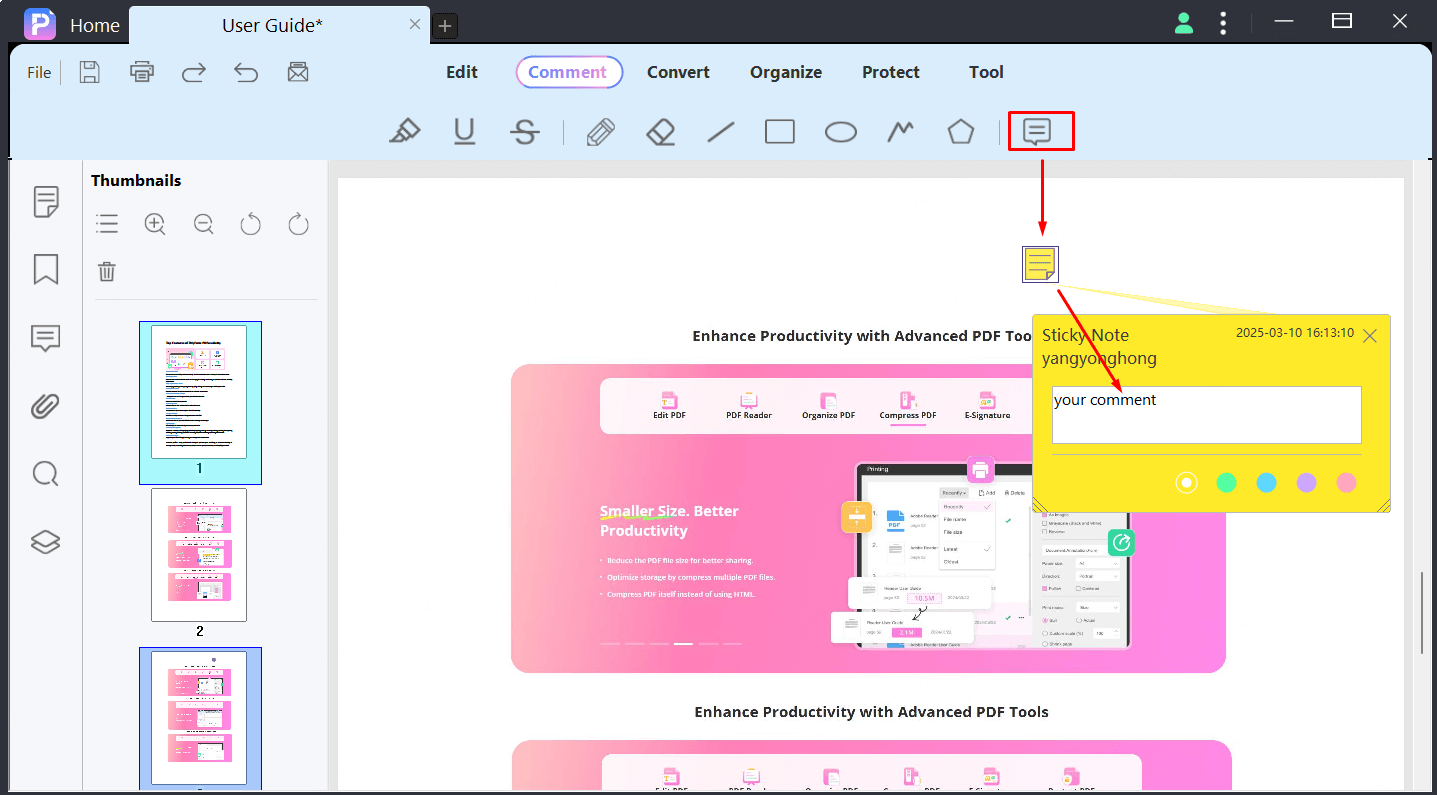
1. Add Comments (Sticky Note)
2. Markup Text (Highlight/Strikethrough/Underline)
3. Pencil & Eraser Tool
4. Add Shapes
5. Comment Properties
6. Undo/Delete Annotations
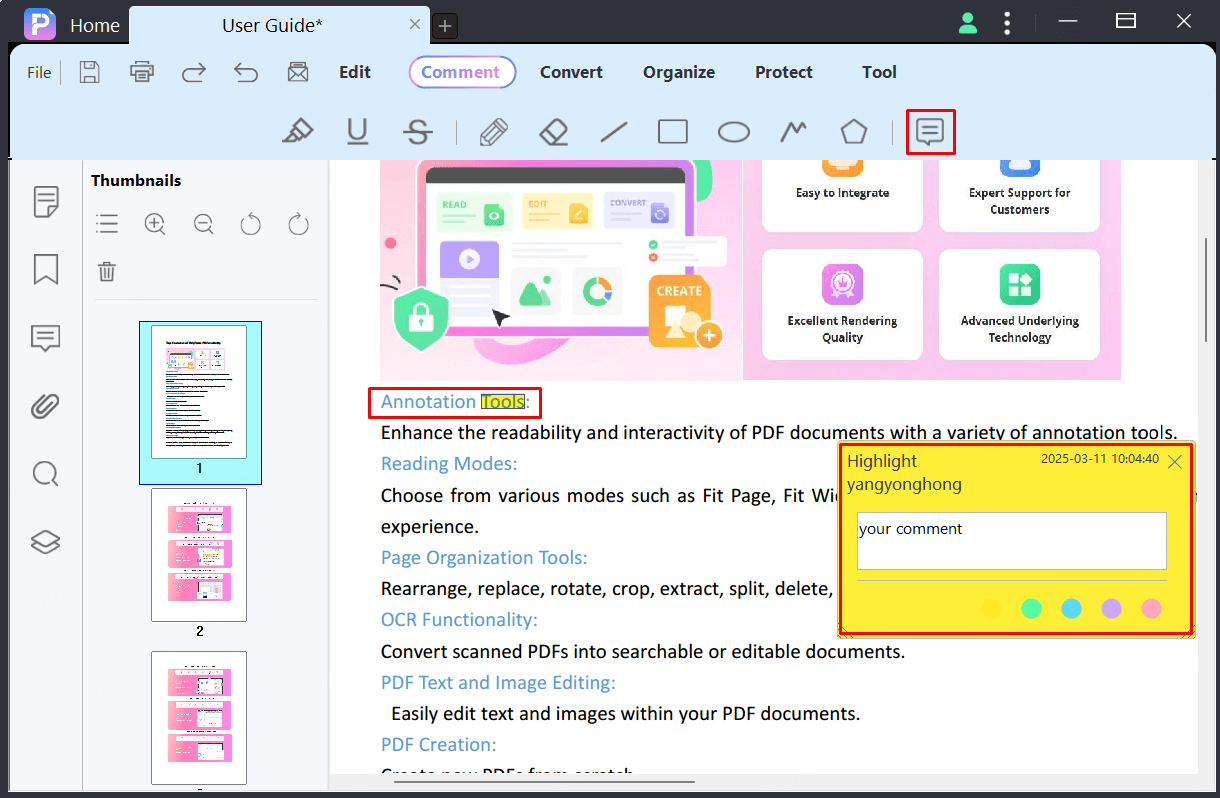
Add Comments
First of all, click the “Comment” tab, then choose “Sticky Note” button on comment tool bar. And then click on the position of page where you want to add the Sticky Note.
After adding the comment, you can click on to select it to move, copy, delete, or change the properties.
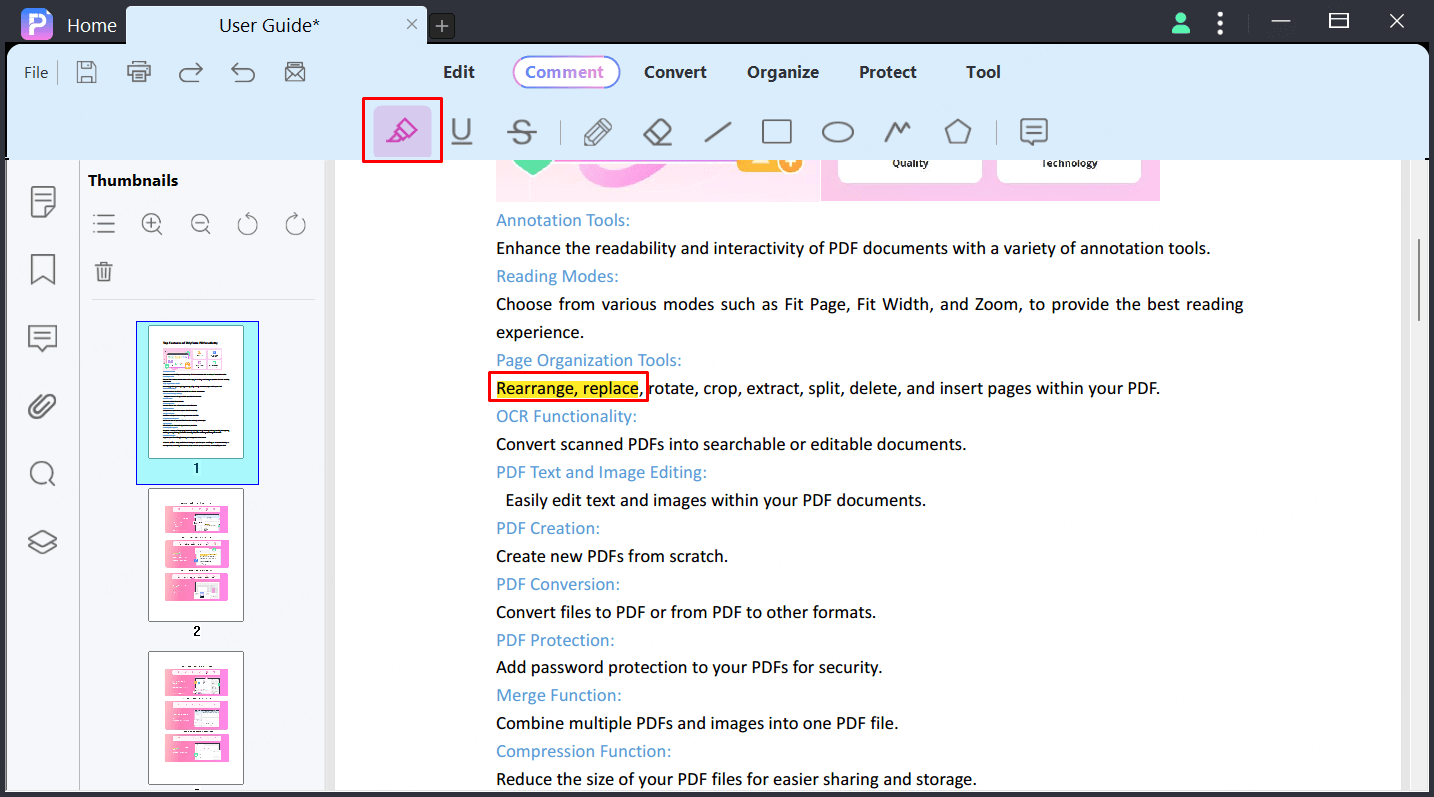
Markup Text
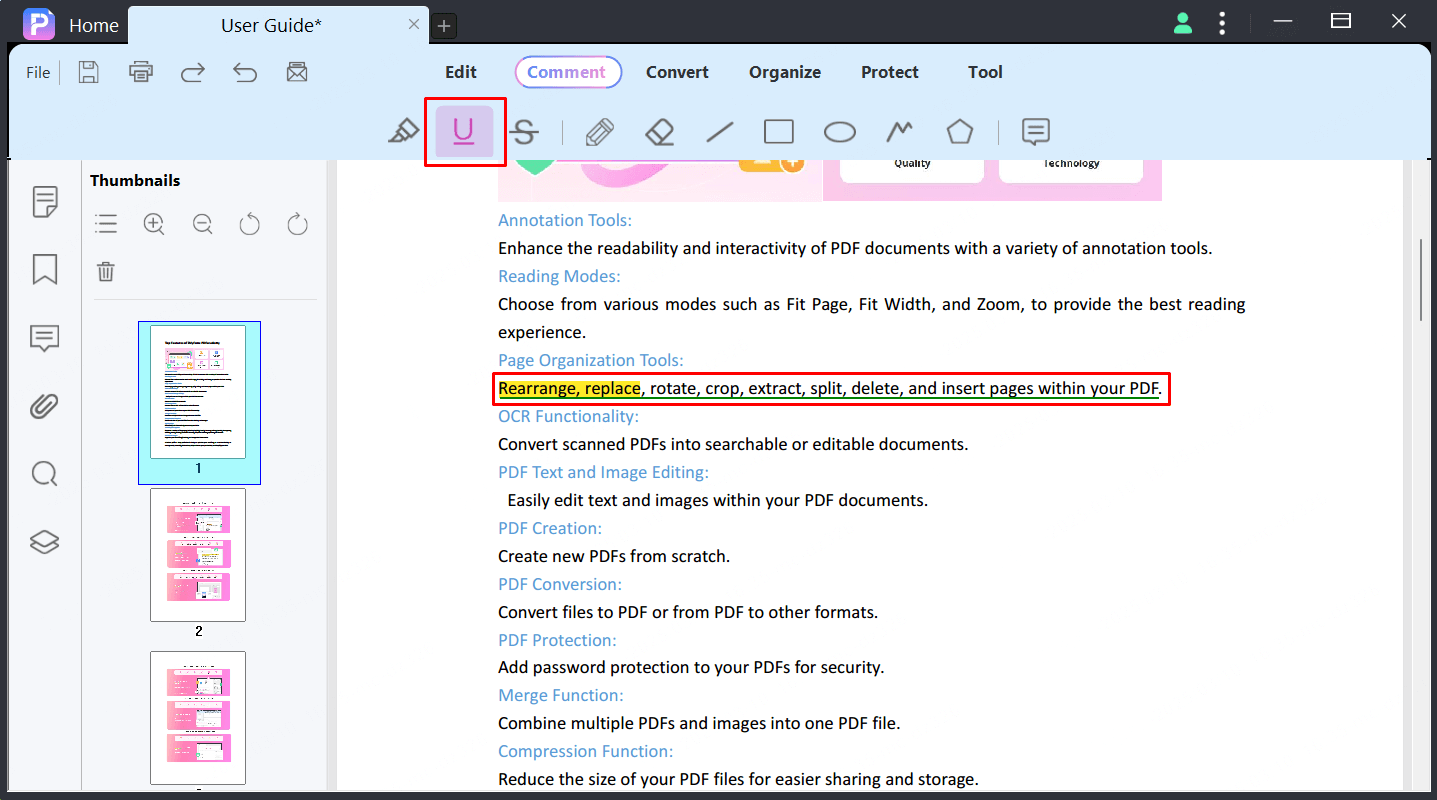
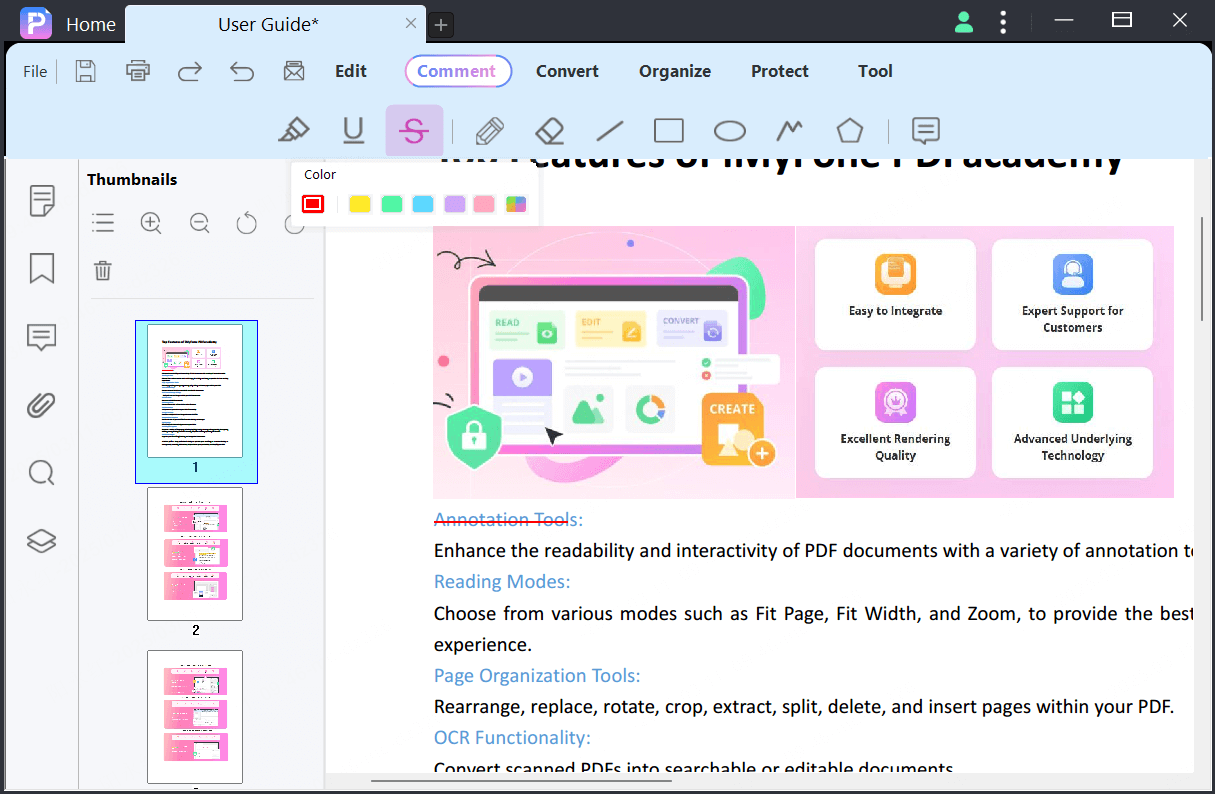
Click Comment tab, the markup tools: "Highlight", "Strikeout", “Underline", and many other tools there for your quick access.
Highlight : To highlight text or passages, you can click the Highlight icon, select the color for highlighting, and select the text you want to highlight. This feature helps you mark important text or passages as a means of memory retention or for later review.
Underline : Click the Underline icon, select the color you want on the float panel, then select the text to add the underline of selected text.
Strikeout : Click the Strikeout icon and then select the text. This feature making others know the text is deleted.
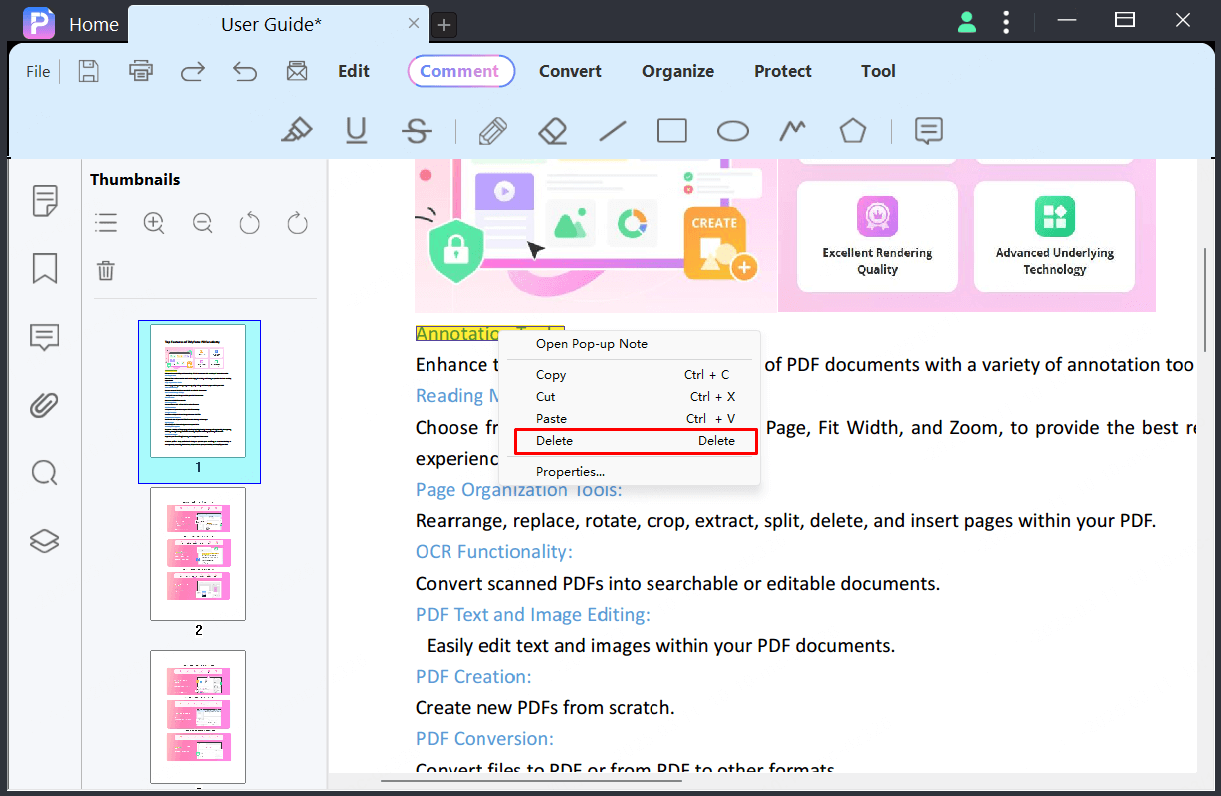
You can right-click on it to Delete/Copy/Cut it. Additionally, if you mistakenly add an annotation, you can press “Ctrl + Z” to undo it or “Ctrl + Shift + Z” to redo.
After adding the comment, you can select Hand Tool on Floating navigation Bar to exit current tool or select other tools for changing.
Pencil & Eraser Tool
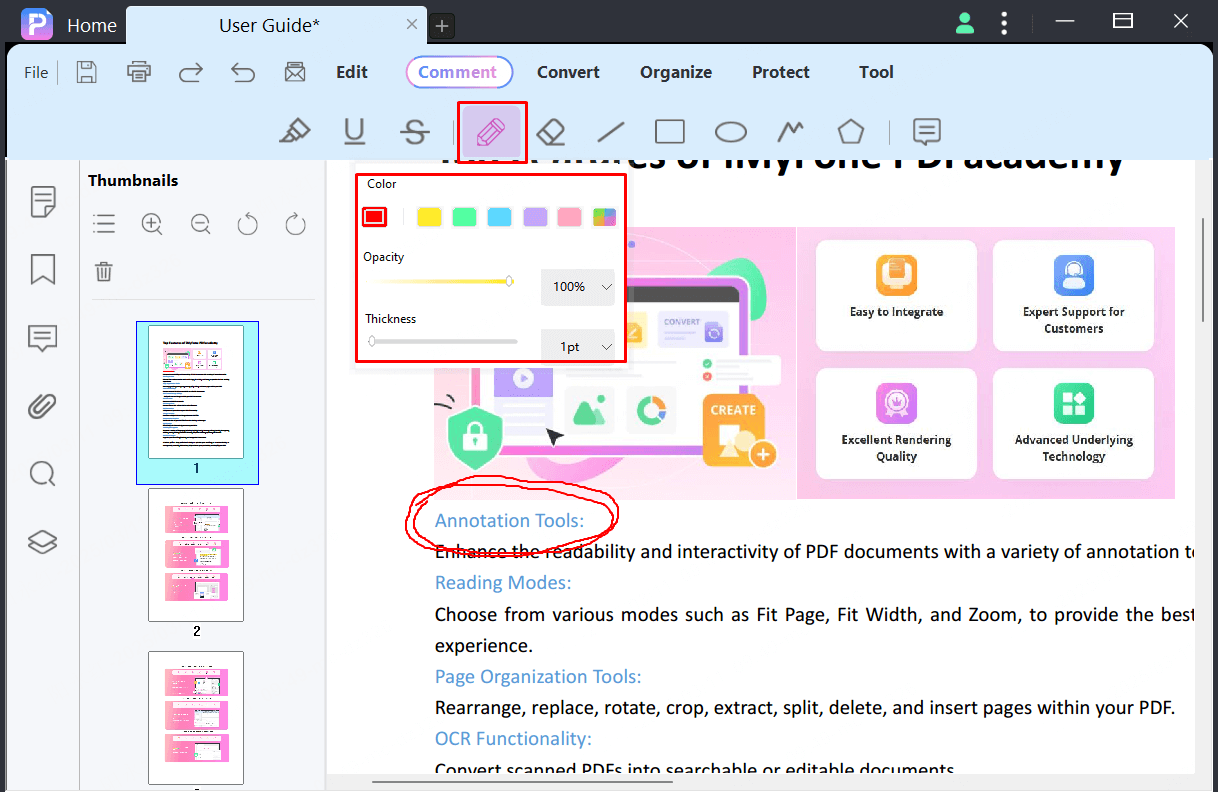
Pencil annotation and Eraser tool help you drawing on PDF free hand.
Select the "Pencil" tool on the Annotation tool bar that will open some customize options for you before drawing. Select the color, opacity, and thickness of the pencil. You can now draw with your free hand using the cursor.
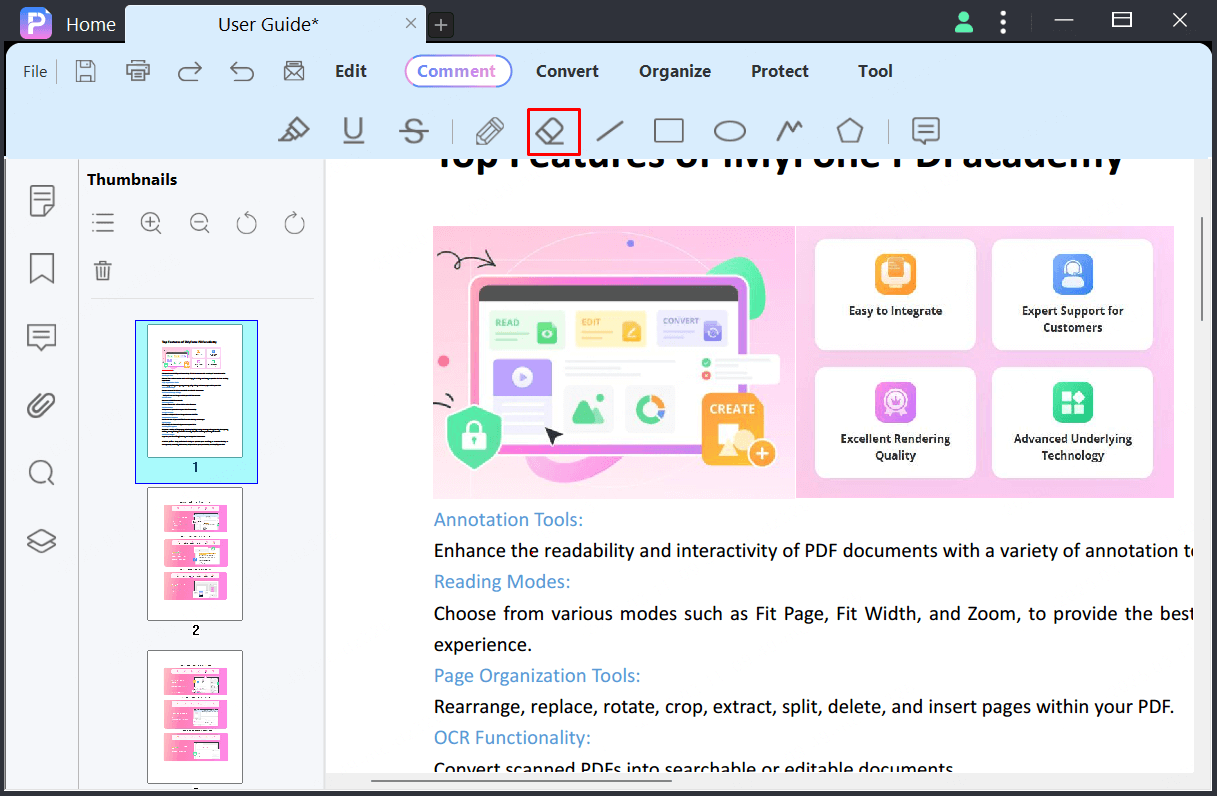
The Eraser tool is used to erase the pencil markups only, it cannot be used to erase other markups.
Add Shapes
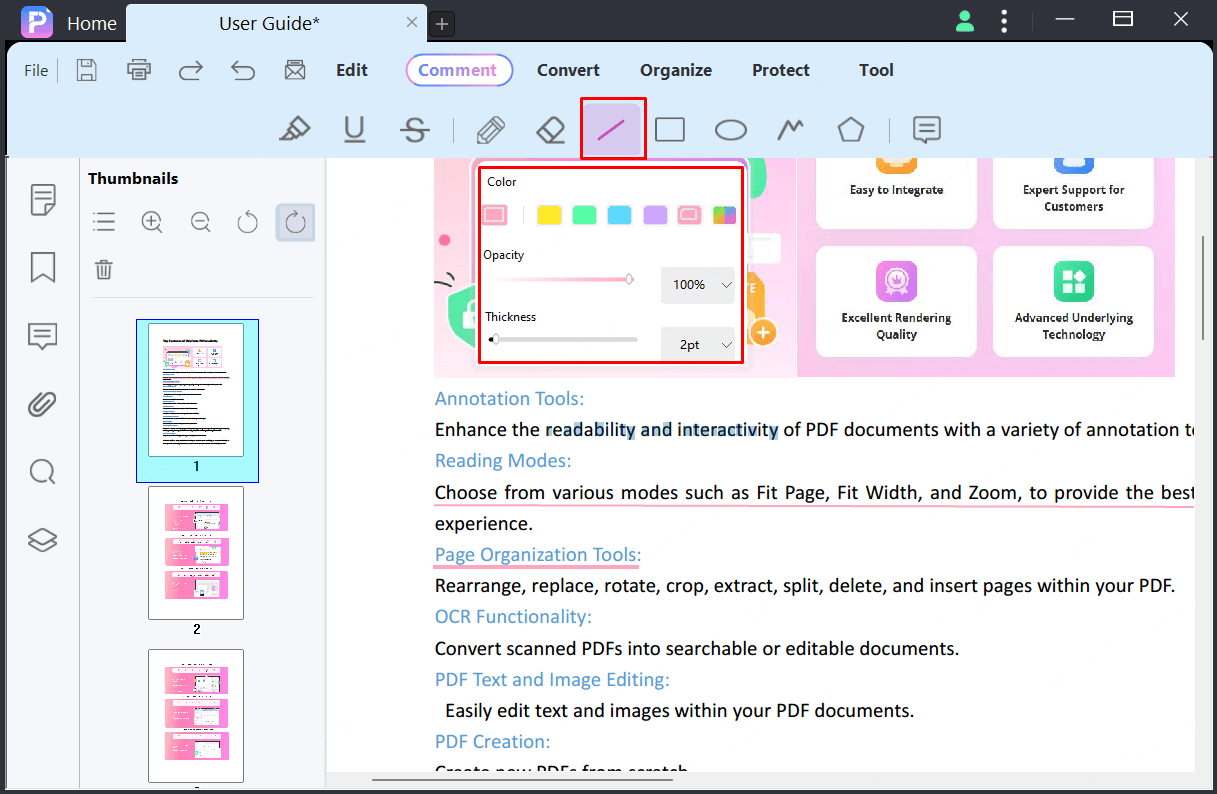
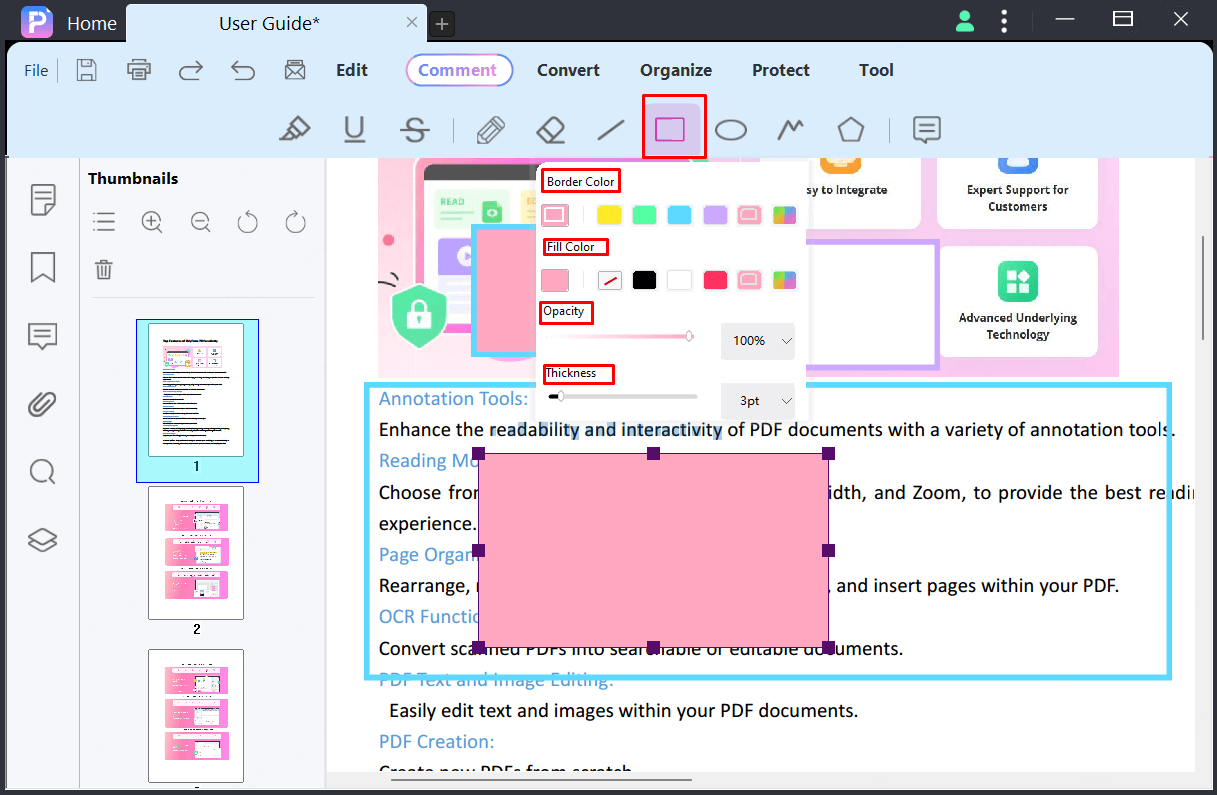
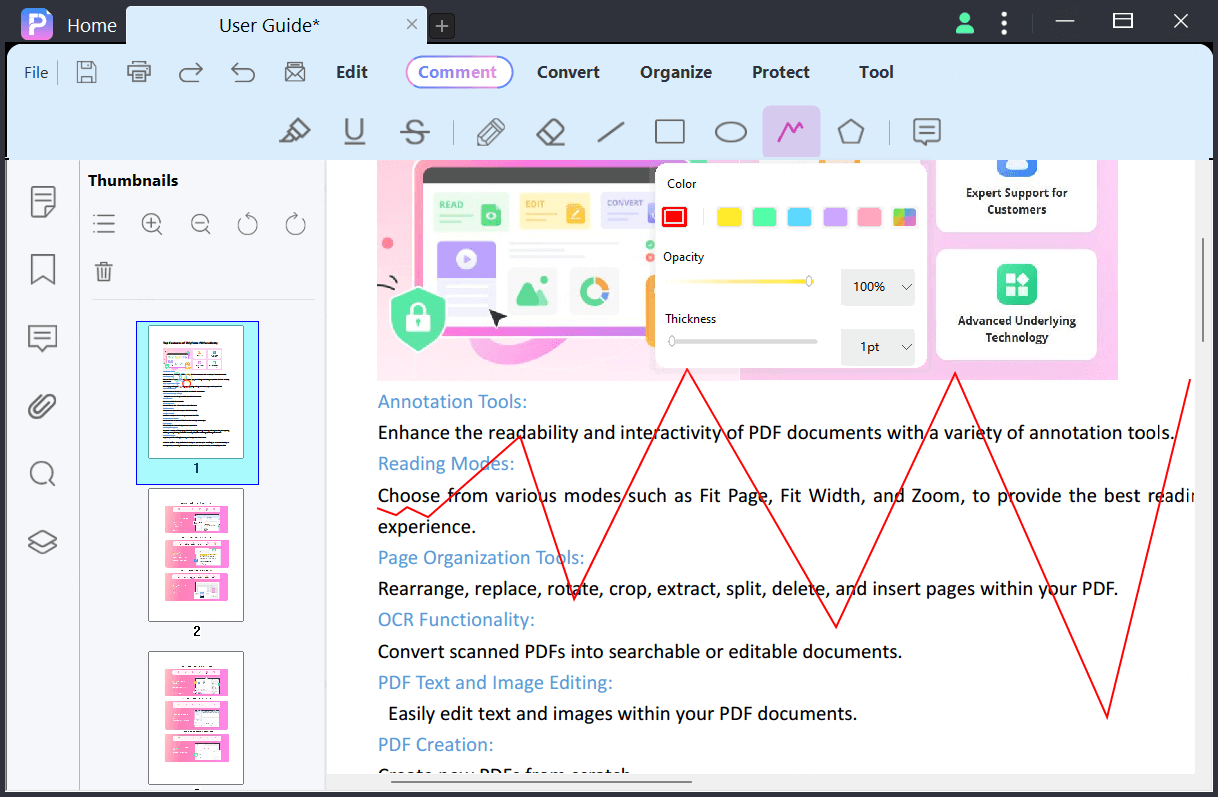
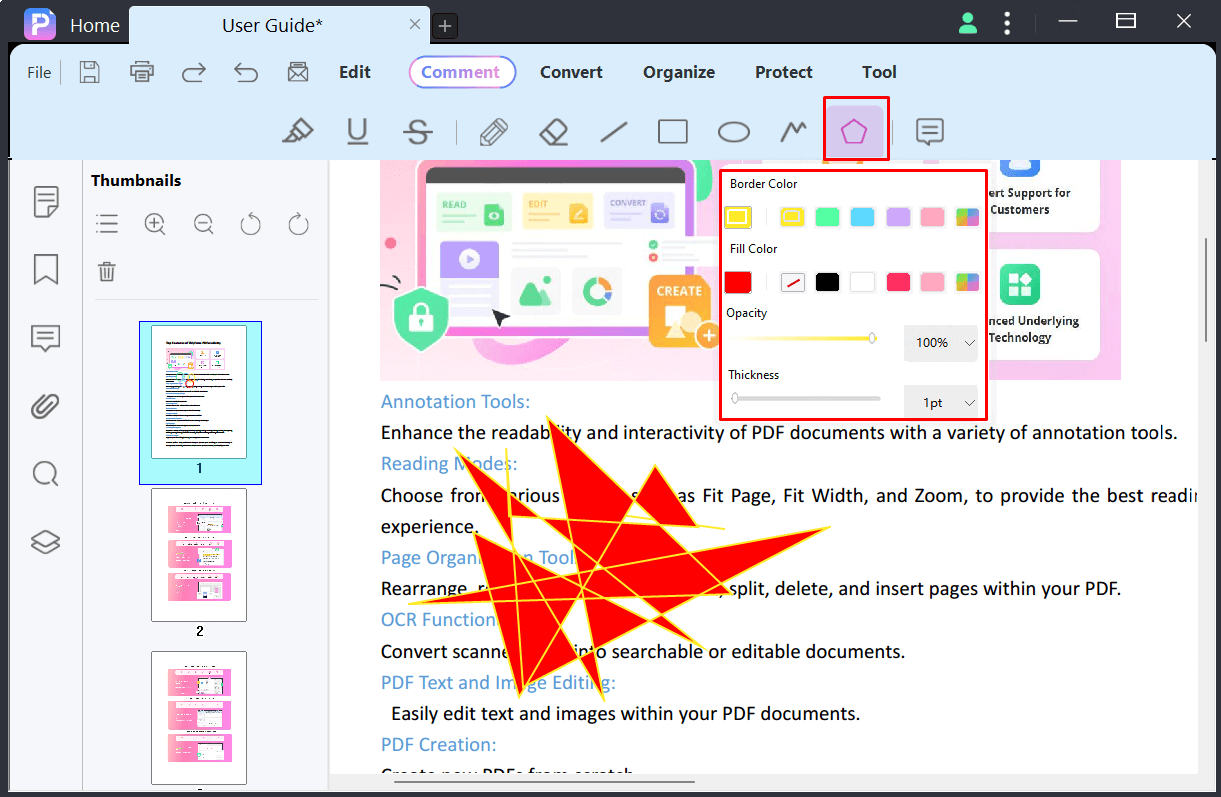
PDFacademy support five shape tools :“Line”, “Rectangle”, ”Oval”, ”Polyline”, “Polygon”. You can click the ”Comment” tab to find the drawing tools.
Line:Draw a line by clicking the line icon.
Rectangle:Click the oval icon and click and drag on your document. Pressing “Shift” to draw circle.
Polyline:To draw an open plan figure with more than two line-segments. Double-click to finish drawing.
Polygon:To draw a closed plane figure bounded by more than two line-segments. Double-click to finish drawing.
Comment Properties
You can also reset / change the properties of comments in the PDF file. You can change the fill color, border color, opacity, and line width attributes as well.
2 Steps to change comment properties:
1. Click on annotations, then change attributes on the popup the Properties Panel.
2. Right-clicking on the annotations then selecting the ”Properties” from the context menu.
Undo/Delete Annotations
You can Redo / Undo / Delete annotations on PDF by the following steps:
1. Press the keyboard shortcut "CTRL + Z" to undo the annotations.
2. Press the keyboard shortcut "CTRL + Shift + Z" to redo the annotations.
2. Right-clicking on the annotations then selecting the ”Properties” from the context menu.
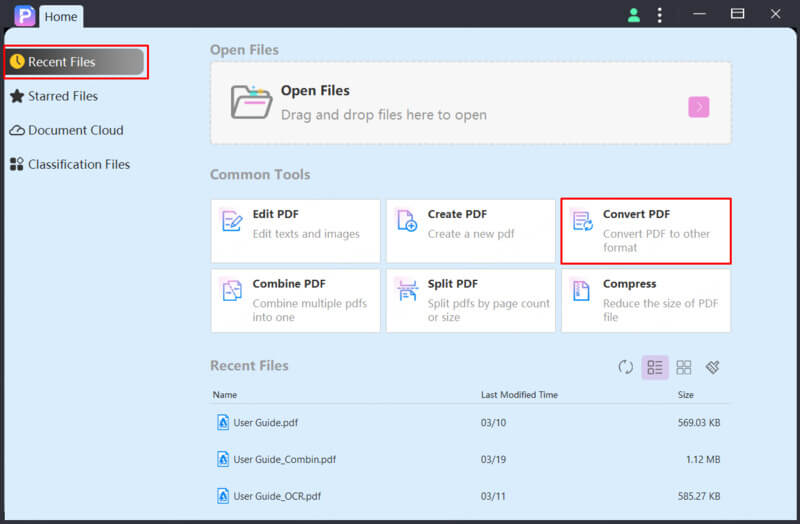
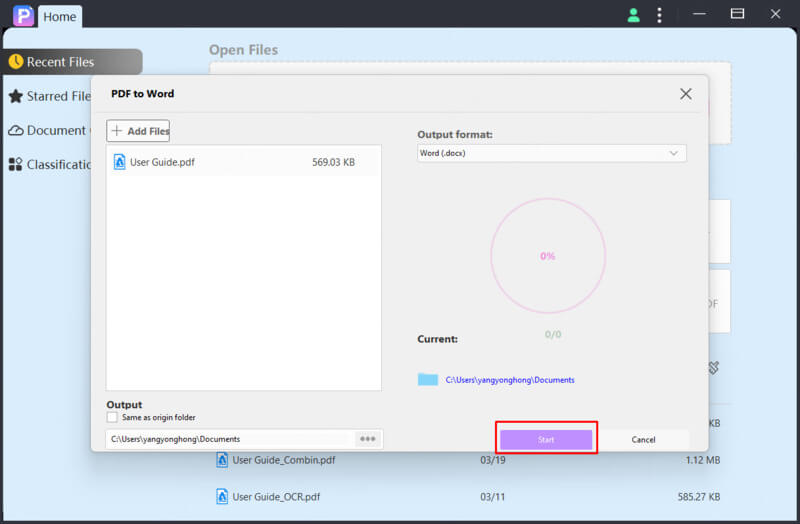
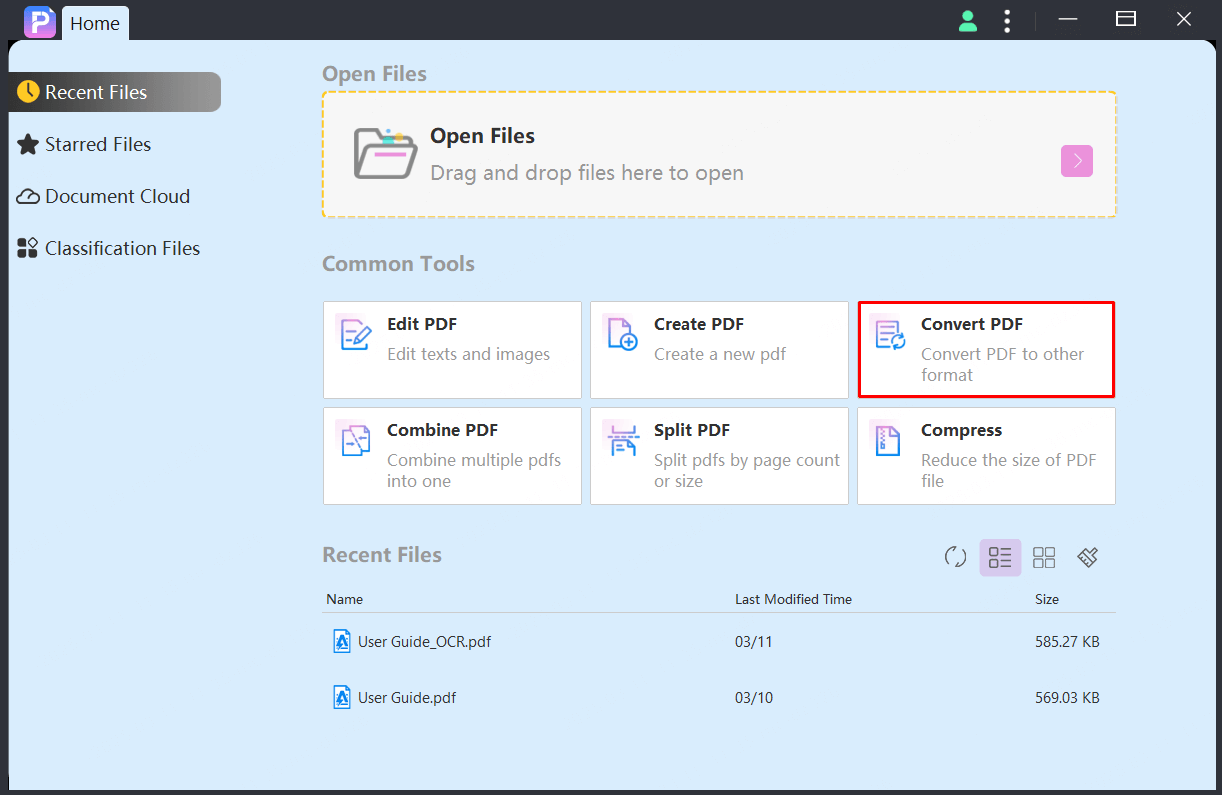
Convert PDF Files
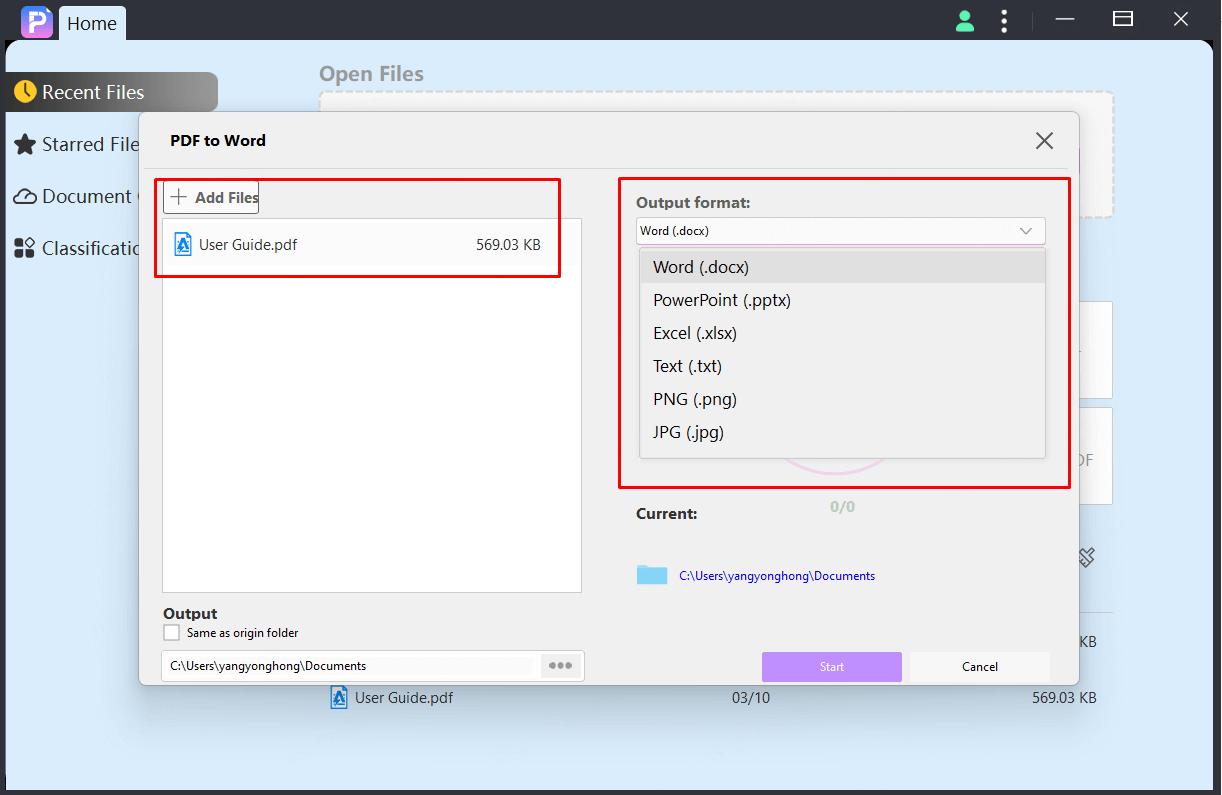
PDFacademy allows users convert PDF to other format document such as MS Word(.docx), MS Excel(.xlsx), MS PowerPoint(.pptx), and Images files (png, jpg, jpeg, tiff, bmp).
Step 1. Click “Convert PDF” button on Common Tools area of Recent List Page.
Step 2. Click “Add Files” button to add pdf files and select the “Output format”.
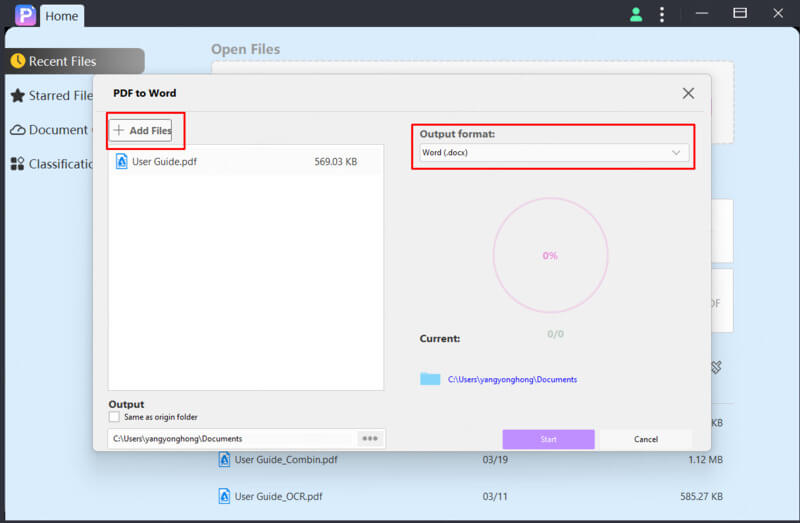
Step 3. Set the output folder if need, and last click “Start” to start the process.
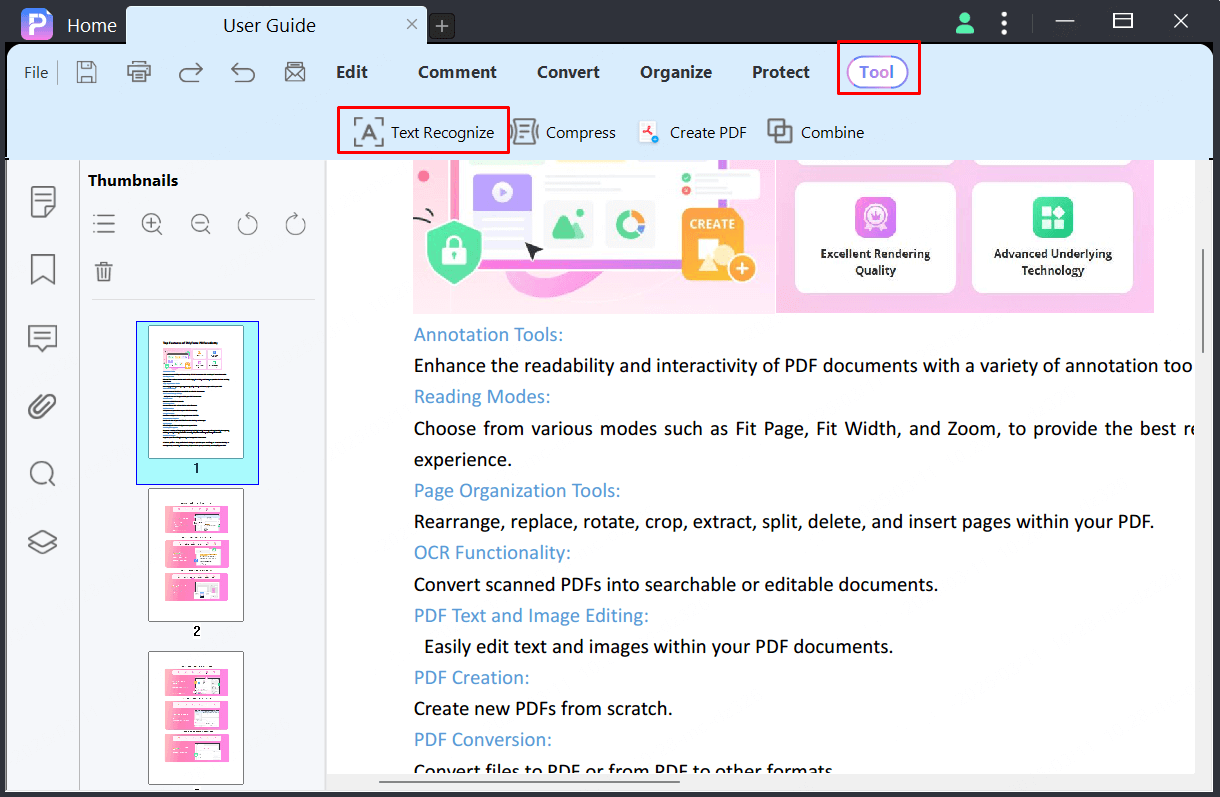
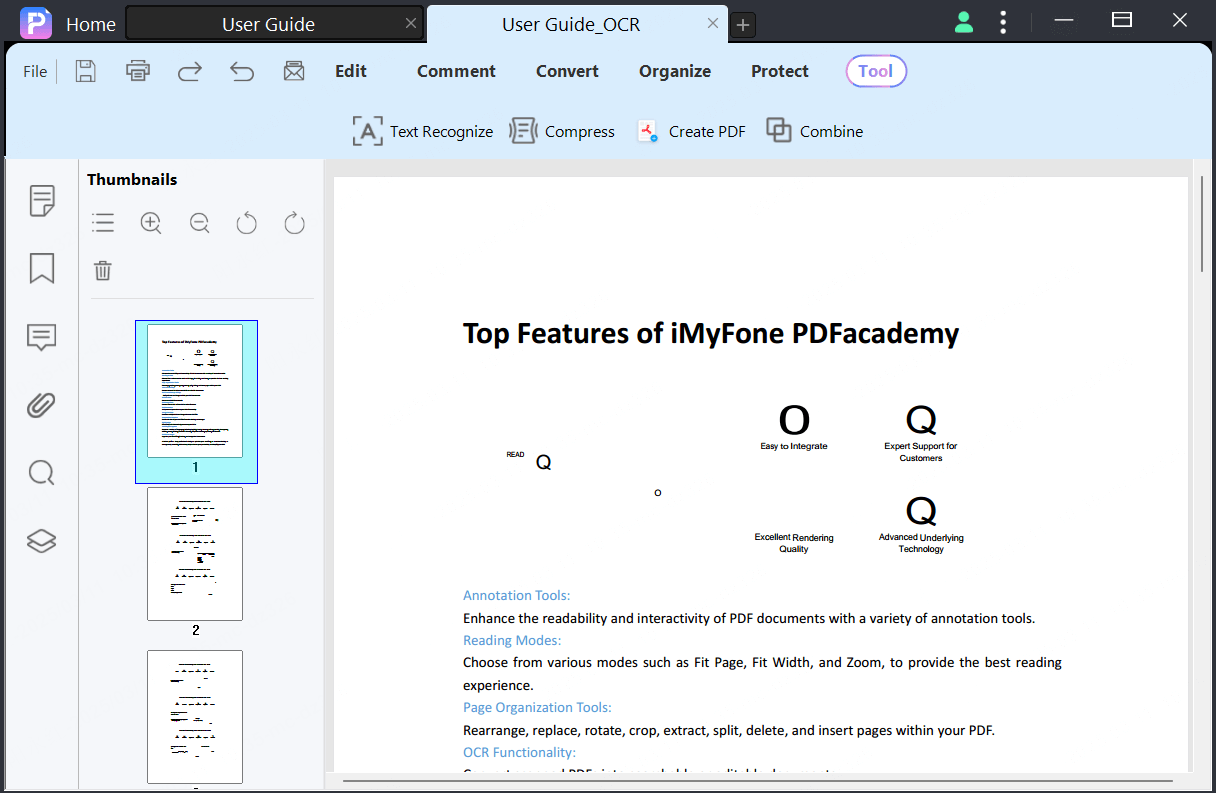
OCR PDFs with PDFacademy
The OCR (Optical Character Recognition) feature allows you to recognize scanned PDF documents as searchable or editable text content. When a scanned paper document is used to create an electronic document (such as a PDF), OCR is required to convert it into an editable PDF document for text copying and text editing.
If you want to edit or convert the scanned PDF files, please follow these steps:
Step 1. Click the "Tool>Text Recognize" button in the main tool panel.
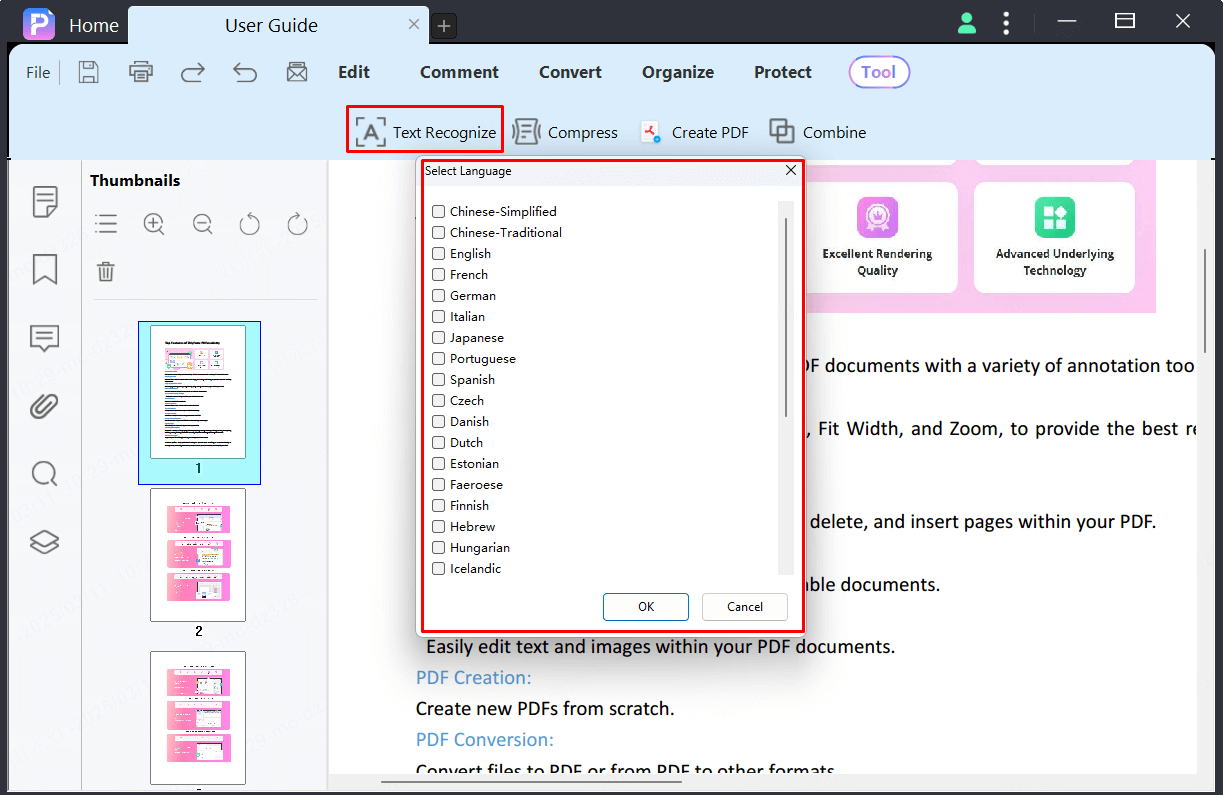
Step 2. Select the language on popup “Select Language” window. Choose the correct language of your PDF content.
Step 3. Click "OK" to perform OCR. A progress panel will pop up to inform you when the process is complete.
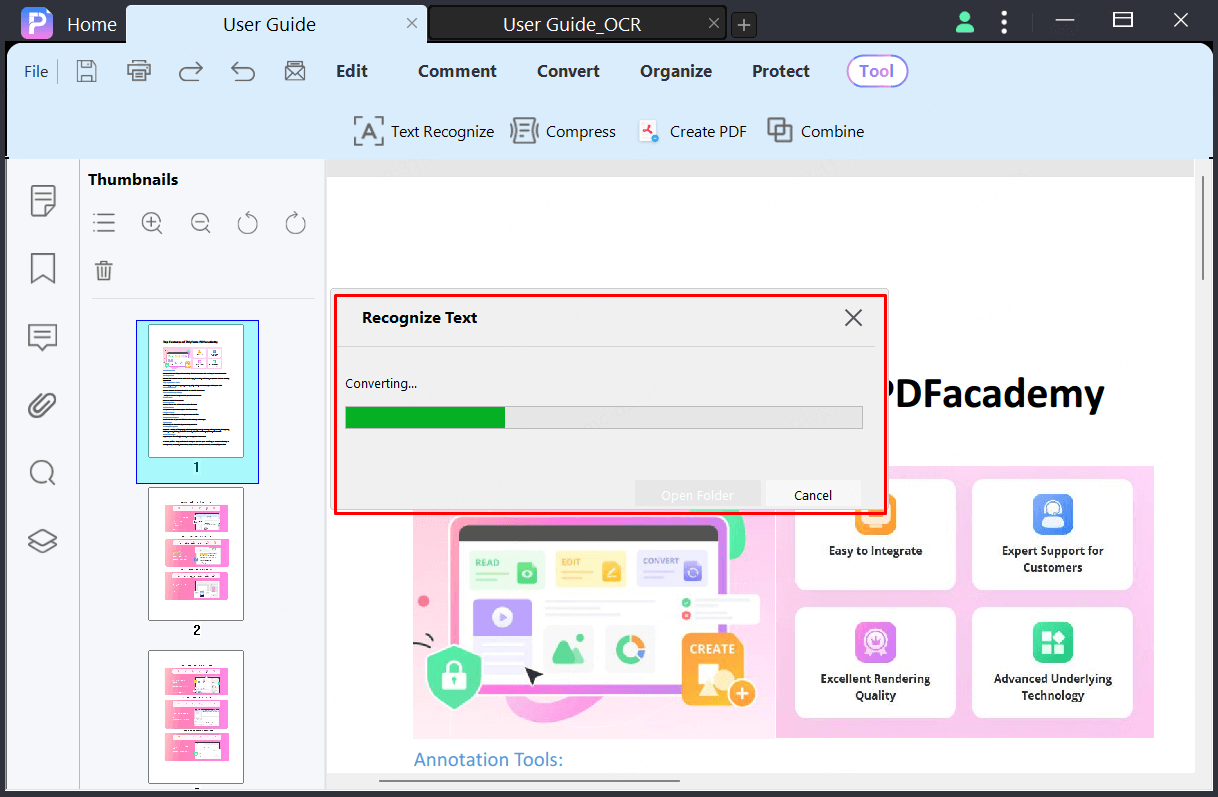
Step 4. When OCR is completed, it will open the newly created editable PDF file (with the "_ocr.pdf" suffix in the file name) in the PDFacademy. Now you can copy, edit text or convert it.
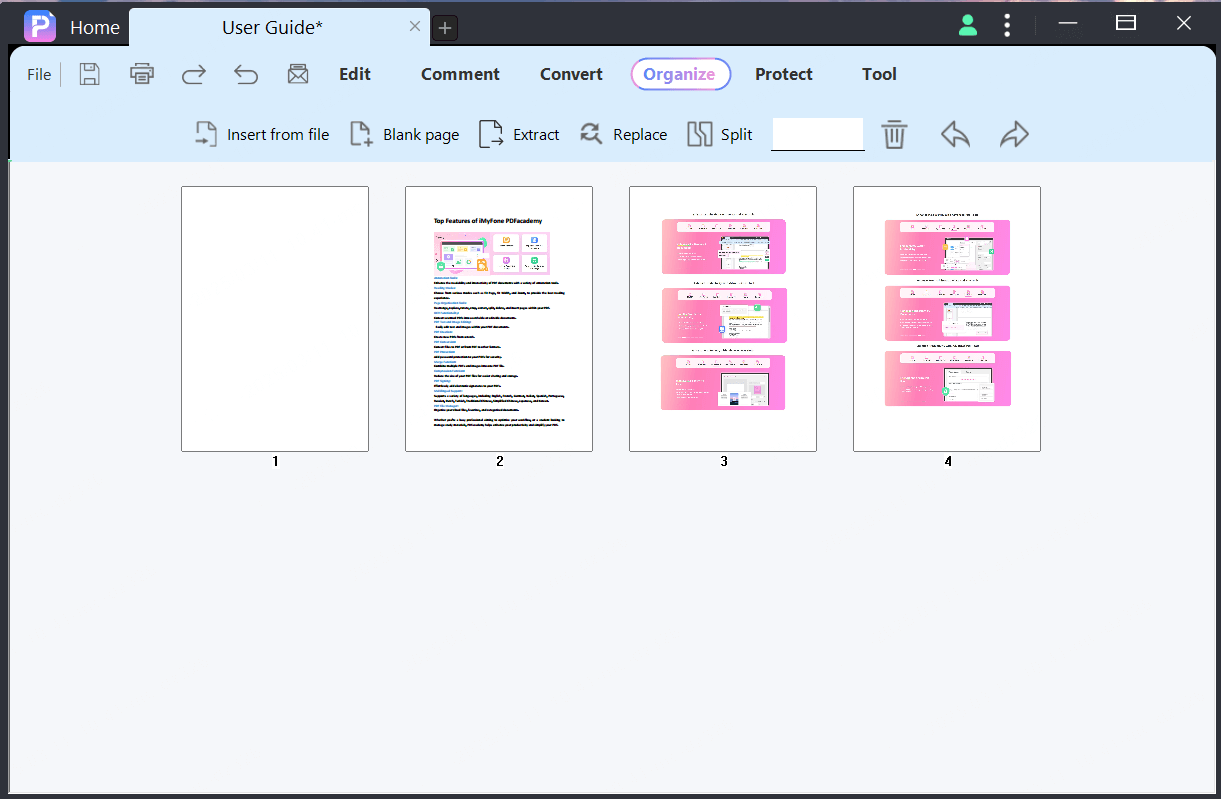
Insert Blank Page in PDF
Step 1. Click "Organize" > "Blank page" button.
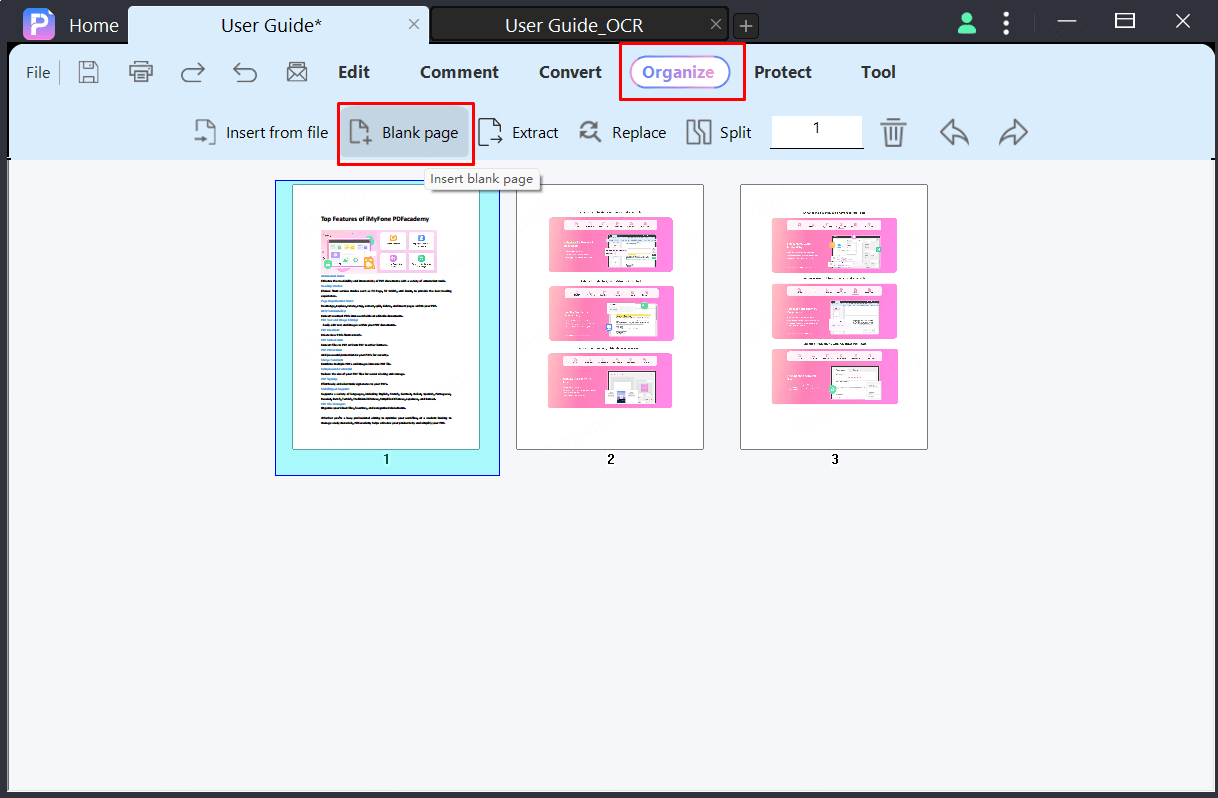
Step 2. Set the number of blank pages you want in the “Insert Blank” dialog box.
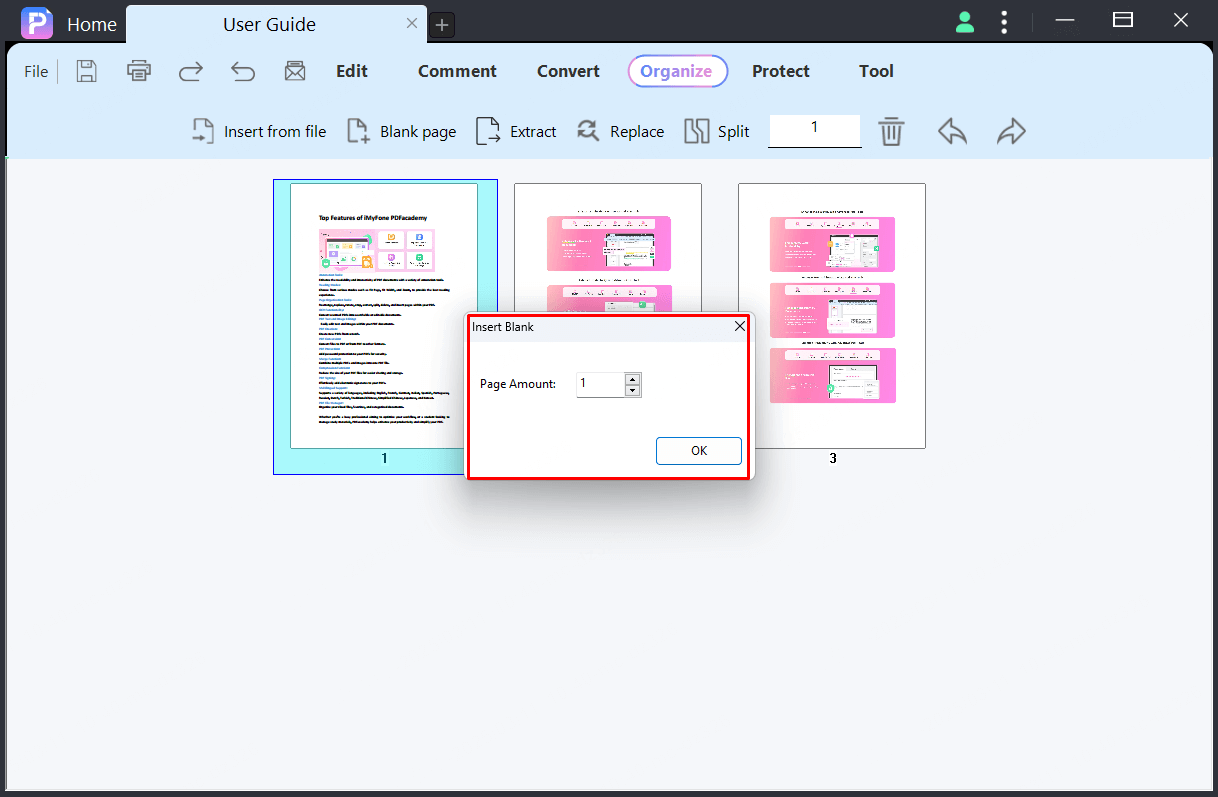
Step 3. A new blank page will be inserted after the current page in the document. You can change the page order by dragging and moving the pages.
[Insert from PDF]
Step 1. Choose the "Organize" > "Insert from file" button to select the PDF document you wish to insert.
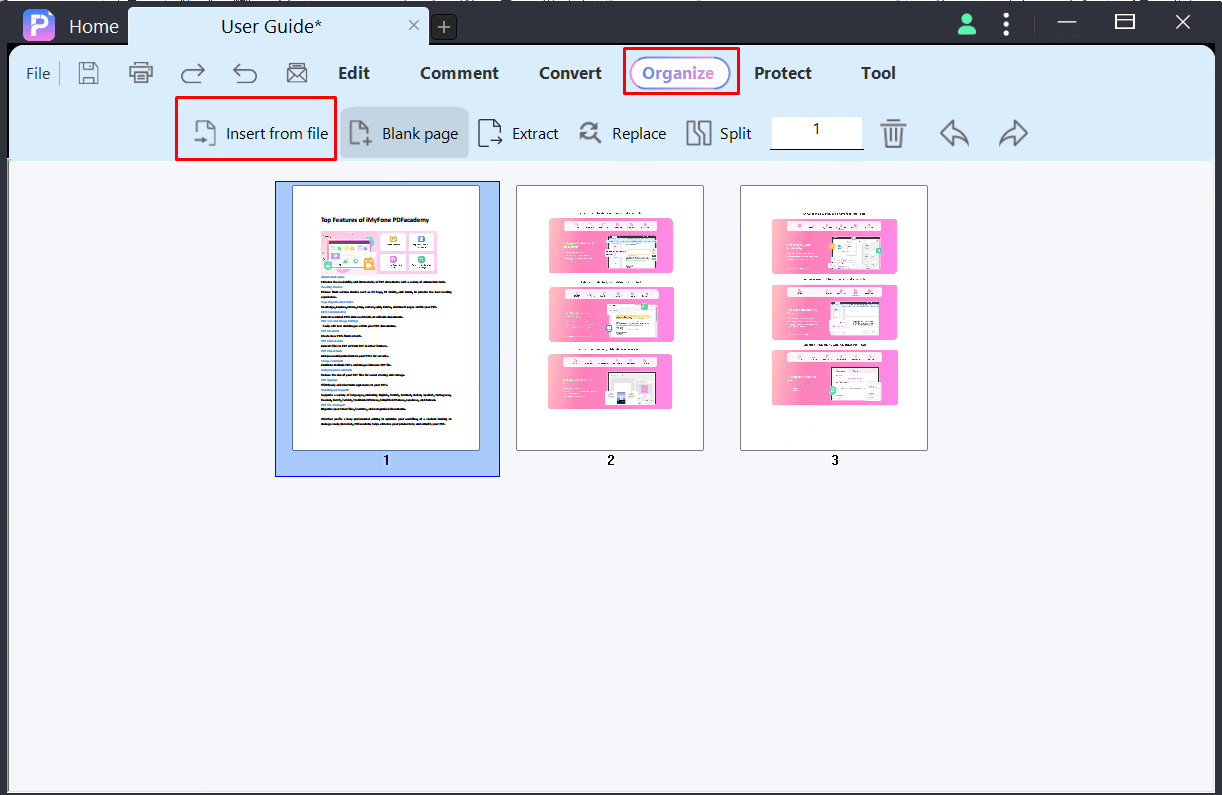
Step 2. Choose the page range that you need from the target PDF and select the location for the inserted pages.
If you want to insert pages form the other format document (e.g. docx, xlsx. pptx, Images files), convert them to PDF first, and then use Insert from PDF feature to insert.

Replace page in PDF
You can click the page(s) you want to replace in the left-side Thumbnail Panel, and right-click to select the "Replace" option in the popup menu.
Alternatively, you can click the "Organize" > "Replace" button.
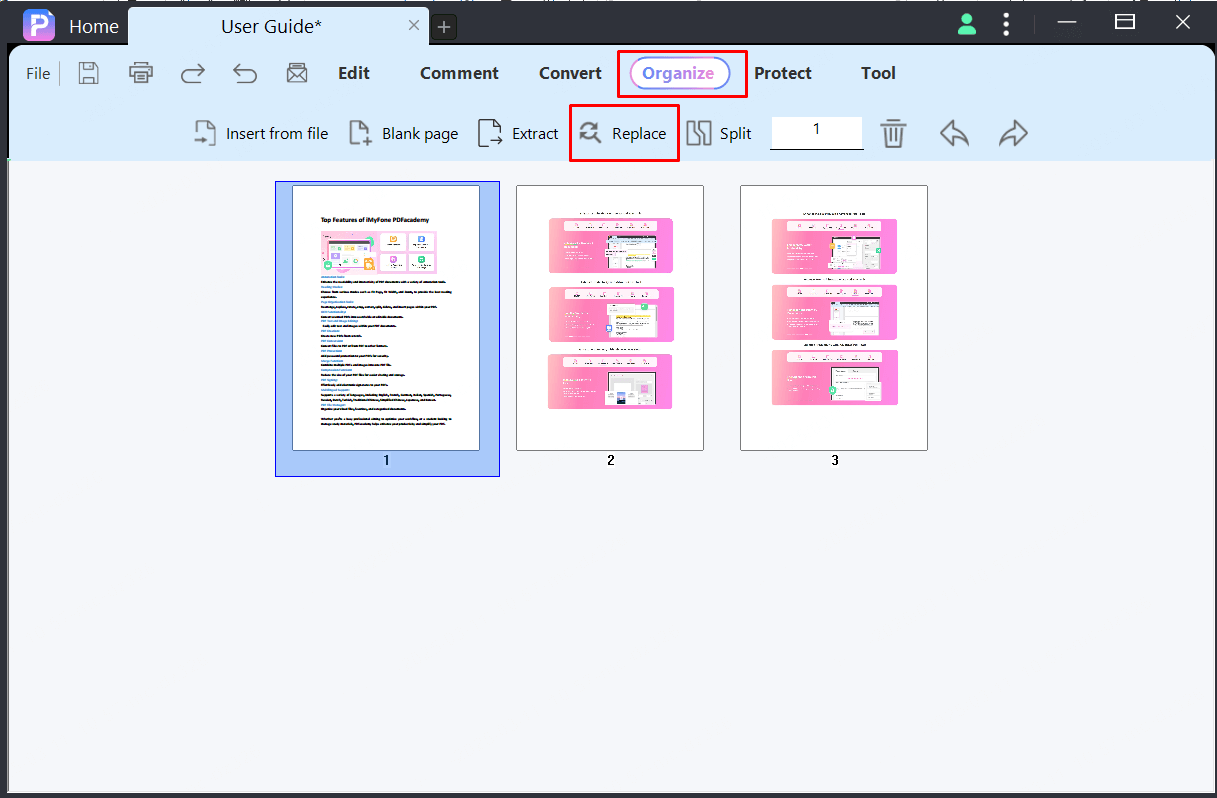
In the pop-up "Replace Pages" dialog box, you can set the to-replace page range of current PDF file, click the "Browse..." button to select the replacement PDF, and set the page range of the replacement PDF.
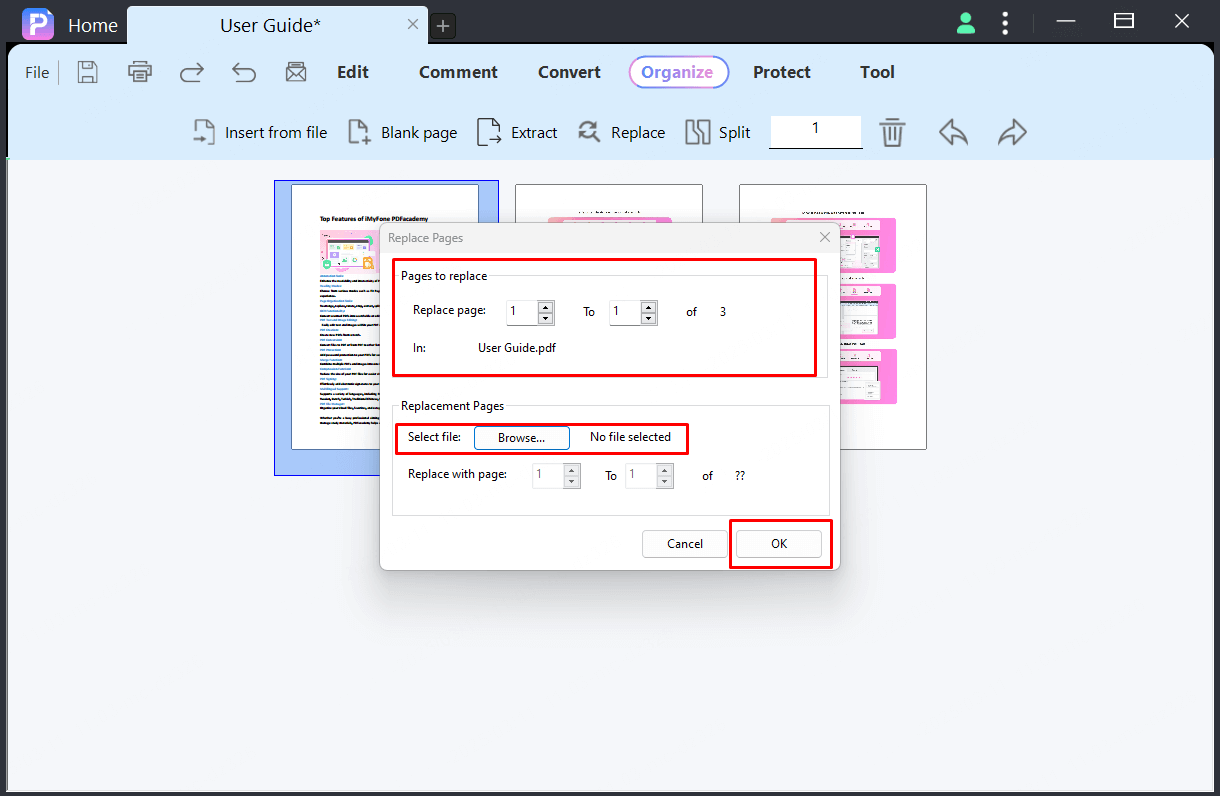
Finally, click "OK" to start the replacement.
Extract pages from PDF
Set the page range to the extract you want, and the extracted pages will be created as a new PDF file and opened as a new untitled memory PDF document in PDFacademy automatically.
Here are the specific steps:
1. Click the "Organize" tab.
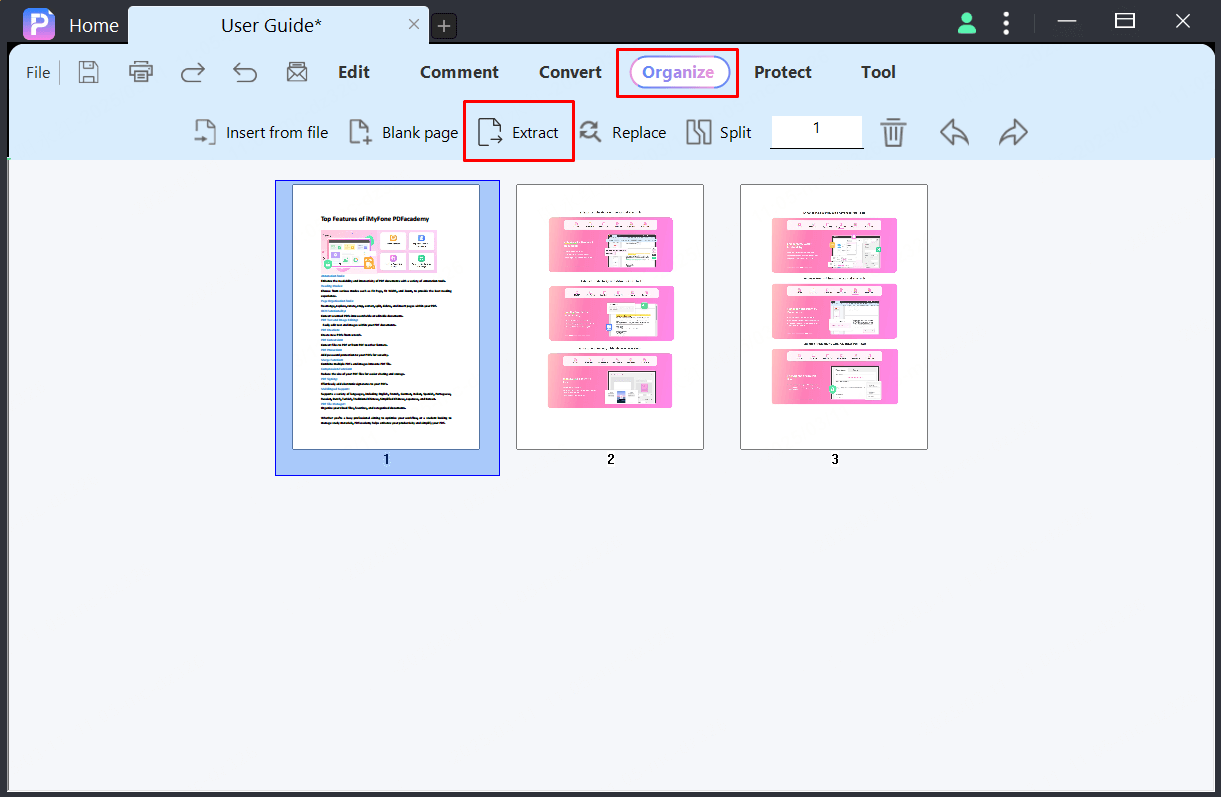
2.Select the "Extract" button and set the page range as you want to extract in the “Extract Pages” dialog box.
Alternatively, press the Ctrl key, and click the page thumbnails and then click the "Extract" button. Click "OK" button.
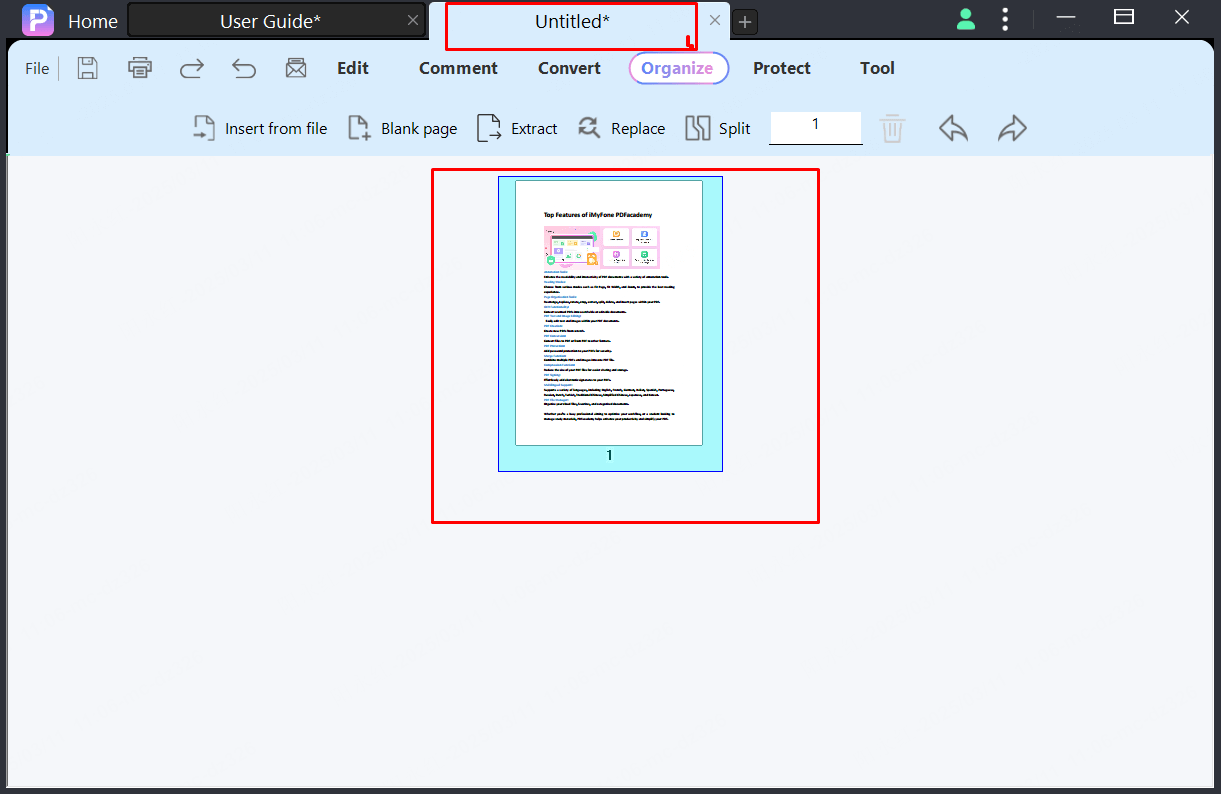
3. Click the "Save" button to save it as a new PDF on your computer.
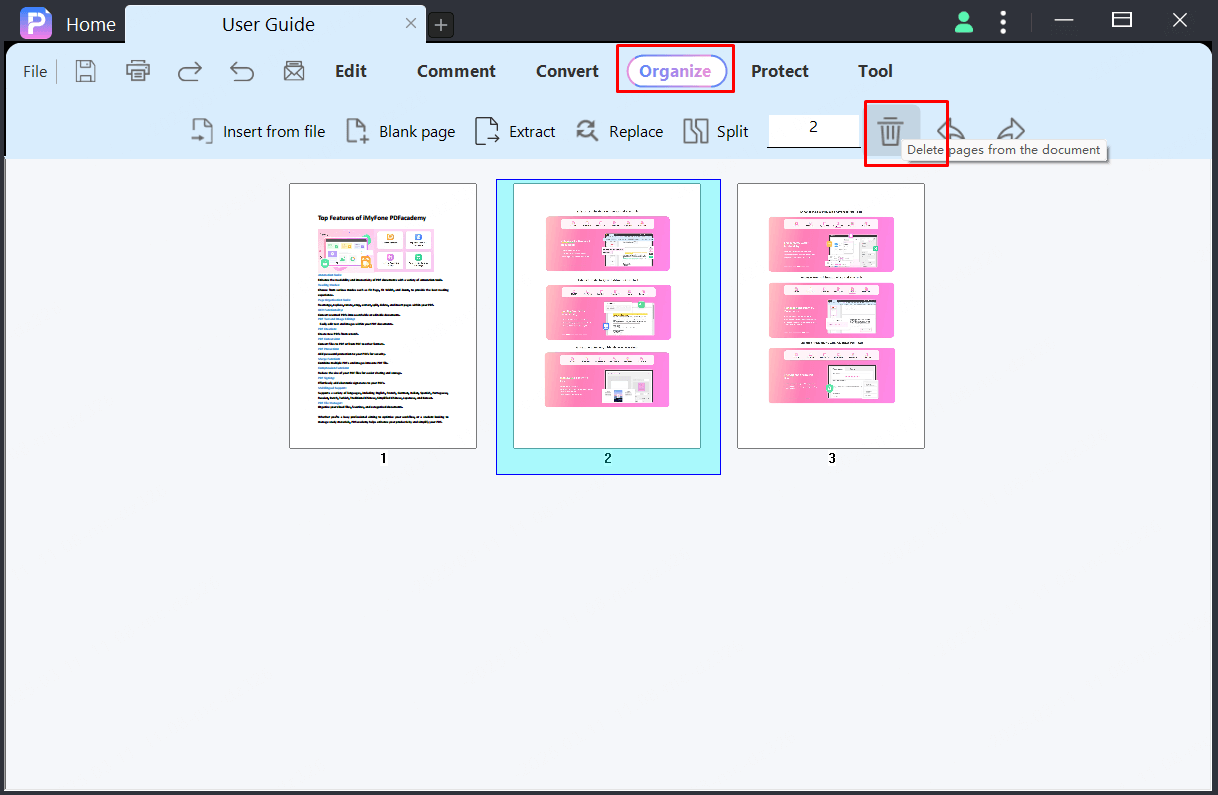
Delete pages from PDF
First, click the page you want to delete in the left-side Thumbnail Panel, or press the "Ctrl" key and select multiple pages, and then press the "Delete" key to remove the pages.
Alternatively, select the "Organize " tab, then click the Page Thumbnails (press "Ctrl" for multiple pages), and then click the "Delete" button to remove the selected pages.
Finally, click the "File" > "Save" or "Save As" button to save the changes.
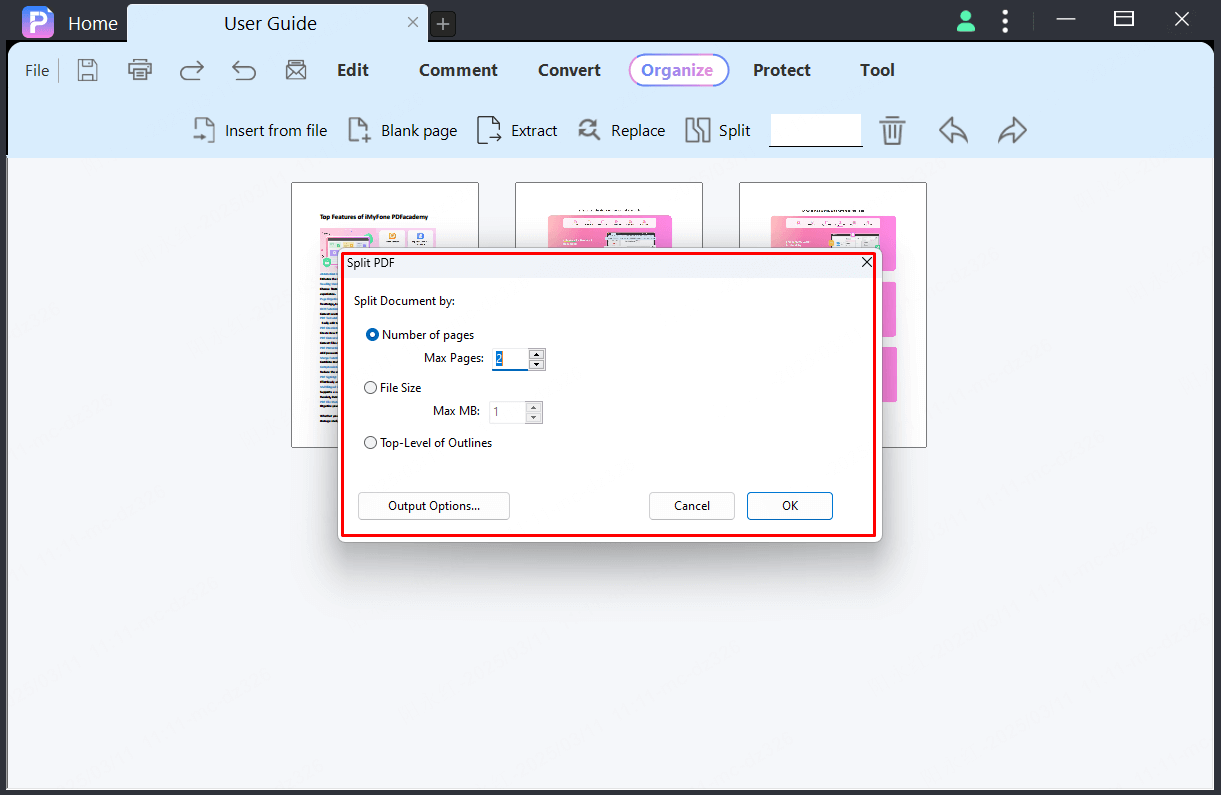
Split PDF file
Click the "Organize" > "Split" button and set the number of pages in each split file after clicking the "Split by number of pages" option.
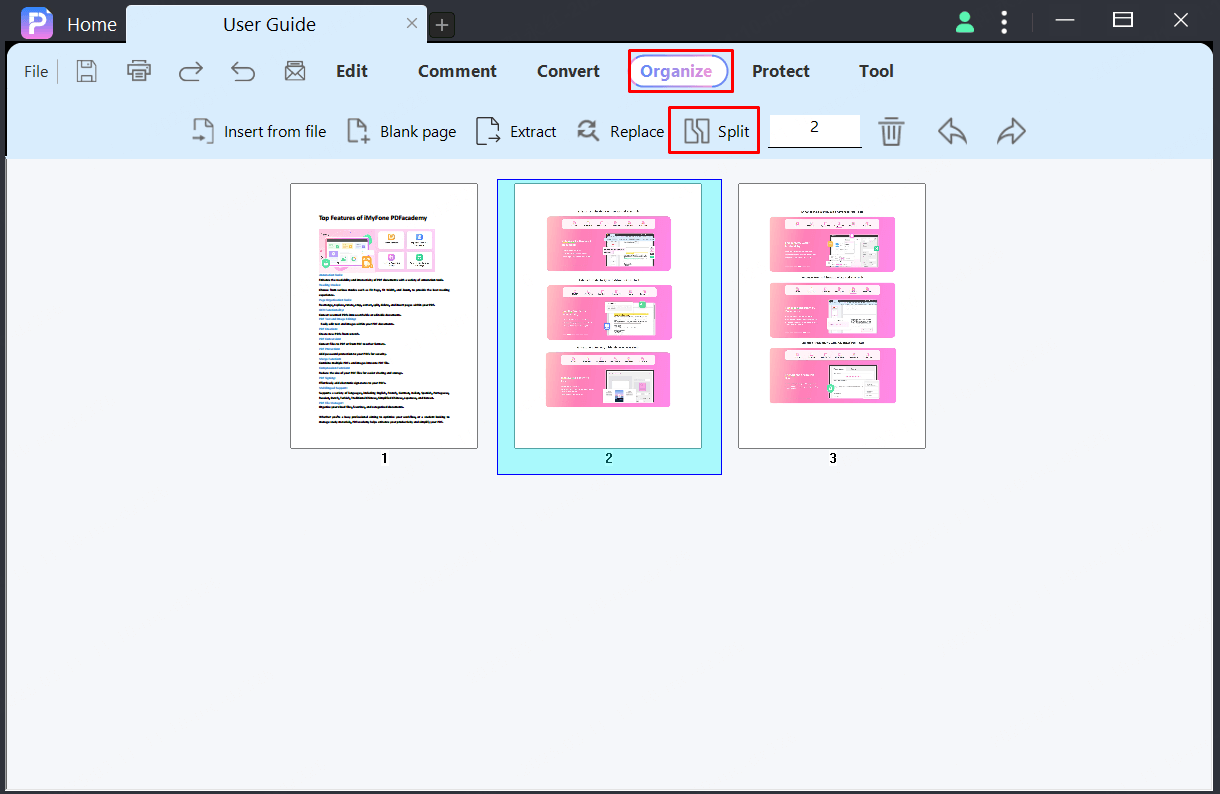
The other option allows you to split the file by max file size or its top-level bookmarks.
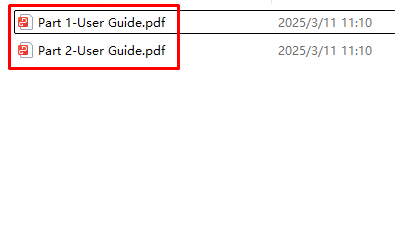
Then, click the "Output Options..." button to choose the output folder to save the split files or set the file label as destination file name.
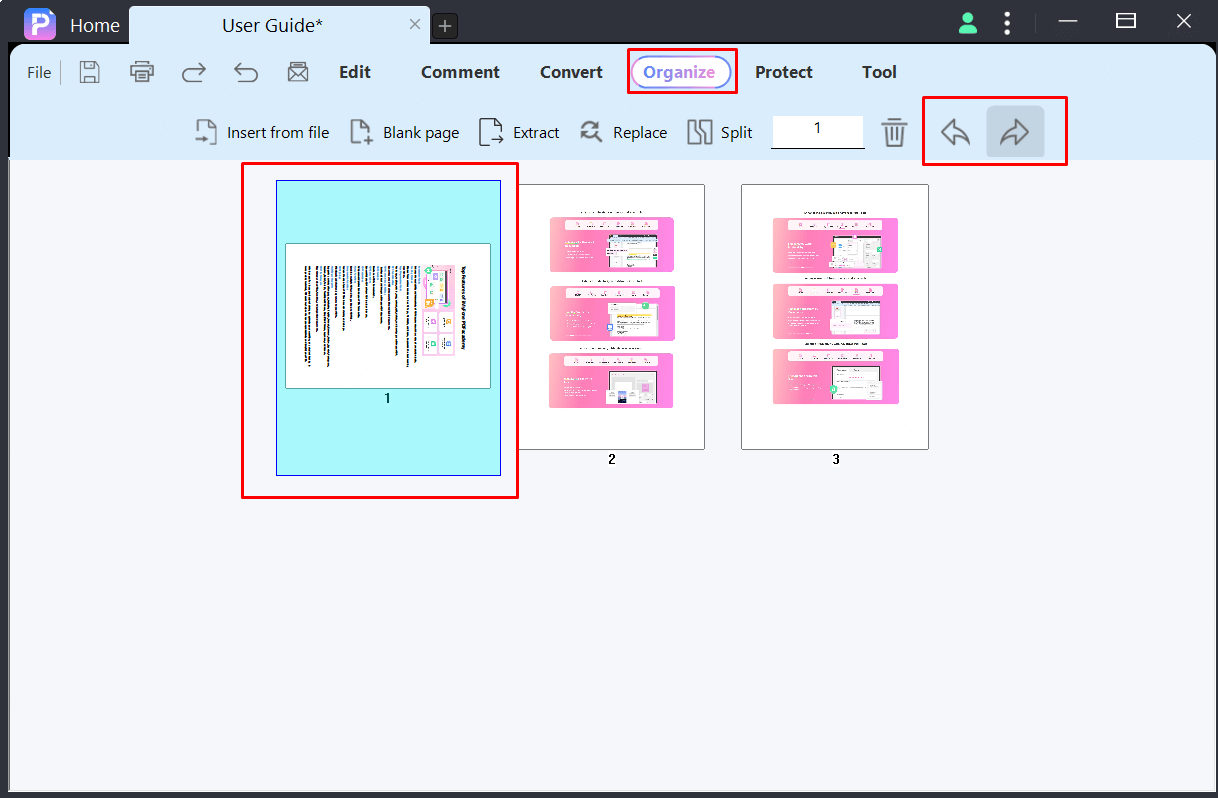
Rotate PDF
First, click the page you want to rotate in the left-side Thumbnail Panel, or press the "Ctrl" key and select multiple pages, and then right-click the thumbnail(s) to select the "Rotate" option on the drop-down menu.
Alternatively, you can click the "Organize" tab, then click the page thumbnail (press the Ctrl key for multiple selection) you want to rotate, and then you can click the button to rotate it clockwise or counterclockwise.
Finally, click the "File" > "Save" or "Save As" button to save the changes.
Batch Process
PDFacademy offers batch processing features and assists users in creating, converting, compressing, combing, splitting PDFs in a batch.
Batch Create
Step 1. Click “Create PDF” button on Common Tools area of Recent List Page.
Step 2. Click “Add Files” button to add source files, select the “Create Mode”, then set the output folder if need, finally click “Start” to start the batch process.
Batch Convert
PDFacademy allows users convert PDF to other format document such as MS Word(.docx), MS Excel(.xlsx), MS PowerPoint(.pptx), and Images files (png, jpg, jpeg, tiff, bmp).
Step 1. Click “Convert PDF” button on Common Tools area of Recent List Page.
Step 2. Click “Add Files” button to add pdf files and select the “Output format”.
Step 3. Set the output folder if need, and last click “Start” to start the batch process.
Batch Numbering
Step 1. Select “Edit” tab on main tool panel, then select “Bates Numbering > Add Bates Numbering” option.
Step 2. Fill the settings according to your preferences and click “Apply to multiple” button.
You can set the following parameters:
Position: Choose from the six different options available on Layout area.
Start Number: Insert a number from where you want to start Bates numbering.
Prefix: Include prefix if you want to add any.
Suffix: Include suffix, if needed.
Font Style: Select font styles from many available options, ranging from Arial and Microsoft YaHei to more. You can also underline your text or change font color.
Font Size: Choose from the different font size options available.
Have you already created a Bates numbering template?
No need to reset all the settings, choose the template by hitting the drop-down box. You can also hit the add template icon to see your current Bates numbering settings as a template.
Step 3. Select PDF files and set the output folder, click “Start” to apply Bates to PDF files.
Batch Watermark
Step 1. Select “Edit” tab on main tool panel, then select “Watermark > Add” option.
Step 2. Now, fill the settings according to your preferences and click “Apply to multiple” button.
Step 3. Select PDF files and set the output folder, click “Start” to apply Bates to PDF files.
Batch Compress
You can follow these steps to compress a PDF file and reduce its size using PDFacademy:
Step 1. Click “Compress” button on “Common Tool” area of Recent List Page.
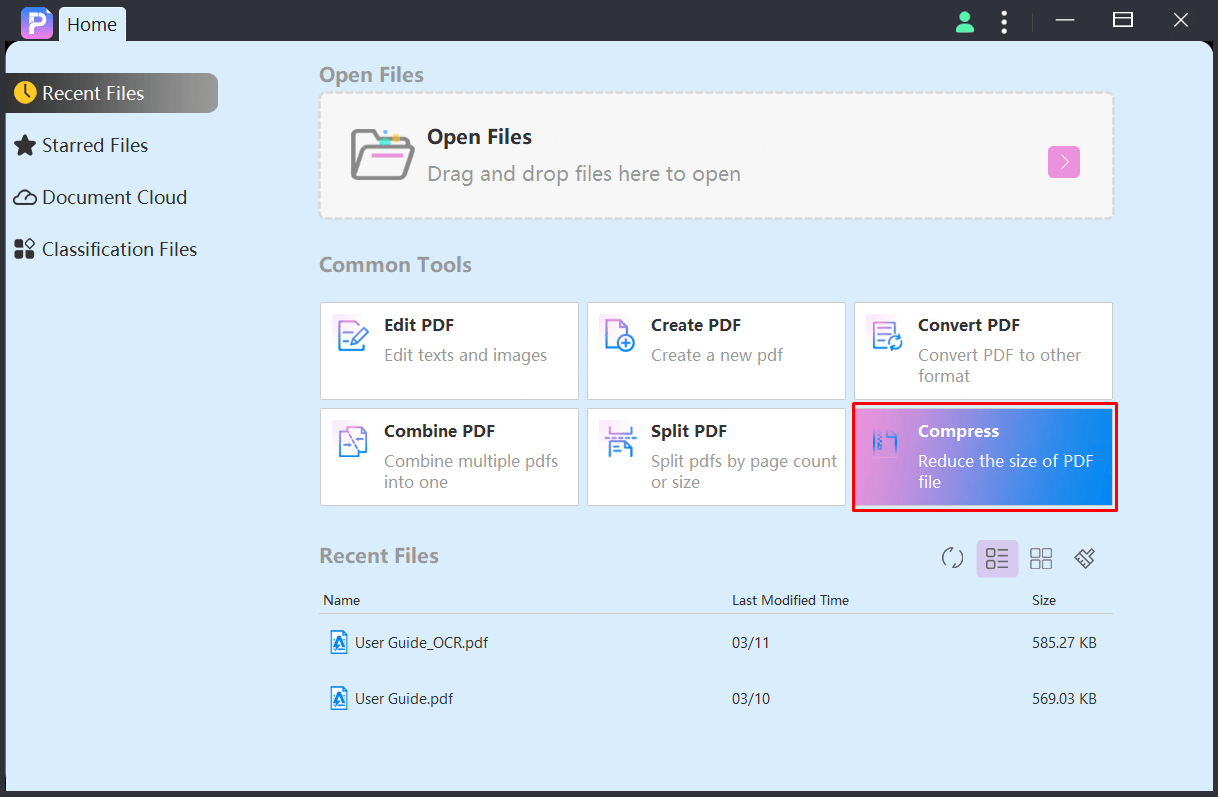
Step 2&3. Select pdf files and compress quality.
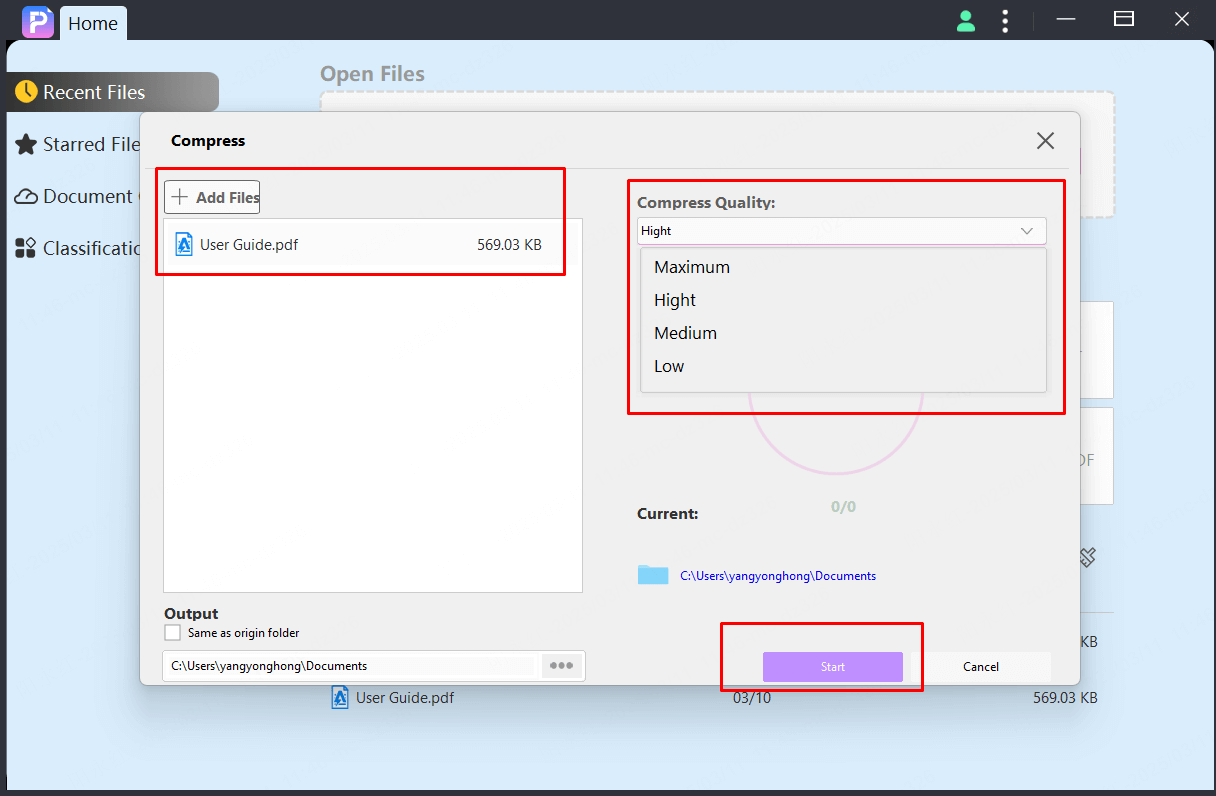
Step 4. Click “Start” to compress your PDFs.

Batch Combine
PDFacademy allows you to merge multiple PDF files or images into a single PDF document.
Step 1. Click “Combine PDF” button on Common Tools area of Recent List Page.
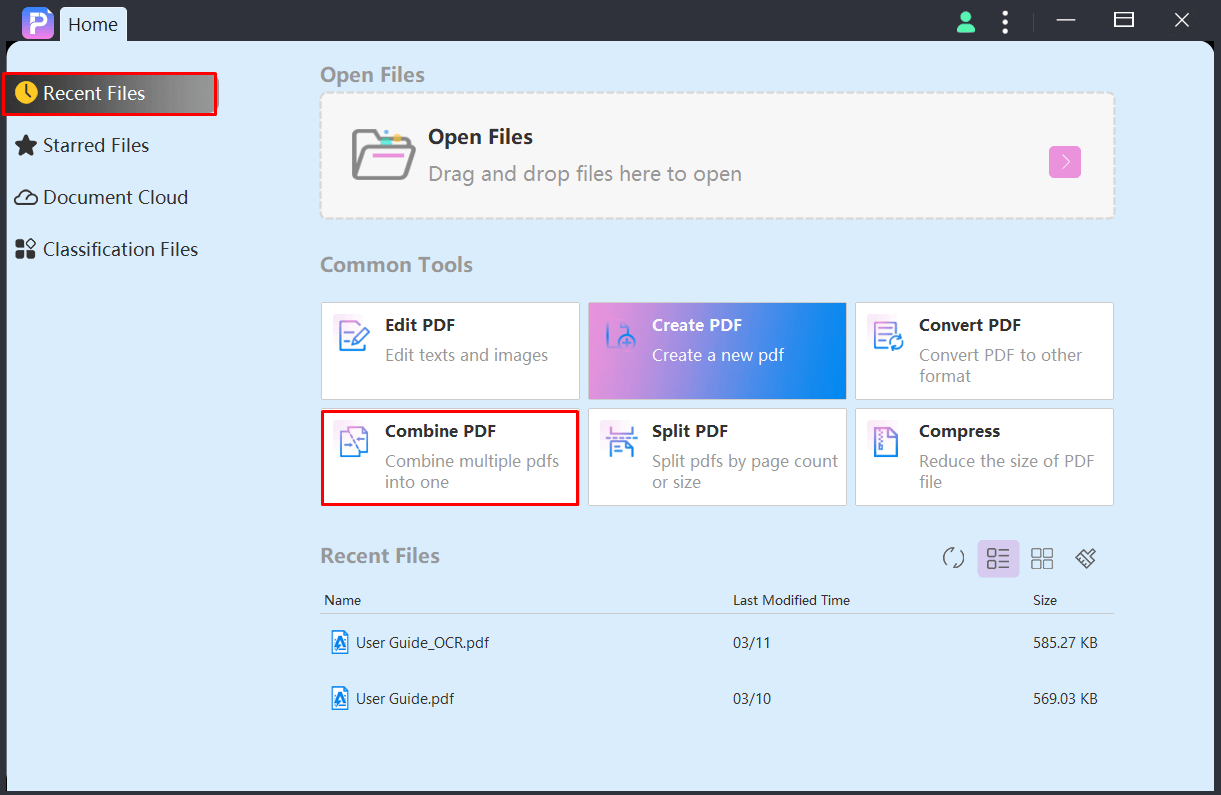
Step 2. Click “Add Files” button to add PDF files and set output folder.

Step 3. Click “Start” to combine your pdf files.
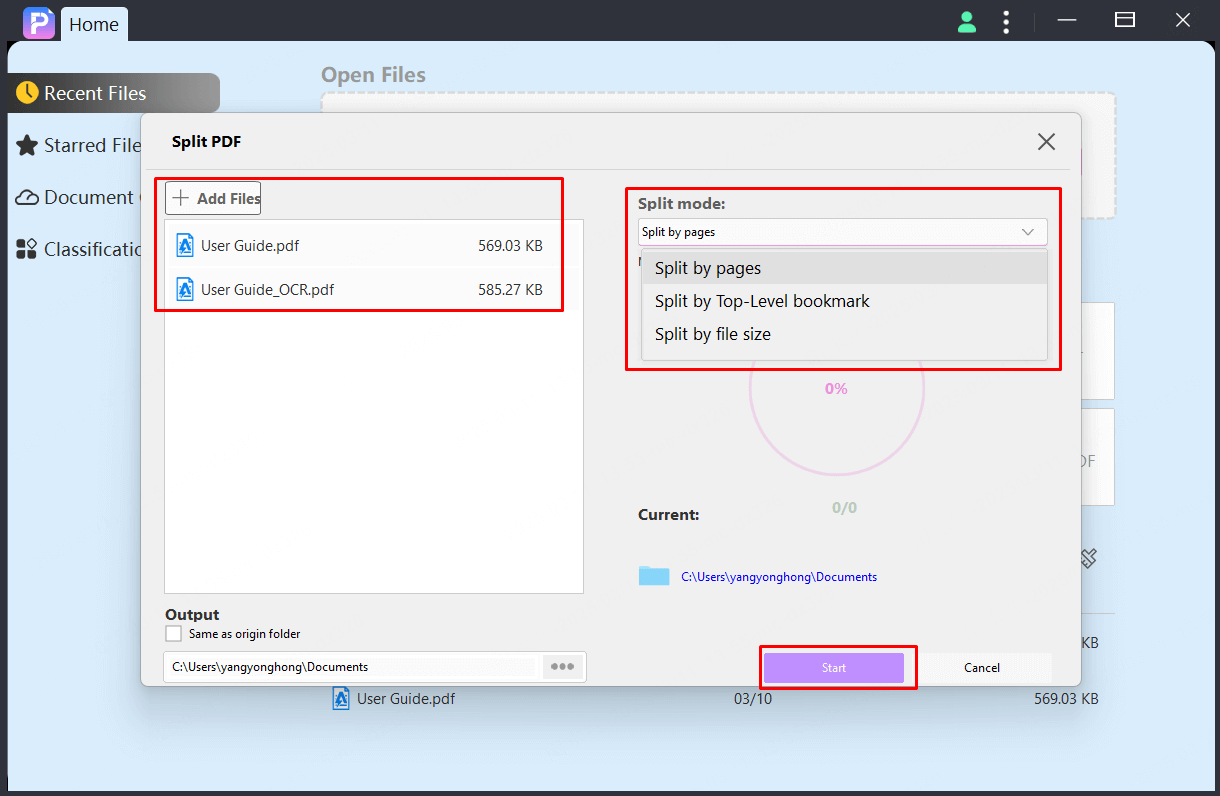
Batch Split
You can split pdf files by Page Number, Top-Level Bookmarks and File Size (MB) on PDFacademy.
Step 1. Click “Split PDF” button on Common Tools area of Recent List Page.
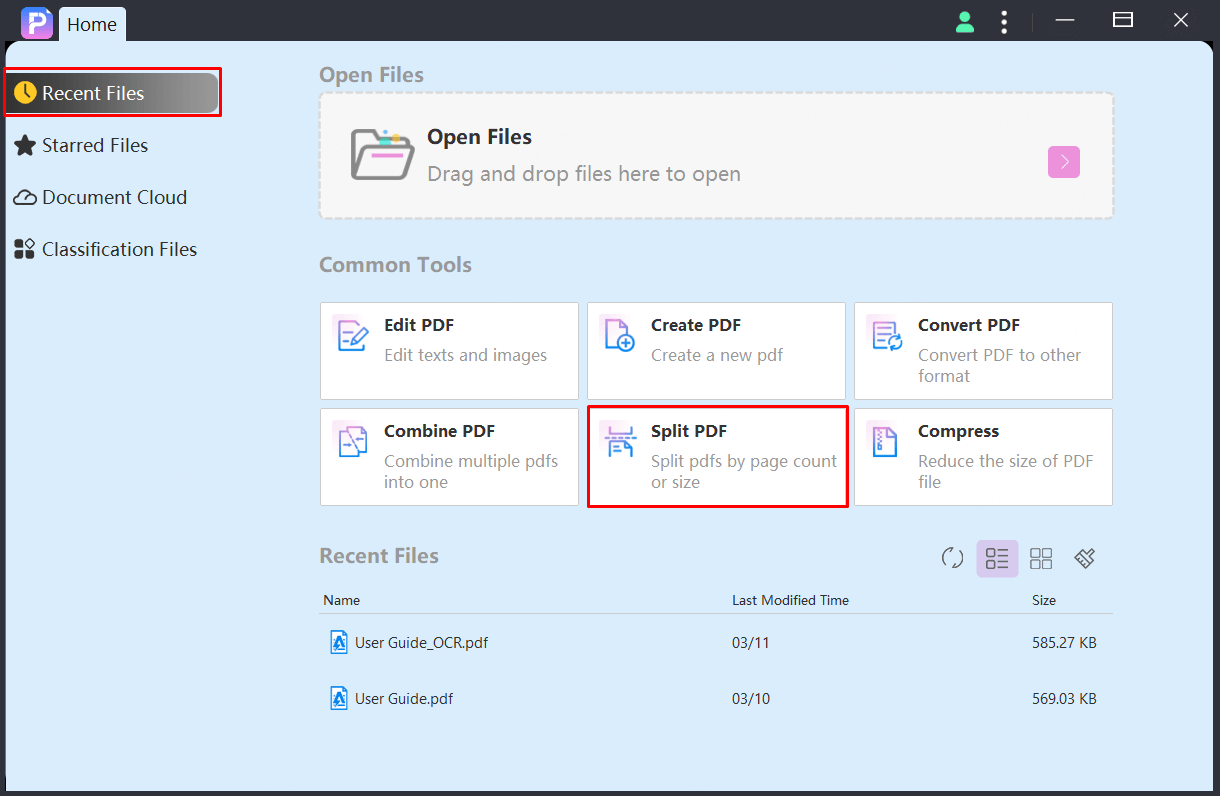
Step 2. Click “Add Fiels” to add files and select the split mode on “Split Mode” area, then select the output folder, click “Start” to split the pdf files.
Password Protect PDF
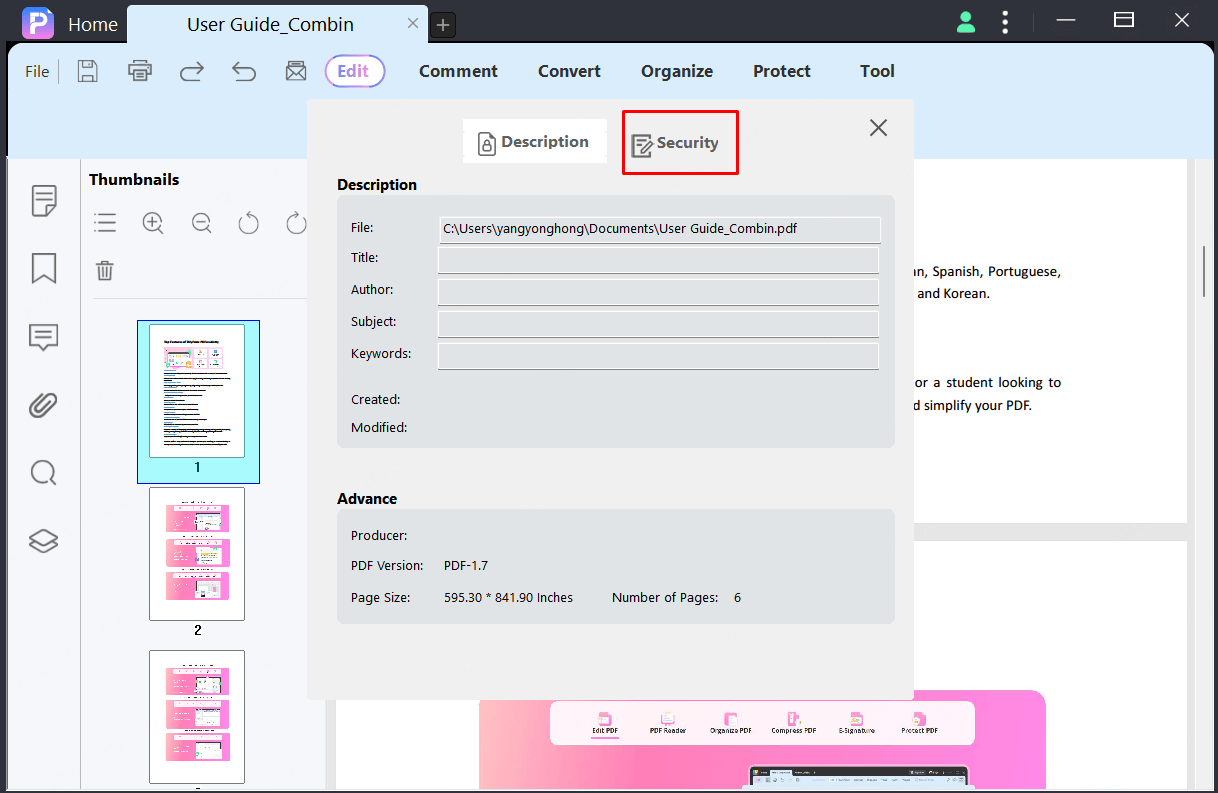
Check PDF permissions
To review the permissions of a pdf file, click the "File" > "Properties" > "Security" button.

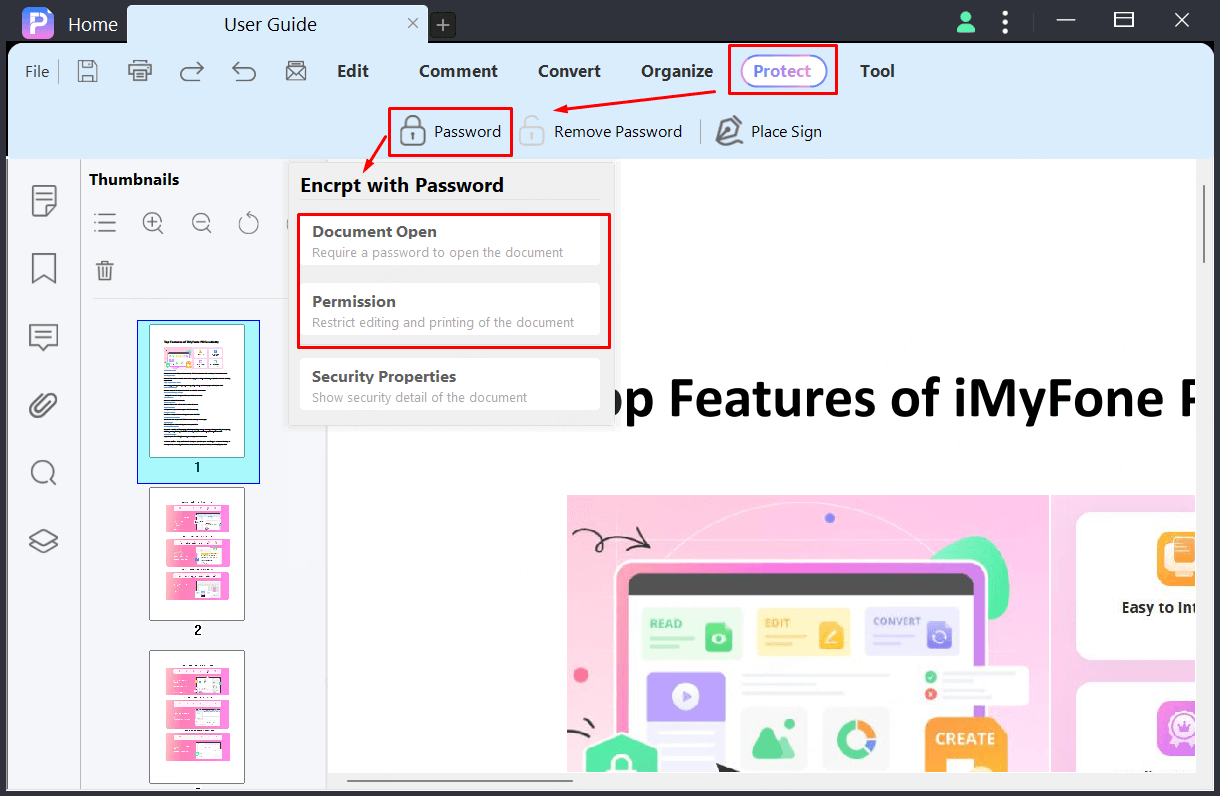
[Add open/permission password]
You can add a password to a PDF document to limit access and restrict user permissions such as opening, printing, copying, and editing.
Two kinds of passwords could be applied to a PDF file:
If the “Open Password” is set, anyone who tries to open the PDF file must input the password.
If the “Permission Password” is set, anyone who wants to change the restrictions must input the Permission Password.
If a PDF is secured with both Open Password and Permission Password, it can be opened with either password.
Select the "Protect" tab and click the “Password” button, then select the protection type you want to apply to your PDF document.
Type your password in the given fields.
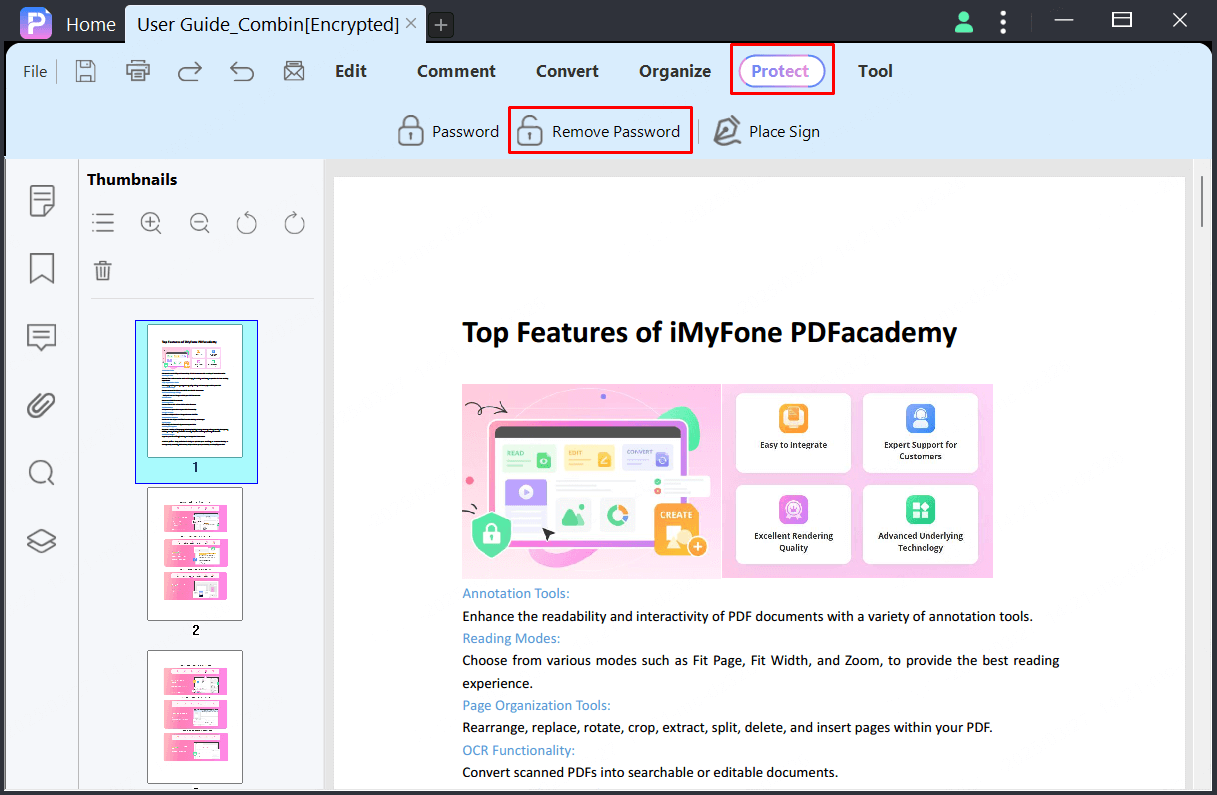
[Remove open/permission password]
To remove the password from a PDF file by PDFacademy, enter the password first.
After opening the PDF file, click the "Protect" > "Remove Password" button, input the permission password if need.
Sign PDF
PDFacademy allows you to sign PDF with a handwritten signature, including uploading an image signature, drawing a signature, and typing a handwritten signature.
3 steps to sign PDF on PDFacademy:
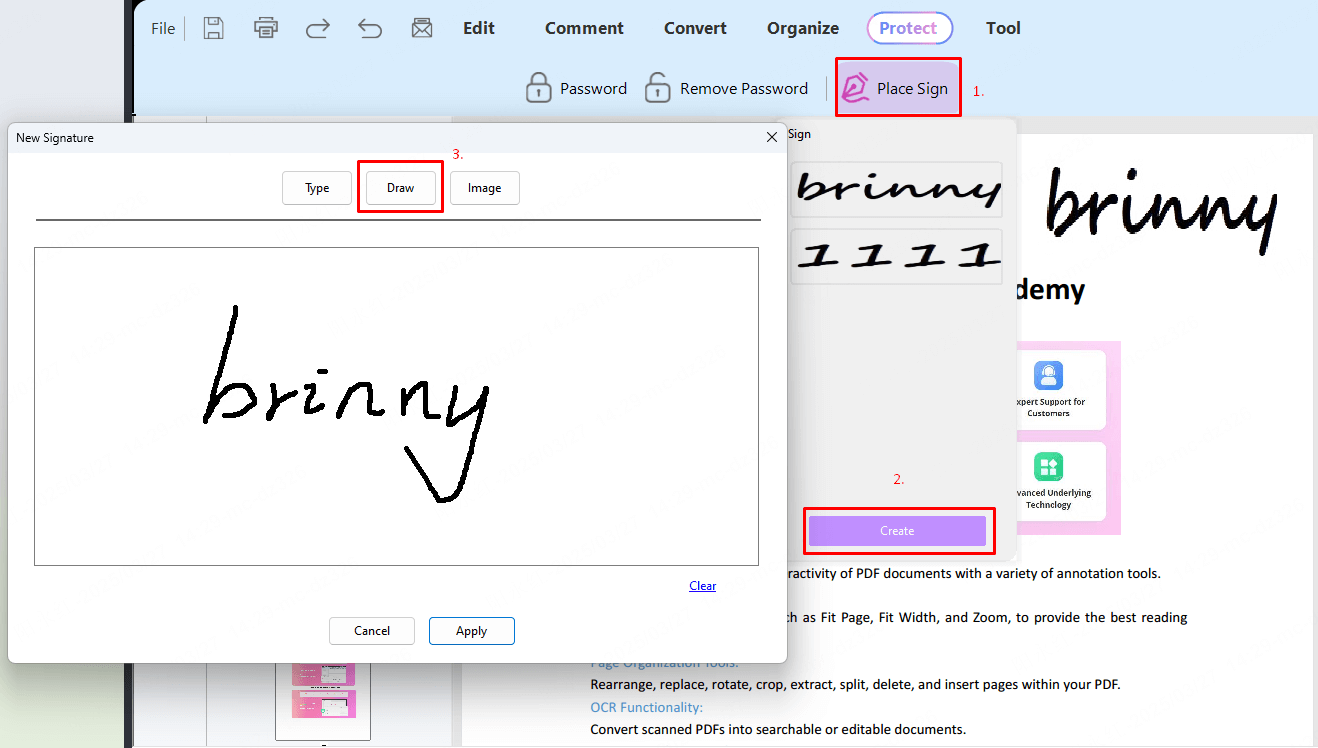
Step 1. Click the "Protect" > "Place Sign" button.
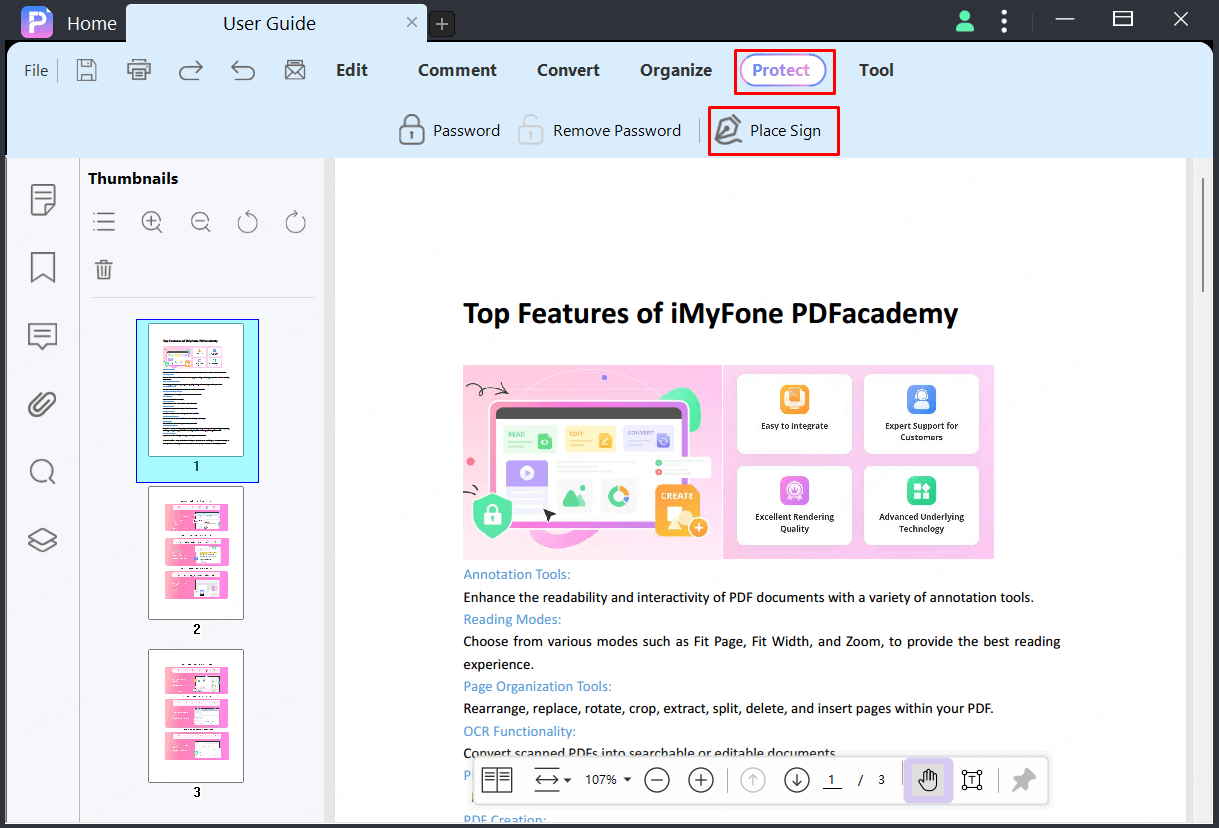
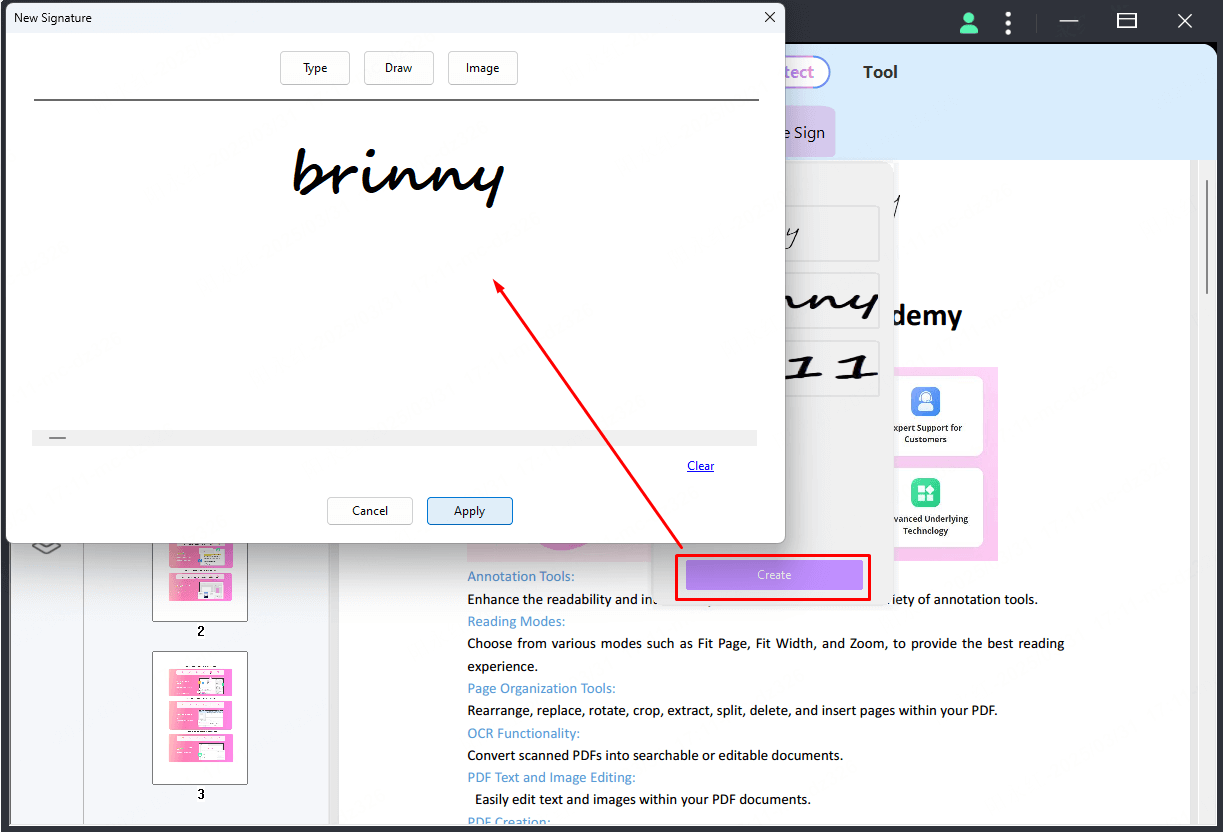
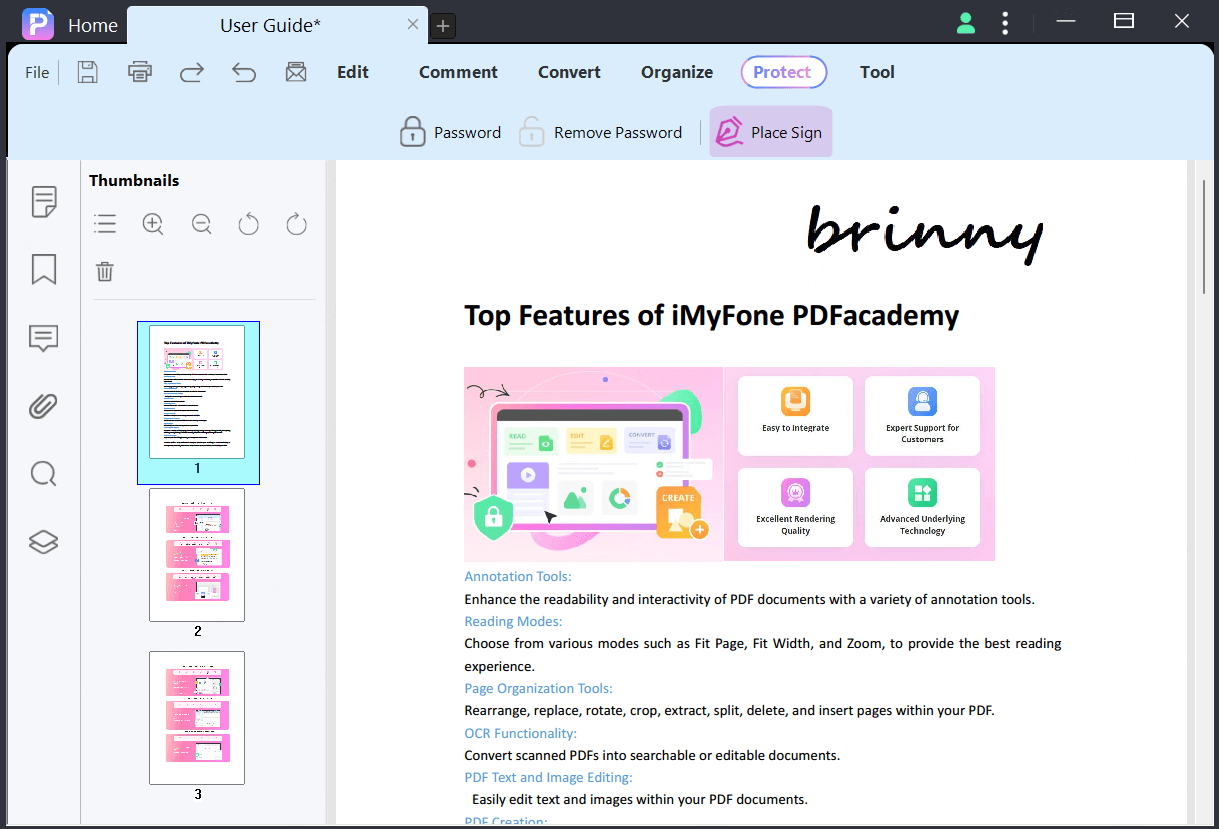
Step 2. Click on the "Create" button to create your handwritten signature or select a exist signature.
Step 3. Click the place where you want to place the signature.
Create handwritten signature
There are three options for adding a handwritten signature, including "Type", "Draw", and "Image".
Click the "Type" button, and you can enter your signature to create your handwritten signature.
Click the "Draw" tab, and you can draw your name directly. Also, you can select the color of the signature as you like.
Tap on the "Image" tab, click "Choose Image" to create an image signature, and then click the "Apply" button.
Cloud Service
The Cloud Service of iMyFone PDFacademy aims to help you synchronize your important PDF files on multiple devices. To know more about what this cloud-based storage offers to its users, do read below:
1. Fast file accessibility: You can upload PDF documents to the cloud at any device, with the service available at all times. The documents uploaded on AmindCloud can be accessed directly at any device.
2. Easy file synchronization: Files that are edited on any device are synchronized on the other device which PDFacademy supported and can be accessible.
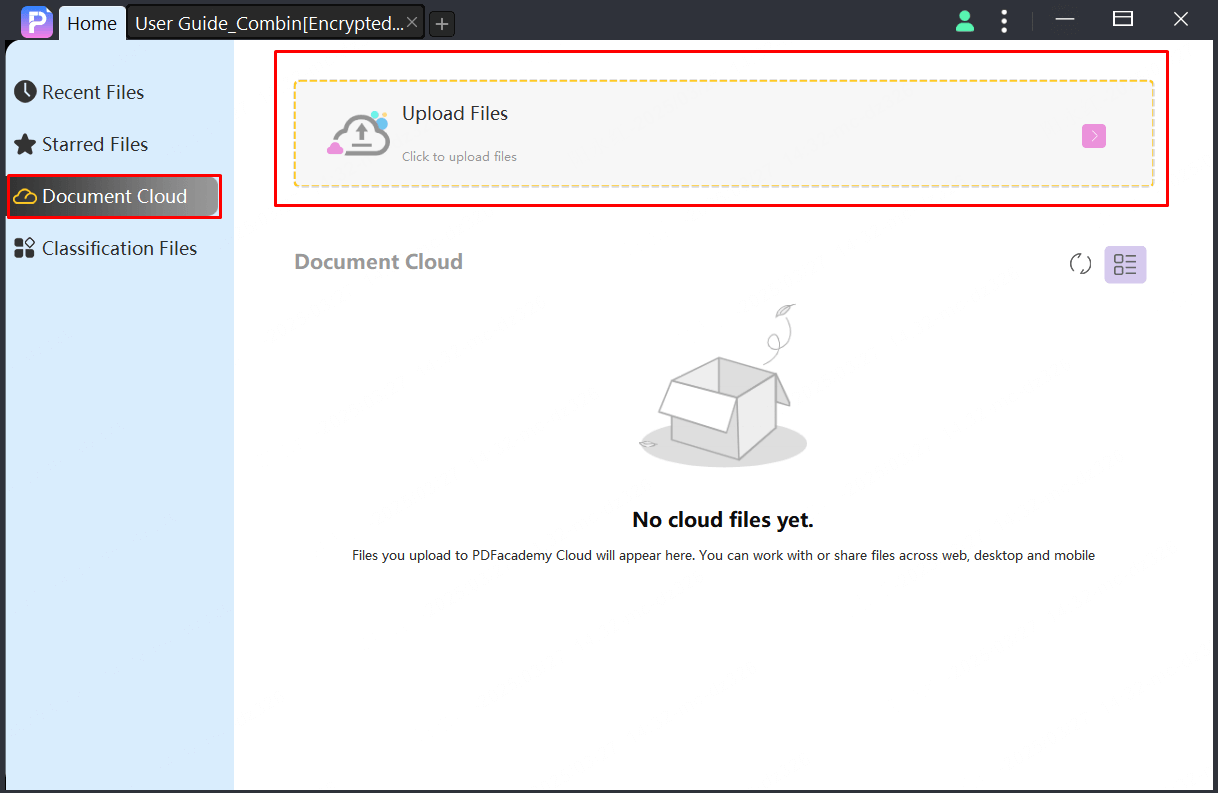
Upload PDF Documents to the Cloud
Launch PDFacademy and choose "Document Cloud" option on the left panel, and then click the "Upload File" button.
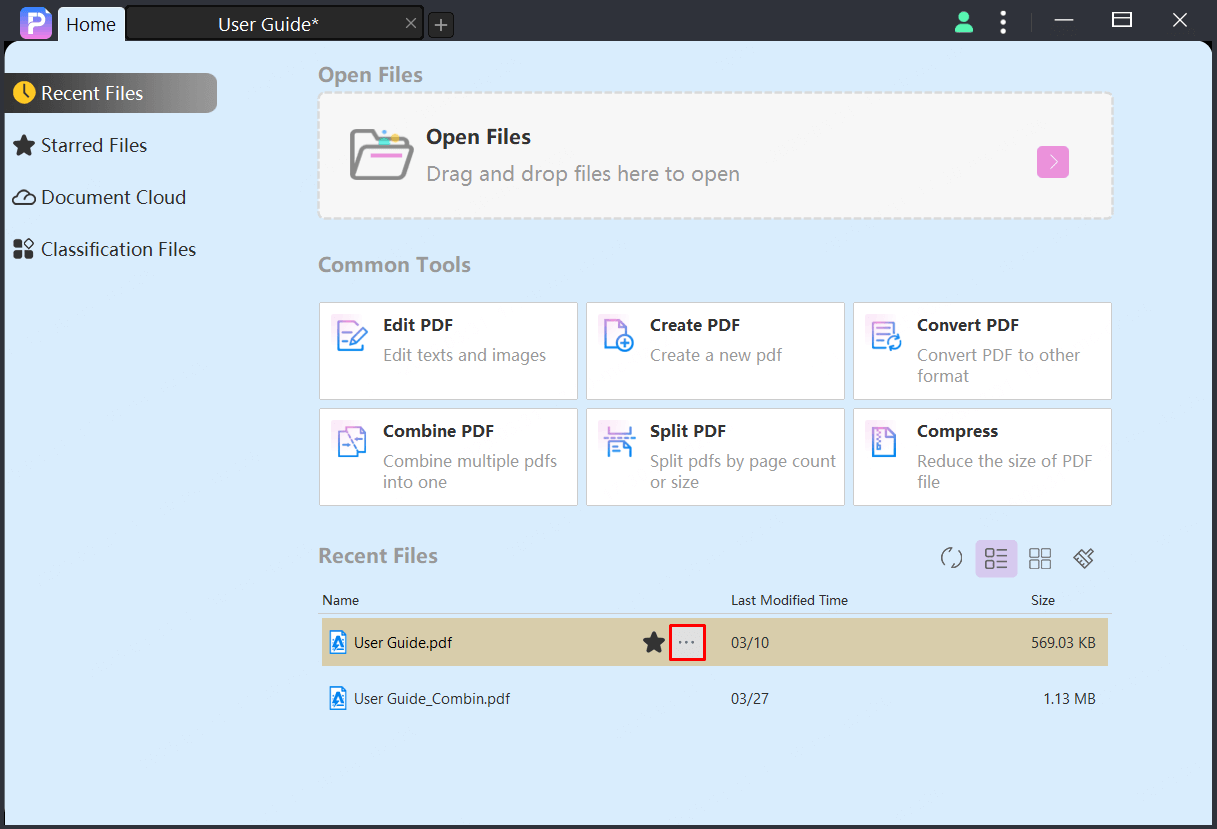
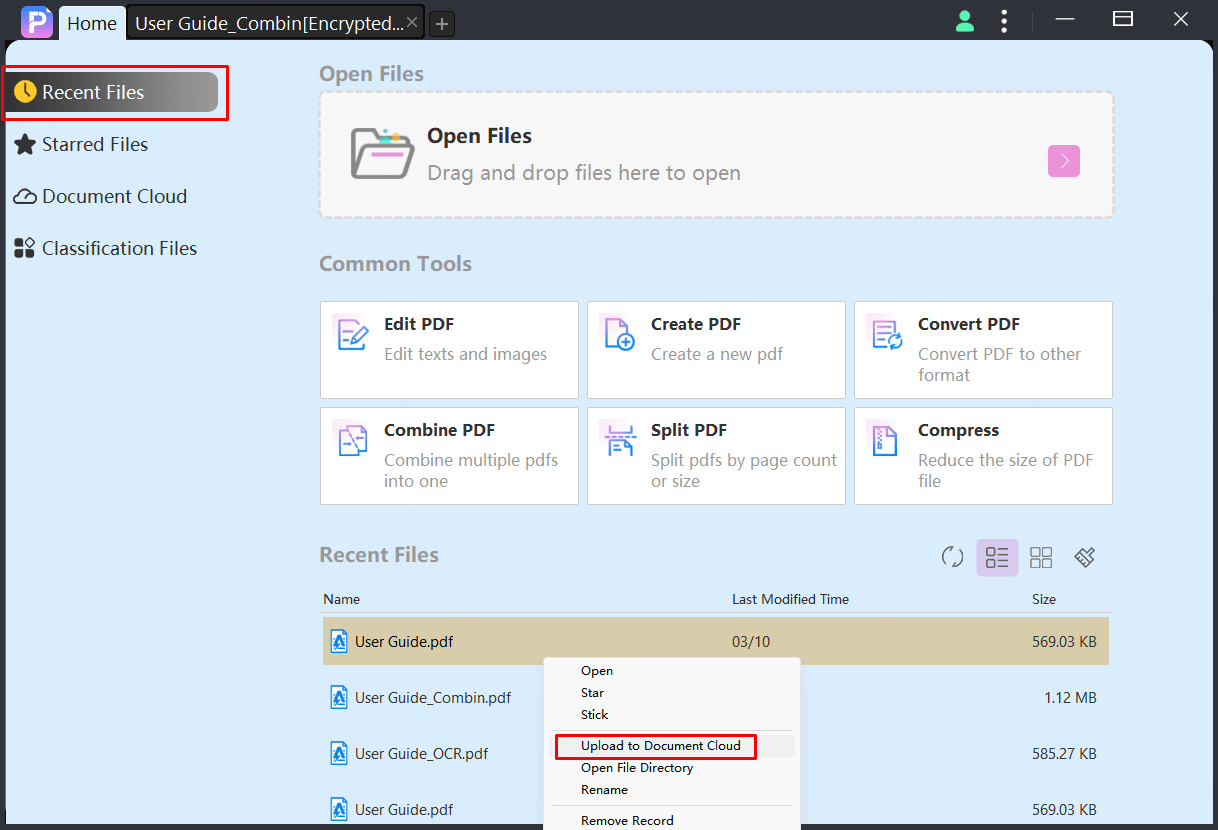
Upload Files from the Recent List
You can also upload PDFs from the "Recent Files" list on the left panel.
Move your mouse overing the file item which you want to upload, and click “Three dots” button, then select the option of "Upload to Document Cloud" from the drop-down menu to upload the file to the Cloud.
Manage Documents in the Cloud
Move your mouse over the file item, click the "Three dots" button, and you can manage the documents in the cloud service.