User Guide of iMyFone TunesMate
Transferring media files between iOS devices and iTunes/computer is extremely easy with iMyFone TunesMate. TunesMate lets you to transfer files conveniently with two-way transfer, and you can even rebuild the iTunes library. It supports music, playlists, movies, camera roll images, photo libraries, podcasts, and more. To correctly use the function you want, click on one of these navigation in the Content bar on the left to read the full guide!
Part 1: Transfer Videos from iPhone/iPad/iPod to Computer
iMyFone TunesMate can make it easy for users to transfer video files from iPhone,iPad or iPod to computer, including Movies, Music Videos, Home Videos, TV Shows, iTunes U and Podcasts.
Step 1: Connect Your iPhone/iPad/iPod
Launch iMyFoneTunesMate on your computer, and connect your iPhone/iPad/iPod via a USB cable.
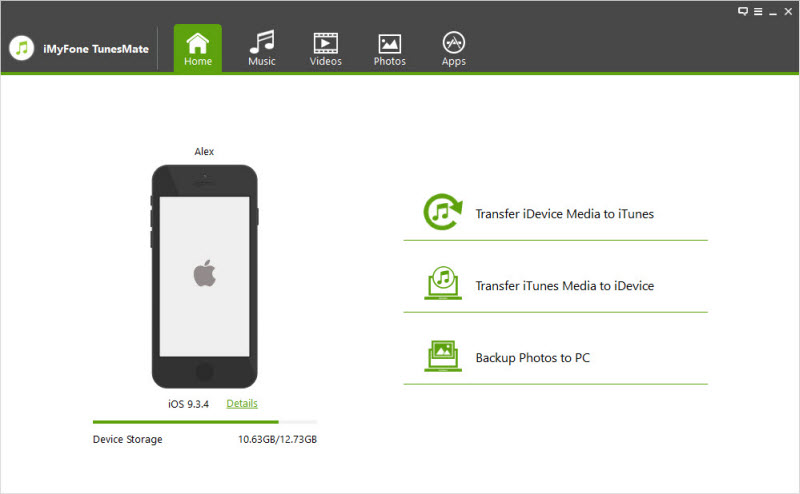
Step 2: Transfer videos from iPhone/iPad/iPod to computer
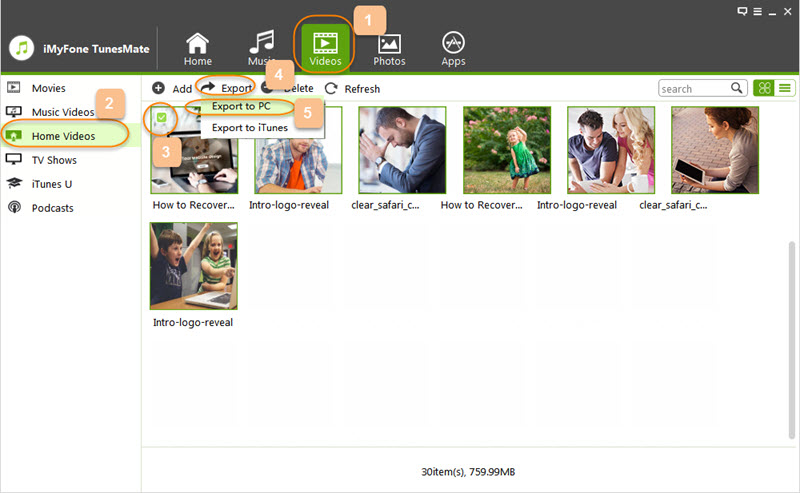
a. Click on the “Videos” icon at the top of interface. Select from the options “Movies/Music Videos/Home Videos/TV Shows/iTunes U/Podcasts” at the left sidebar to transfer. Movies option would be selected by default.
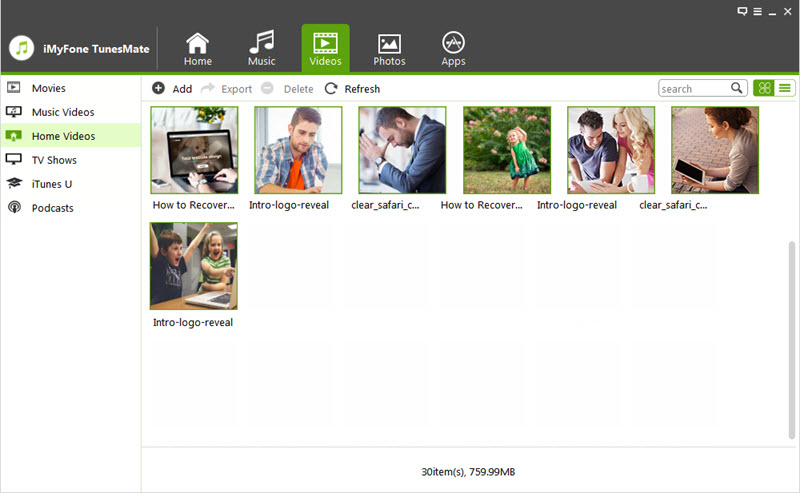
b. Check the videos you want to transfer and click “Export > Export to PC” from the top menu to transfer your videos.
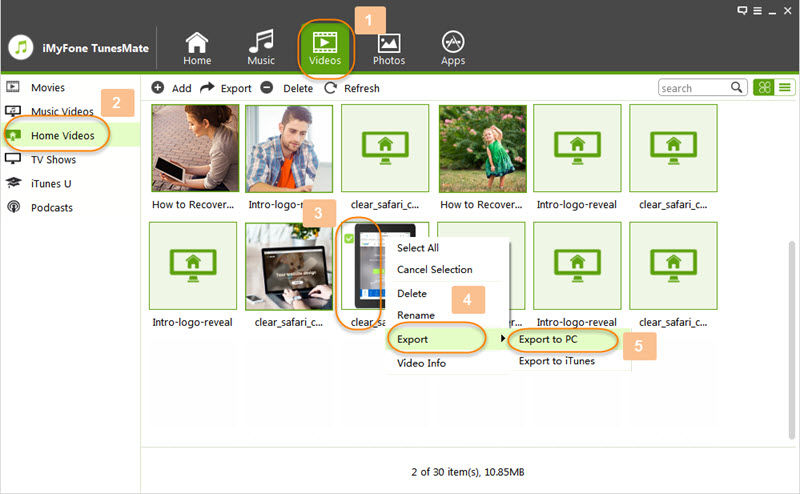
Note: You can also right-click on the selected videos and select “Export > Export to PC” from the drop-down list to continue the transfer.
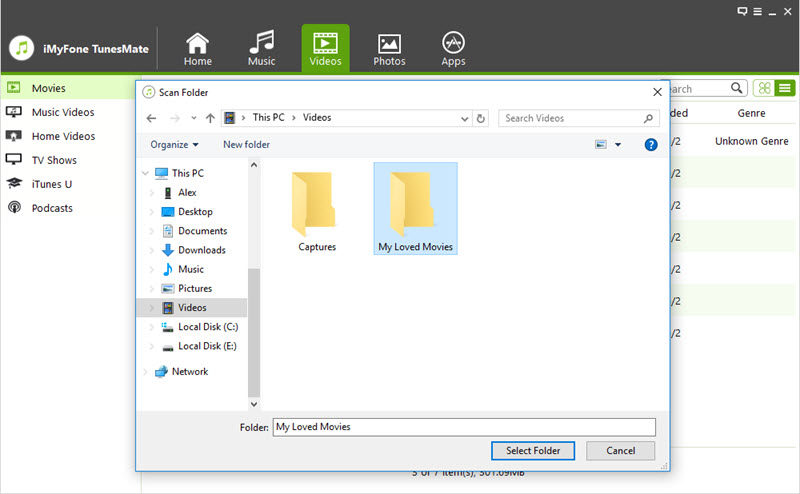
c. Browse and choose the target folder on the computer from the pop-up window. Click “Select Folder” to confirm and start the transfer process.
Step 3: Transfer successfully
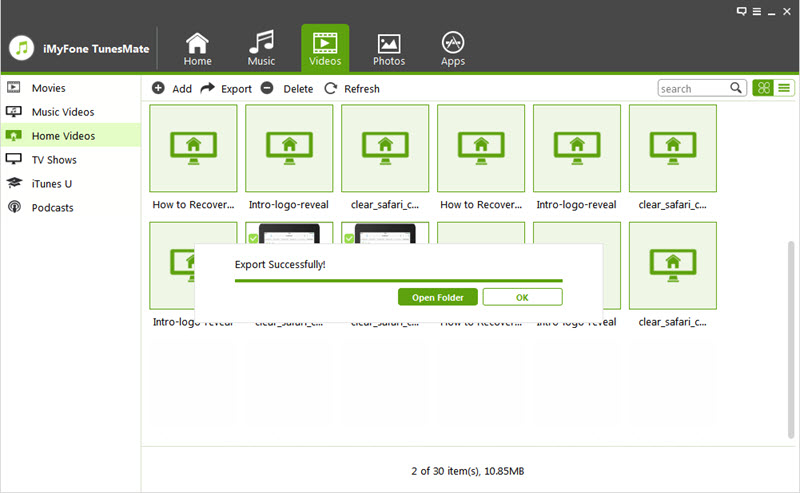
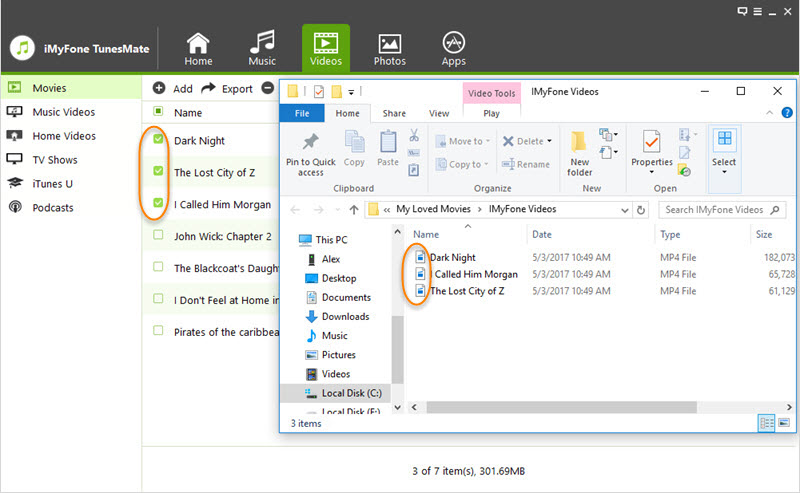
A window will pop up to tell you “Export Successfully”. Click “Open Folder” to find the transferred videos on computer or click “OK” to close the window.
Part 2: Transfer Videos from Computer to iPhone/iPad/iPod
iMyFone TunesMate enables users to add videos to your iPhone/iPad/iPod from the computer or external drive. Now you can watch your movies and videos on the go. Your favorite movies and saved videos can easily be transferred to your iDevice, including Movies, Music Videos, Home Videos, TV Shows, iTunes U and Podcasts.
Step 1: Launch iMyFoneTunesMate on your computer, and connect your iPhone/iPad/iPod with a USB cable.

Method 1: Transfer Videos Using Buttons
Step 2: Select video type which you want to add
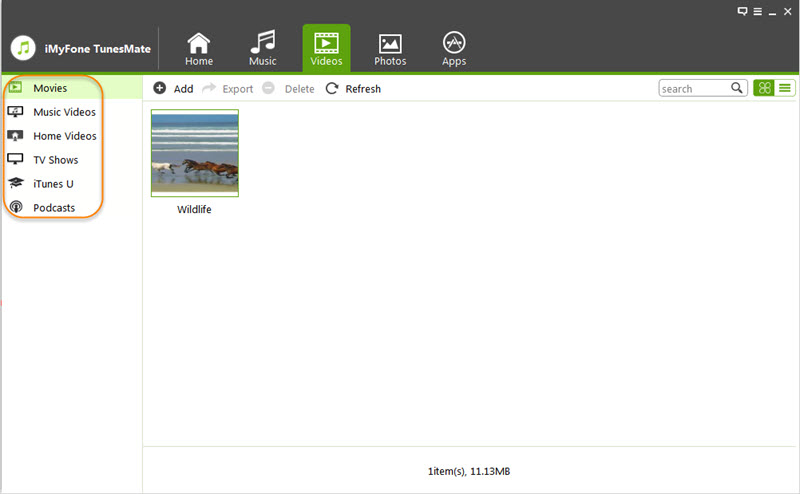
Click on “Videos” icon at the top of interface. Select from the video type at the left sidebar: Movies, Music Videos, Home Videos, TV Shows, iTunes U and Podcasts to initiate transfer. “Movies” would be selected by default.
Step 3: Select and add videos from computer to iDevice
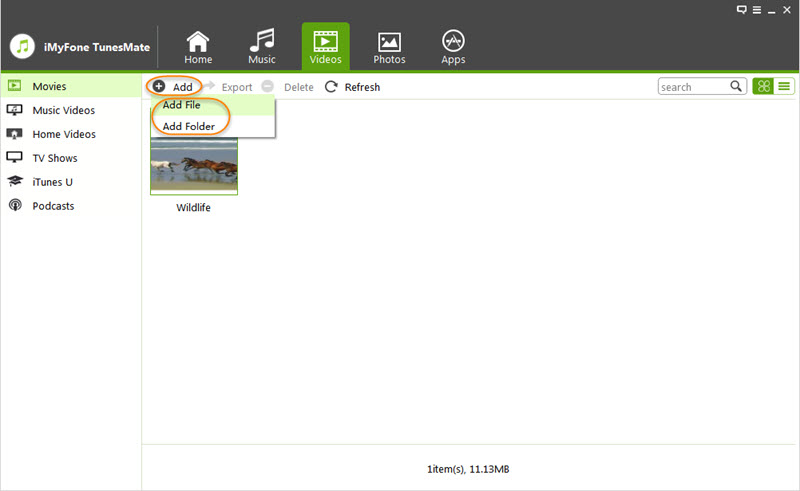
a. Click on “Add” button at the top bar and then select “Add File” or “Add Folder”.
Note: Select “Add File” if you only want to add some specific videos. You can also select multiple videos at once by holding “Ctrl” or “Shift” key when selecting. Click on “Add Folder” if you want to transfer all videos in one folder.
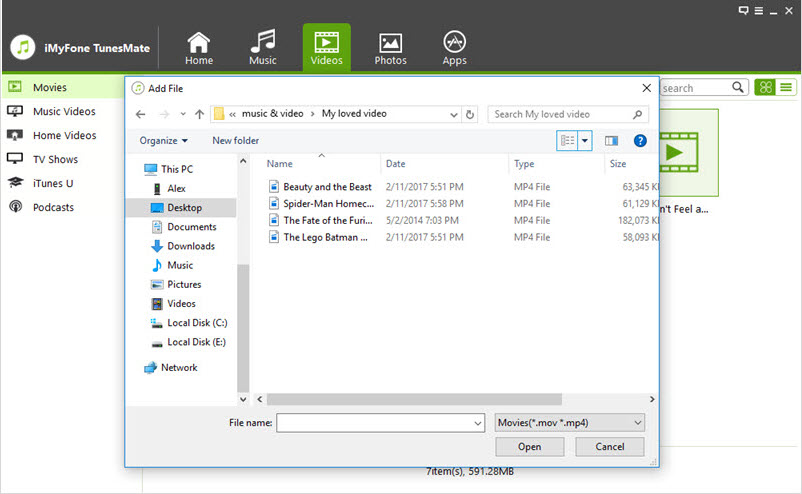
b. Browse and select the videos on your computer and click “Open” button to transfer from the pop-up window.
Method 2: Transfer Videos by Drag-and-Drop
Step 2: Find videos on your computer
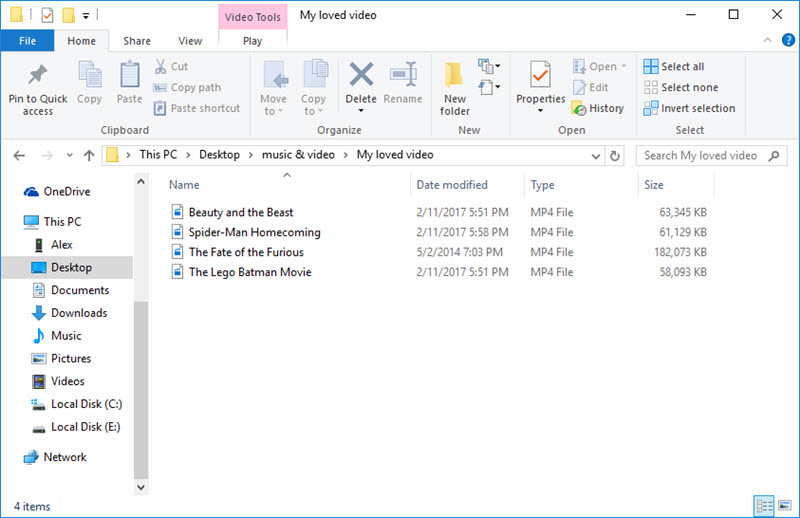
Find and open the folder where you locate videos on your computer.
Step 3: Add videos to iPhone/iPad/iPod by Drag-and-Drop
a. Click on “Videos” icon at the top of interface. Select video type from the left sidebar: Music, Videos, TV Shows, iTunes U and Podcasts, where “Movies” is selected by default.
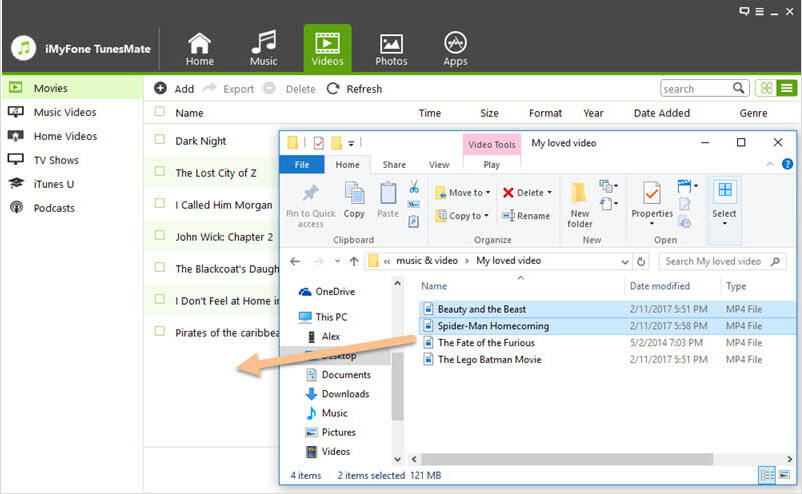
b. Select the videos from the video folder on computer. Drag and drop the selected videos from your computer folder to videos window of iMyFone TunesMate.
Part 3: Transfer Videos from iPhone/iPad/iPod to iTunes Library
iMyFone TUnesMate empowers iOS users to transfer videos to your local iTunes library from iPhone/iPad/iPod in an easy way, including Movies, Music Videos, Home Videos, TV Shows, iTunes U and Podcasts. TunesMate will detect videos library on your iDevice and in iTunes. Only the exclusive videos which are not existing in iTunes will be transferred, avoiding duplicates.
Method 1: 1-Click Transfer All Videos to iTunes Library
This method enables you to transfer all the videos or other video files in types from iPhone/iPad/iPod to iTunes library at once, including Movies, Music Videos, Home Videos, TV Shows, iTunes U and Podcasts. But you cannot selectively transfer some specific videos with this way.
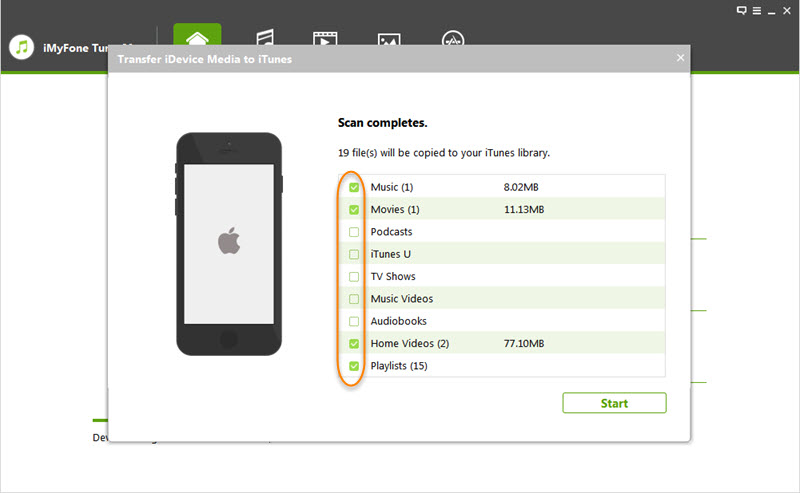
Please refer to the guide <1-Click Transfer iDevice Media to iTunes> for the detailed steps.
Method 2: Transfer Videos Selectively
Step 1: Launch iMyFoneTunesMate on your computer and connect your iPhone/iPad/iPod with a USB cable.

Step 2: Select and transfer videos from iDevice to iTunes library
a. Click on “Videos” icon on the top of interface. Select from the videos types in the left sidebar: Movies, Music Videos, Home Videos, TV Shows, iTunes U and Podcasts. “Movies” is selected by default.
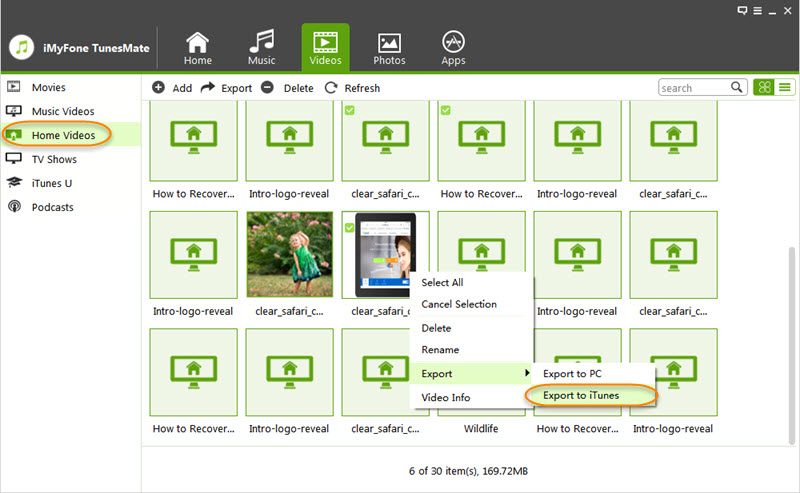
b. Select the videos you wish to transfer to your iTunes library and click “Export > Export to iTunes” at the top bar.

Note: You can also right-click on the selected video and select “Export > Export to iTunes” from the drop-down list.
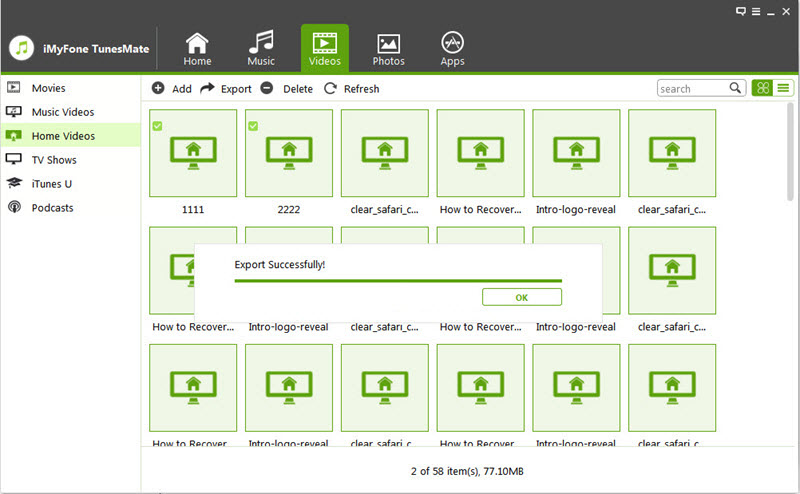
Step 3: Transfer successfully
A window will pop up and show you “Export Successfully”. Click “OK” on it to complete the transfer process.
Part 4: Transfer Videos from iTunes Library to iPhone/iPad/iPod
iMyFone TunesMate enables you to transfer videos from iTunes library to iDevice without covering any original data on device, including Movies, Music Videos, Home Videos, TV Shows, iTunes U and Podcasts. You do not need to worry about any mistaken deletion when transferring.
Please refer to the guide <1-Click Transfer iTunes Media to iDevice> for the detailed steps.
Part 5: Delete Videos on iPhone/iPad/iPod
It is very inconvenient to delete video files from iPhone/iPad/iPod one by one if you have a large video collection. iMyFone TunesMate empowers you to select and delete videos from iDevice in batch in just clicks, including Movies, Music Videos, Home Videos, TV Shows, iTunes U and Podcasts.
Step 1: Connect Your iPhone/iPad/iPod
Launch iMyFoneTunesMate on your computer, and connect your iPhone/iPad/iPod via a USB cable.

Step 2: Select and delete videos from iDevice
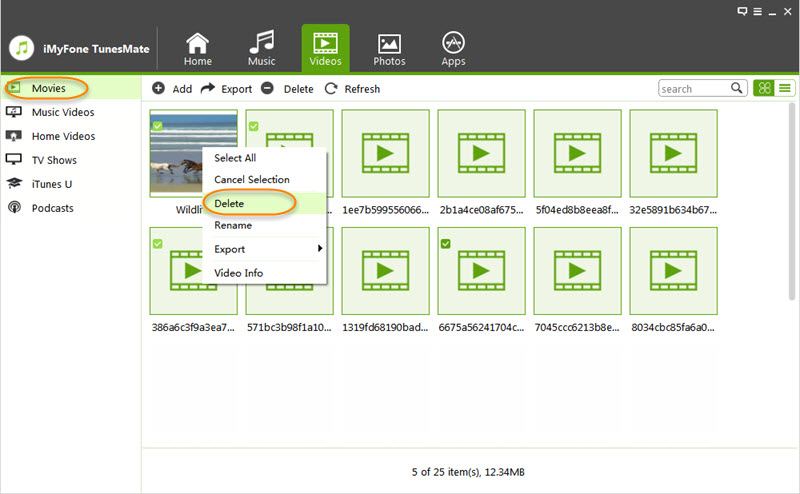
a. Click on “Videos” icon at the top of interface and you will be in the “Movies” window by default. You can also select the video types from the left sidebar: Movies, Music Videos, Home Videos, TV Shows, iTunes U and Podcasts.
b. Select the videos you want to delete, and click on “Delete” button at the top bar. A pop-up window would ask you to confirm, click “Yes” to complete the process.
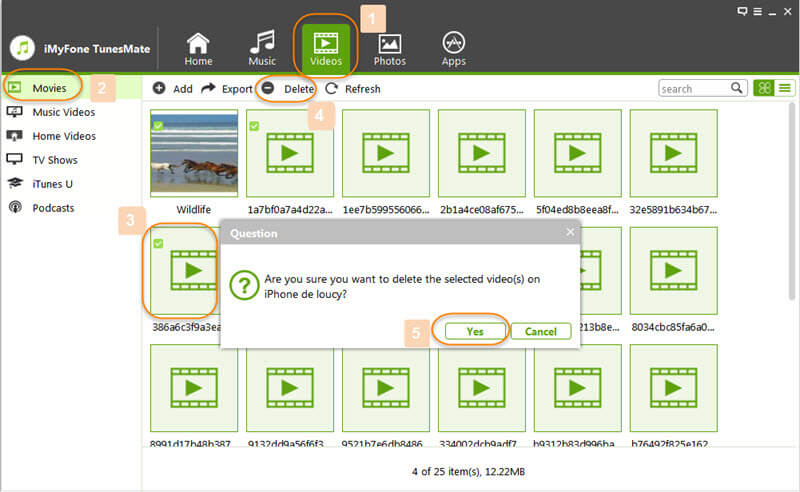
Note: You can also right-click on the selected videos, and select “Delete” from the drop-down list.
Still Need Help?
Go to Support Center >


