[2025 Updated] How to Show Hidden Files on Mac?
Category: PC Data Recovery

6 mins read
Are you struggling to find hidden files on your Mac? Don’t worry!
Whether you're a tech enthusiast, a digital organizer, or simply need to access system files for troubleshooting, this guide will walk you through the different methods to reveal hidden files and folders, helping you manage your Mac more efficiently.

In this article:
Part 1. Why Are Files Hidden on Mac?
Before diving into how to show hidden files, it's helpful to understand why files might be hidden in the first place. To prevent accidental modification or deletion, macOS hides certain files and folders that are crucial for your Mac's operation, such as system files, configuration files and cache files.
While it's generally safe to leave these files hidden, knowing how to access them can be useful for advanced tasks.
If you urgently need to locate or recover these hidden files, you can use the following methods.
Part 2. How to Show Hidden Files on Mac?
Method 1. The Best Way to Retrieve Hidden Files on Mac
The safest way to view hidden files on macOS is to use iMyFone D-Back.
It is a professional data recovery software that combines various functions and features robust file recovery and management capabilities. For example, it can scan your Mac to detect lost or hidden files and is also capable of repairing damaged files.

How to See Hidden Files on Mac with iMyFone D-Back?
Step 1. Download and install iMyFone D-Back on your device.
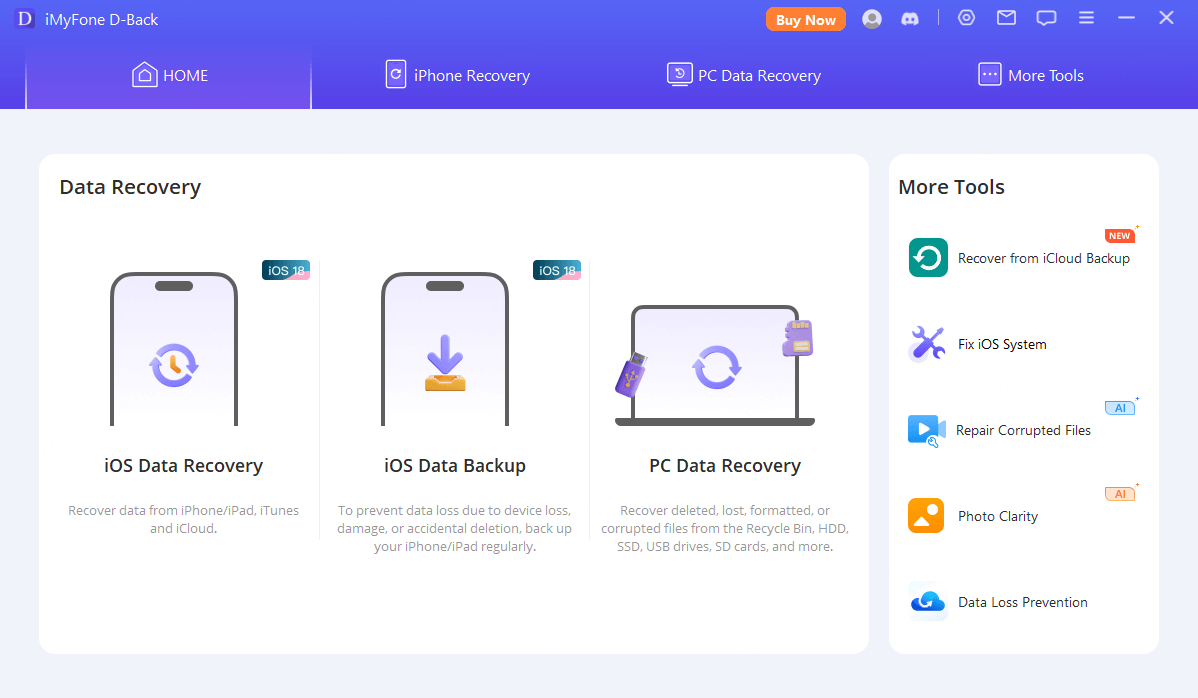
Step 2. Click on “PC Data Recovery” or "Data Recovery" on the homepage.

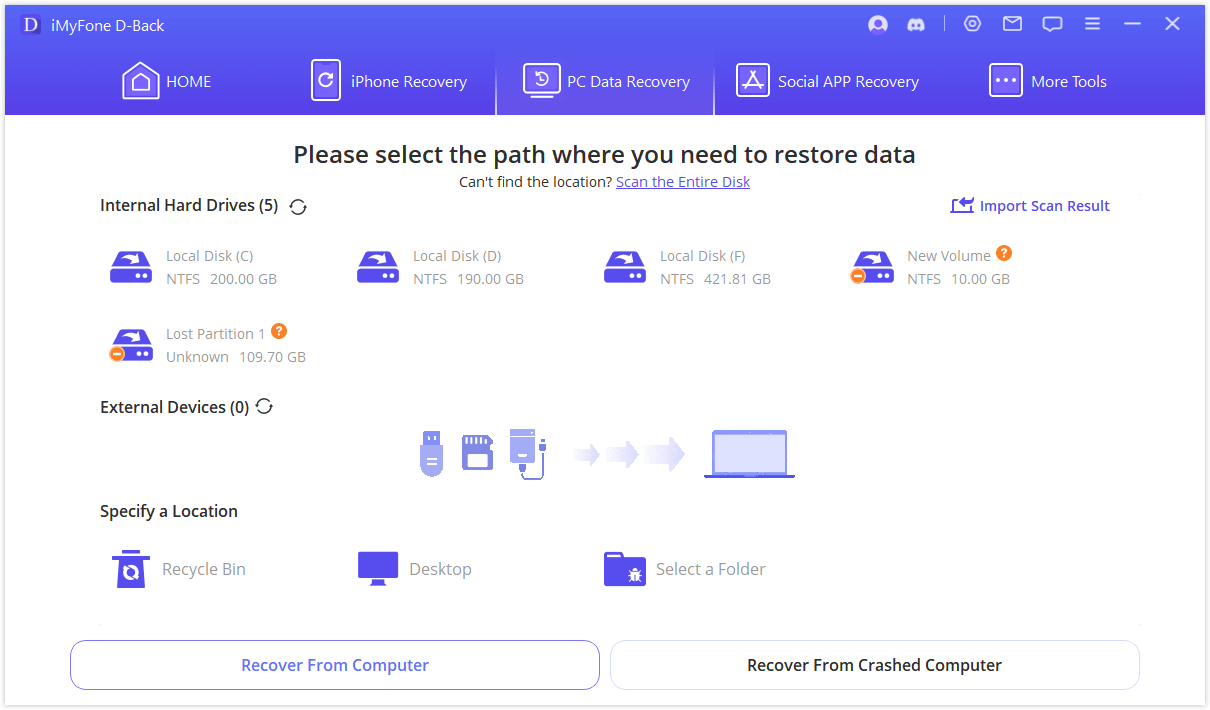
Step 3. Select the path and wait for scanning.

Step 4. Once the scan is complete, you will be able to see all the files.
Method 2. Finder
The quickest way to view hidden files in macOS is by using a keyboard shortcut in Finder.
Finder is a core application in macOS that helps users browse and manage files and folders on their computer. It provides a graphical user interface for easy access, organization, and manipulation of the file system.
Main Features:
- File Browsing: Finder allows users to browse through files and folders, view detailed information, organize folder structures, and quickly access recently used files and applications.
- Search Functionality: The built-in search feature (Spotlight) allows users to find files and folders quickly based on names, types, contents, and other criteria.
- Quick Access: The Finder sidebar provides quick access to commonly used folders, devices, and locations, making it easier to navigate to frequently accessed content.
- Here are the specific steps to follow:
1. Open Finder: Click on the Finder icon in your Dock to open a new Finder window.
2. Use the Shortcut: Press Command + Shift + . (period). This will toggle the visibility of hidden files and folders.
This shortcut will only show hidden files temporarily. If you close and reopen Finder, the hidden files will be hidden again until you use the shortcut once more.
Method 3. Forklift
Another way to find hidden files on Mac is by using third-party tools like Forklift. It is a powerful file manager and FTP client designed specifically for macOS. And it provides an intuitive and efficient way to manage files and folders, supporting various protocols and tools. Whether for daily file management or advanced file transfers, Forklift provides a convenient and powerful solution.
Main Features:
- Dual Pane Interface: Forklift uses a dual-pane design for more convenient file operations. Users can browse and manage files in two separate windows, supporting drag-and-drop actions.
- Multiple Protocol Support: Forklift supports various protocols, including FTP, SFTP, WebDAV, Amazon S3, and Dropbox, making it easy to transfer files between different platforms and services.
- File Comparison and Syncing: Includes built-in file comparison and syncing tools to help users synchronize folder contents and compare file differences.
- Steps to show hidden files on Mac with Forklift:
1. Open Forklift.
2. Enable hidden files through the “View” menu or toolbar icon.
3. Navigate and manage your files with hidden ones now visible.
- Be Cautious: Hidden files often include important system files. Modifying or deleting these files can impact your Mac's performance.
- Backup Regularly: Always make sure to back up your data before making any significantchanges to system files.
- Use System Preferences: For certain tasks, you might find that using built-in System Preferences or tools is safer and more straightforward.
Part 3. FAQs about Hidden File Recovery
1 How does iMyFone D-Back find hidden files?
When you launch iMyFone D-Back, you initiate a scan of your Mac. The software can perform a quick scan to find files that are currently accessible but hidden or a deep scan to search for files that might have been deleted or are hidden more deeply in the system.
2 What’s the difference between free trial and full version?
The free trial version has more limitations compared to the full version. For example, the free version allows you to scan and preview files for free but only lets you recover up to eight files. If you are satisfied with the recovery results or need to recover more files, you can choose to purchase the full version to restore files completely.
3 What to do if I stuck in the refreshing and loading page?
First, remove all the external disks that are connected to your computer. And then connect the disk that you want to recover files from. If the problem still exists, please contact us for support.
Conclusion
By following this guide, you'll be able to reveal and manage hidden files on your Mac with confidence. To enhance your productivity and help you troubleshoot issues more efficiently, iMyFone D-Back is more worth recommending. Just download it and give it a try!
Happy file hunting!


