This question has a positive answer. We are going to discuss 3 different ways which will give you an exposure on how to transfer WhatsApp from iPhone to iPhone without iTunes. Keep reading and solve your query here. But if you are thinking about switching to an Android device, then this guide about transferring WhatsApp from iPhone to Android might be more useful.
Video Guide:
1 Directly Transfer WhatsApp from iPhone to iPhone without iTunes
The best way to transfer WhatsApp from iPhone to iPhone without iTunes is taking the help of iTransor for WhatsApp. This is the best whatsApp transfer tool that works in an impressive way. The special thing about this program is
- Transfer all WhatsApp messages from iPhone to iPhone, Android to Android, iPhone to Android and vice versa.
- Backup WhatsApp for free and keep all the backups in your computer without data overwritten. Both WhatsApp Messenger and WhatsApp Business are supported.
- Export the WhatsApp backup to Html or Excel (csv for Mac) and read them as they appear on your iPhone.
- Compatible with iOS 9.0 and later including iOS 16, Android 2.0 to 11.0. Works on both Windows PC and Mac.
- Restore the backups to either new iPhone or Android devices without OS restrictions.
- Trusted by many reliable review sites including Macworld, Make Use Of and etc.

Let us now understand how you can transfer WhatsApp from iPhone to iPhone without iTunes using this tool.
Step 1. Launch the program in your PC and click on 'Transfer WhatsApp between Devices' option given on the left panel.
Step 2. Connect the 2 iPhones to PC. Confirm the Source and Destination device and hit 'Transfer'. The tool will start transferring the WhatsApp data.
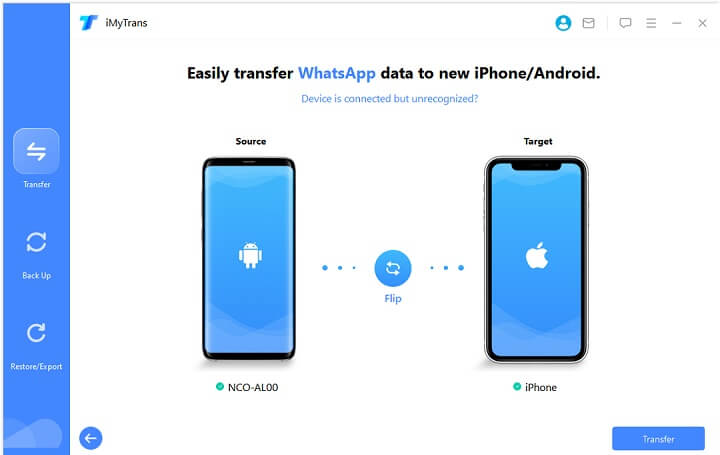
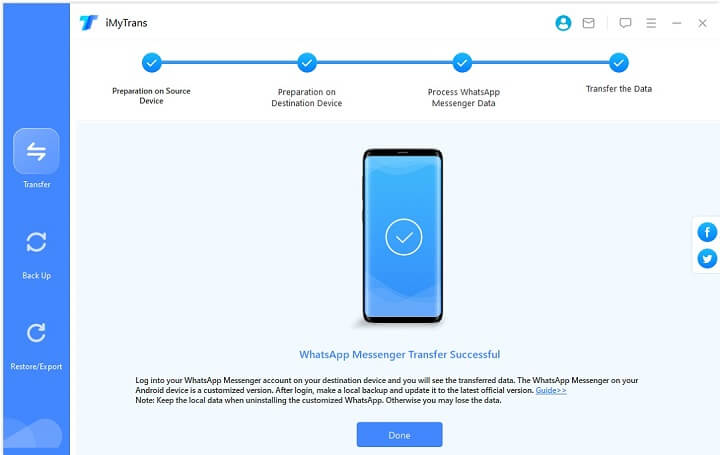
Step 3. Your WhatsApp will be transferred successfully to your new iPhone, including the whatsApp texts, images, audios, videos, etc. .
2 Transfer WhatsApp from iPhone to iPhone Using iCloud
If you wish to transfer WhatsApp from iPhone to iPhone without iTunes, another of the ways you can try is iCloud. Many iOS users use this service for backing up their data. iCloud takes a strong internet connection for a smooth process. Also, please bear in mind that iCloud offers only 5GB of free storage. If you want to save the data beyond this storage, you will need to purchase more. There are also possibilities that WhatsApp couldn't restore chat history from iCloud since it requires strong and stable network. The steps for transferring WhatsApp through iCloud are given below.
Step 1: In your iOS device, open 'WhatsApp'.
Step 2: Go to 'Settings' and tap on 'Chats'.
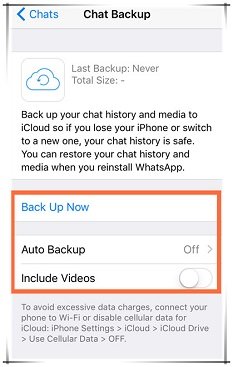
Step 3: Now, choose 'Chat Backup' followed by 'Back Up Now'.
Step 4: You can notice 'Auto Backup' option. This feature can help you to schedule your backup by setting a preferred frequency.
Step 5: You can also decide whether you wish to include videos in your backup or not by toggling 'Include Videos' button on or off.
Step 6: After choosing everything, your backup will begin and will complete on the basis of your internet and data size.
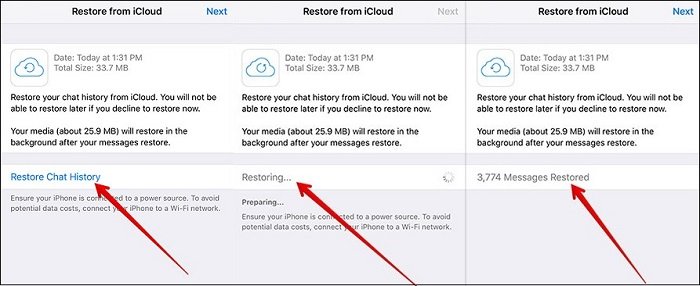
Step 7:Once the backup is made, it's time to transfer WhatsApp from iPhone to iPhone. Take your new iPhone and install WhatsApp from the App Store.
Step 8:Enter WhatsApp details by logging in with the same phone number and verifying OTP.
Step 9:Next, follow the instructions and restore your WhatsApp chats in your new phone. This way your WhatsApp will get transferred to the new phone.
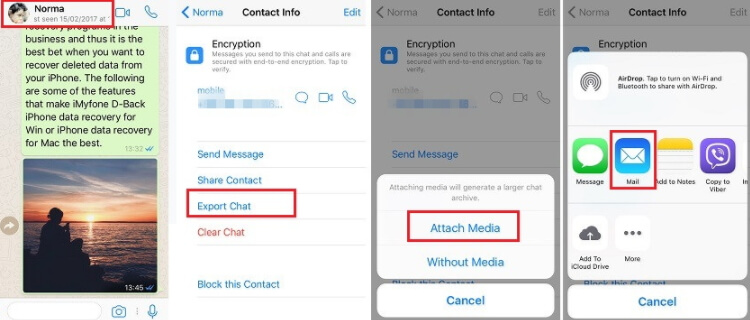
3 Email the WhatsApp Chat History to Another iPhone
The last method to learn how to transfer WhatsApp from iPhone to iPhone without iTunes is emailing your chat history. Without further ado, we would like to state the tutorial. Check out the steps below.
Step 1:Open 'WhatsApp' in your old iPhone and select any of the chat, be it an individual or a group chat.
Step 2:Now, look for the contact or group name at the top and tap on it. You will be able to see the contact/group info at your screen.
Step 3:Scroll a little down and hit on the 'Export Chat' option.
Step 4:You will be asked to email the chats with media or without media. Tap on 'Attach Media' if you desire to get the media files transferred to your new device otherwise tap on 'Without Media'.
Step 5:Lastly, enter the correct Email ID and just tap on 'Send'.


 February 13, 2023
![[Transfer WhatsApp] How to Transfer WhatsApp from iPhone to iPhone Without Using iTunes](https://img.youtube.com/vi/6Qw8qe4YqAE/sddefault.jpg)